相关文档:黑马优购项目在线文档、黑马优购接口文档

uni-app 是一个使用 Vue.js 开发所有前端应用的框架,开发者编写一套代码,
可发布到iOS、Android、Web(响应式)、以及各种小程序
(微信/支付宝/百度/头条/飞书/QQ/快手/钉钉/淘宝)、快应用等多个平台
官网链接:https://uniapp.dcloud.net.cn/
安装
使用 HBuilderX 编辑器进行安装

官网下载地址:https://www.dcloud.io/hbuilderx.html
HBuilderX 内置相关环境,开箱即用,无需配置nodejs;
H是HTML的首字母,Builder是构造者,X是HBuilder的下一代版本。
简称HX。 HX是轻如编辑器、强如IDE的合体版本
用途
实现类似 less 的多层嵌套 选择器 效果,并在项目的根目录有一个全局 scss文件设置全局变量: 相关文档
安装地址
下载地址:DCloud 插件市场
安装方式
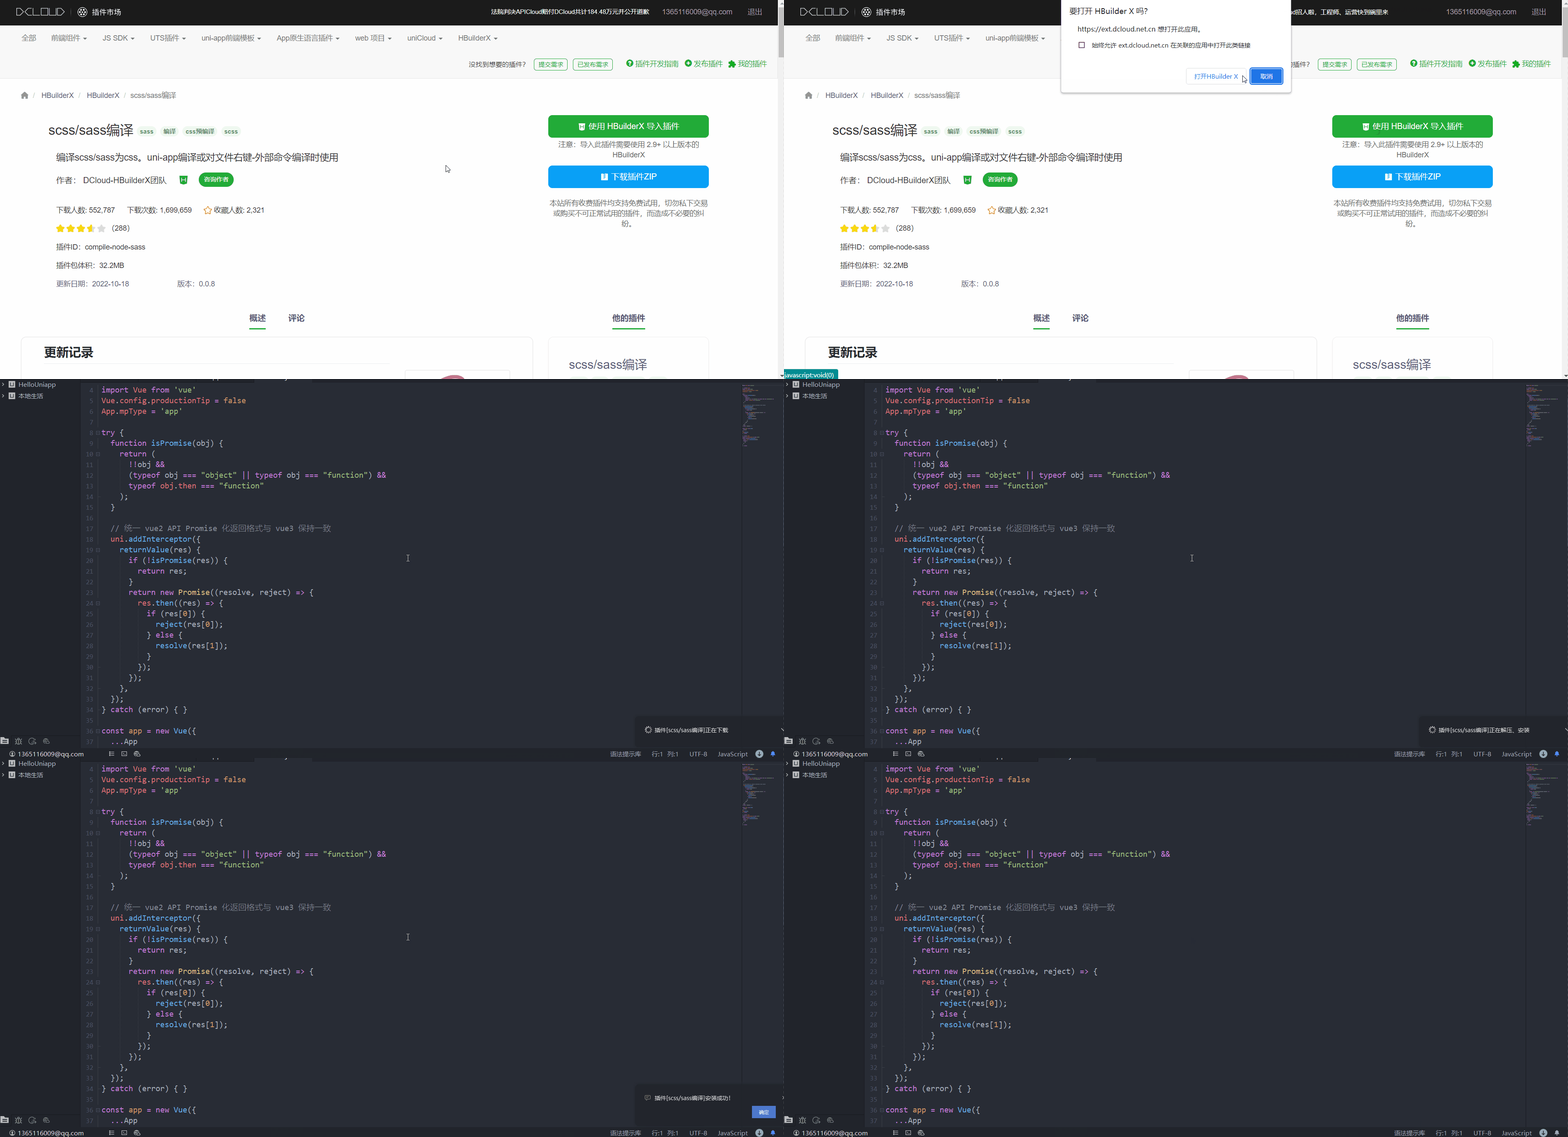
单击 “使用 HBuilderx” 按钮进行一键安装
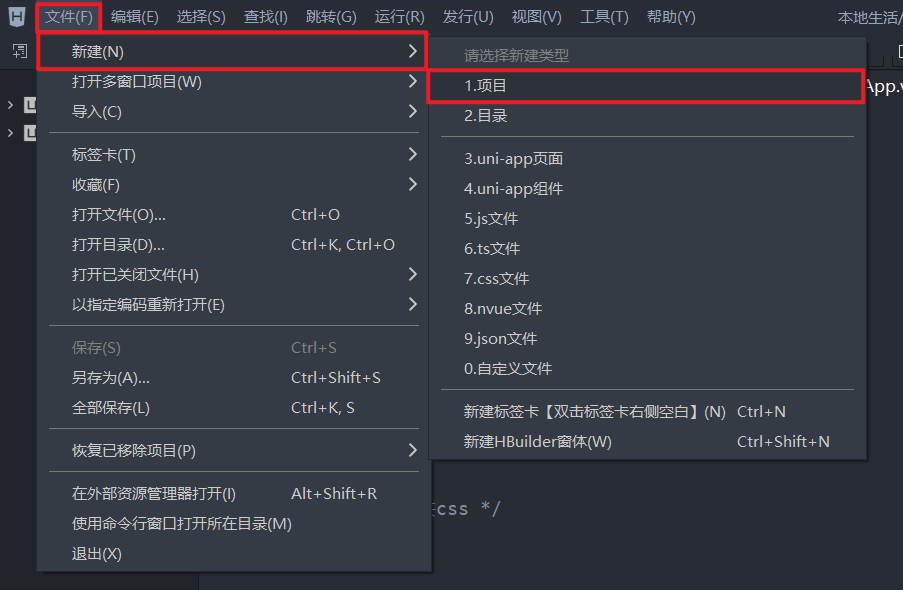
文件 → 新建 → 项目
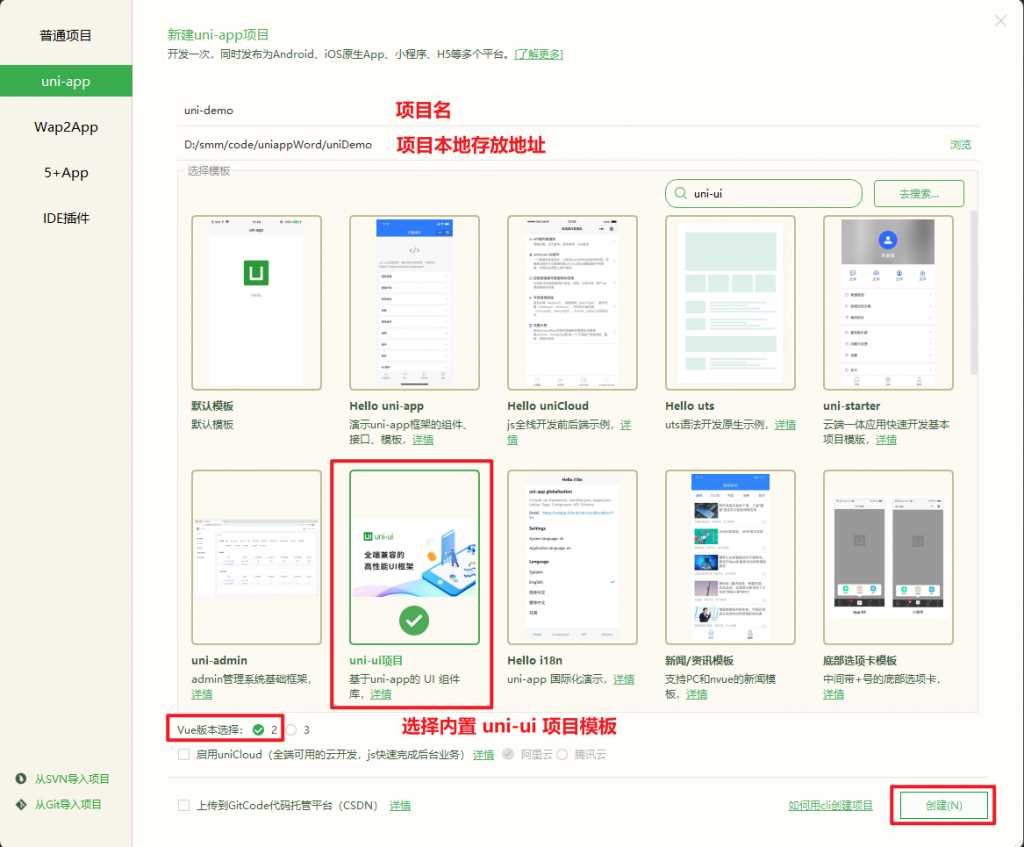
填写项目基本信息
项目部署完成
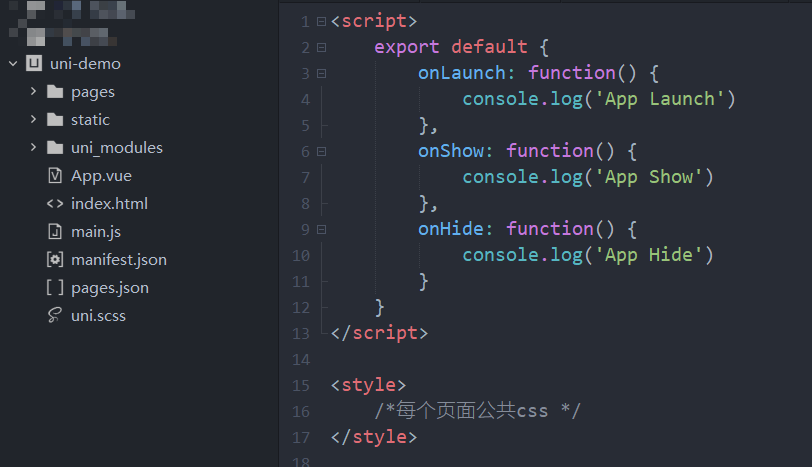
一个 uni-app 项目,默认包含如下目录及文件:
┌─components            uni-app组件目录
│  └─comp-a.vue         可复用的a组件
├─pages                 业务页面文件存放的目录
│  ├─index
│  │  └─index.vue       index页面
│  └─list
│     └─list.vue        list页面
├─static                存放应用引用静态资源(如图片、视频等)的目录,注意:静态资源只能存放于此
├─main.js               Vue初始化入口文件
├─App.vue               应用配置,用来配置小程序的全局样式、生命周期函数等
├─manifest.json         配置应用名称、appid、logo、版本等打包信息
└─pages.json            配置页面路径、页面窗口样式、tabBar、navigationBar 等页面类信息
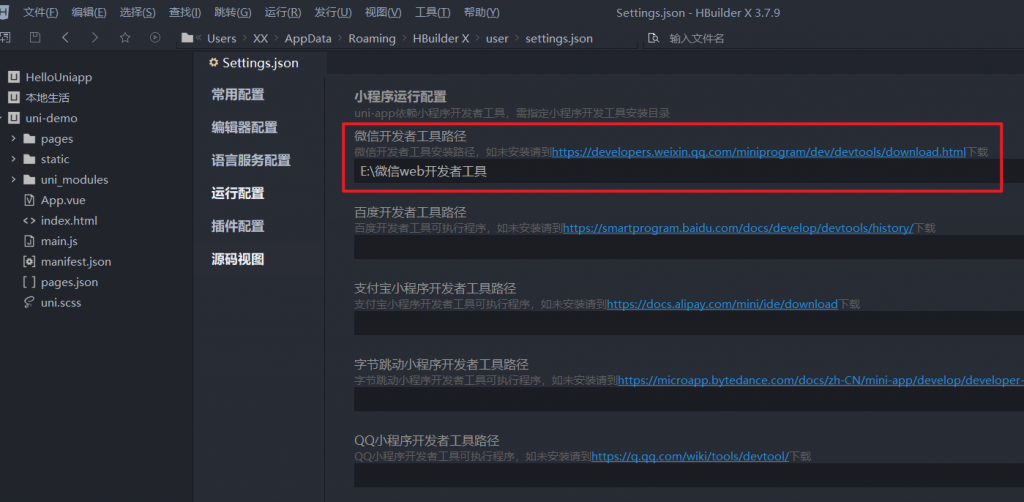
绑定到微信开发者工具
在对应项目中配置 微信web开发者工具 文件目录的根路径
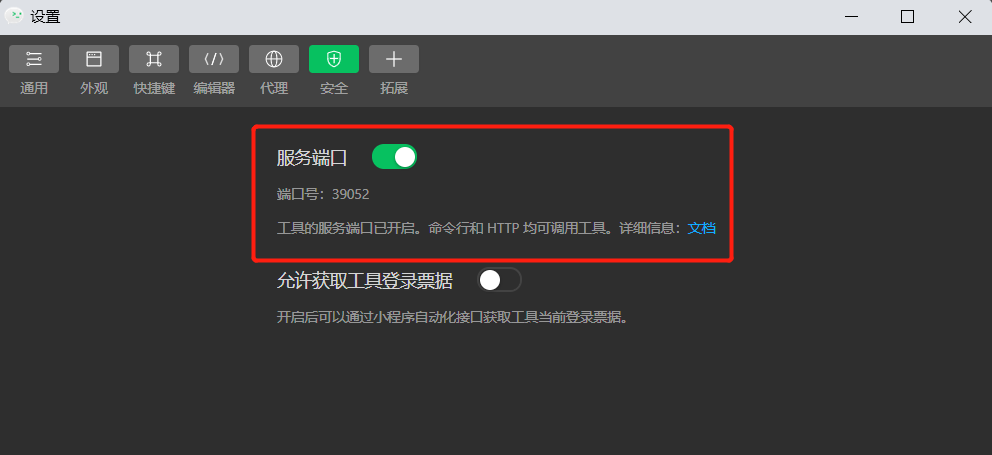
在微信开发者工具中,通过 设置 → 安全设置 面板,开启“微信开发者工具”的服务端口:
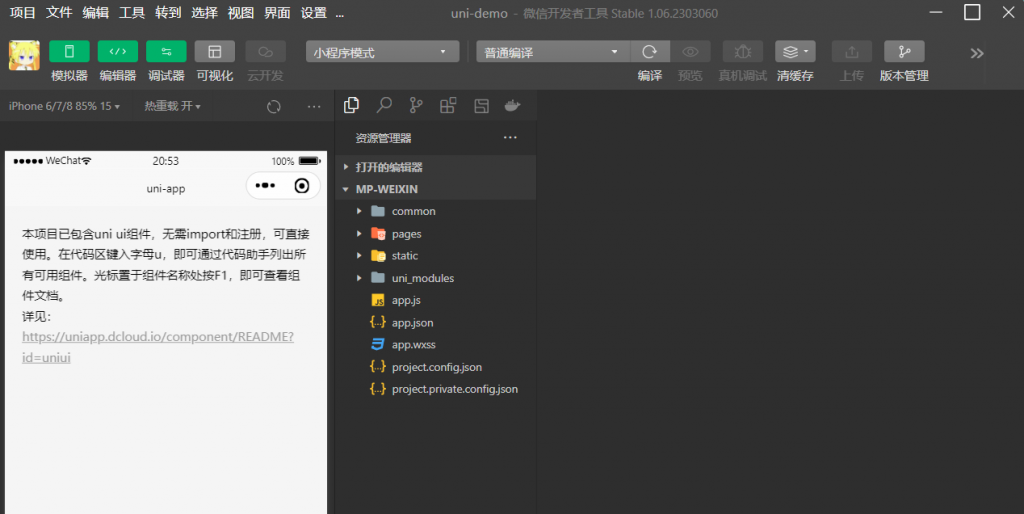
通过这种方式,就可以将 uni-app 项目 打包到微信开发者工具 中,并支持 热更新
本地管理
在项目的根目录中新建 .gitgnore 忽略文件,并配置如下:
# 忽略 node_modules 目录
/node_modules
/unpackage/dist
注意:由于我们忽略了 unpackage 目录中仅有的 dist 目录,因此默认情况下, unpackage 目录不会被 Git 追踪
此时,为了让 Git 能够正常追踪 unpackage 目录,按照惯例,
我们可以在 unpackage 目录下创建一个叫做 .gitkeep 的文件进行占位
打开终端,初始化本地 Git 仓库
git init将所有文件都加入暂存区
git add .本地提交更新
git commit -m "init project"提交至远程仓库
Git 创建分支
# 创建分支 并 进入该分支
git checkout -b tabber
# 查看所有分支
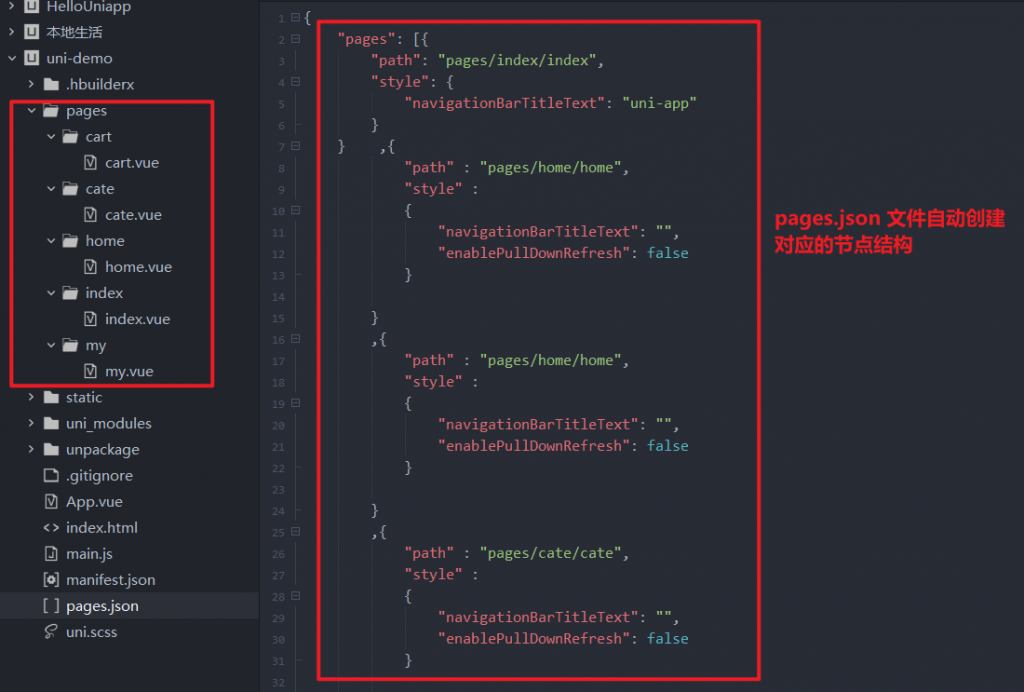
git branch创建 tabBar 页面目录
注意需要勾选 使用 scss 的页面 和 在 pages.json 中注册
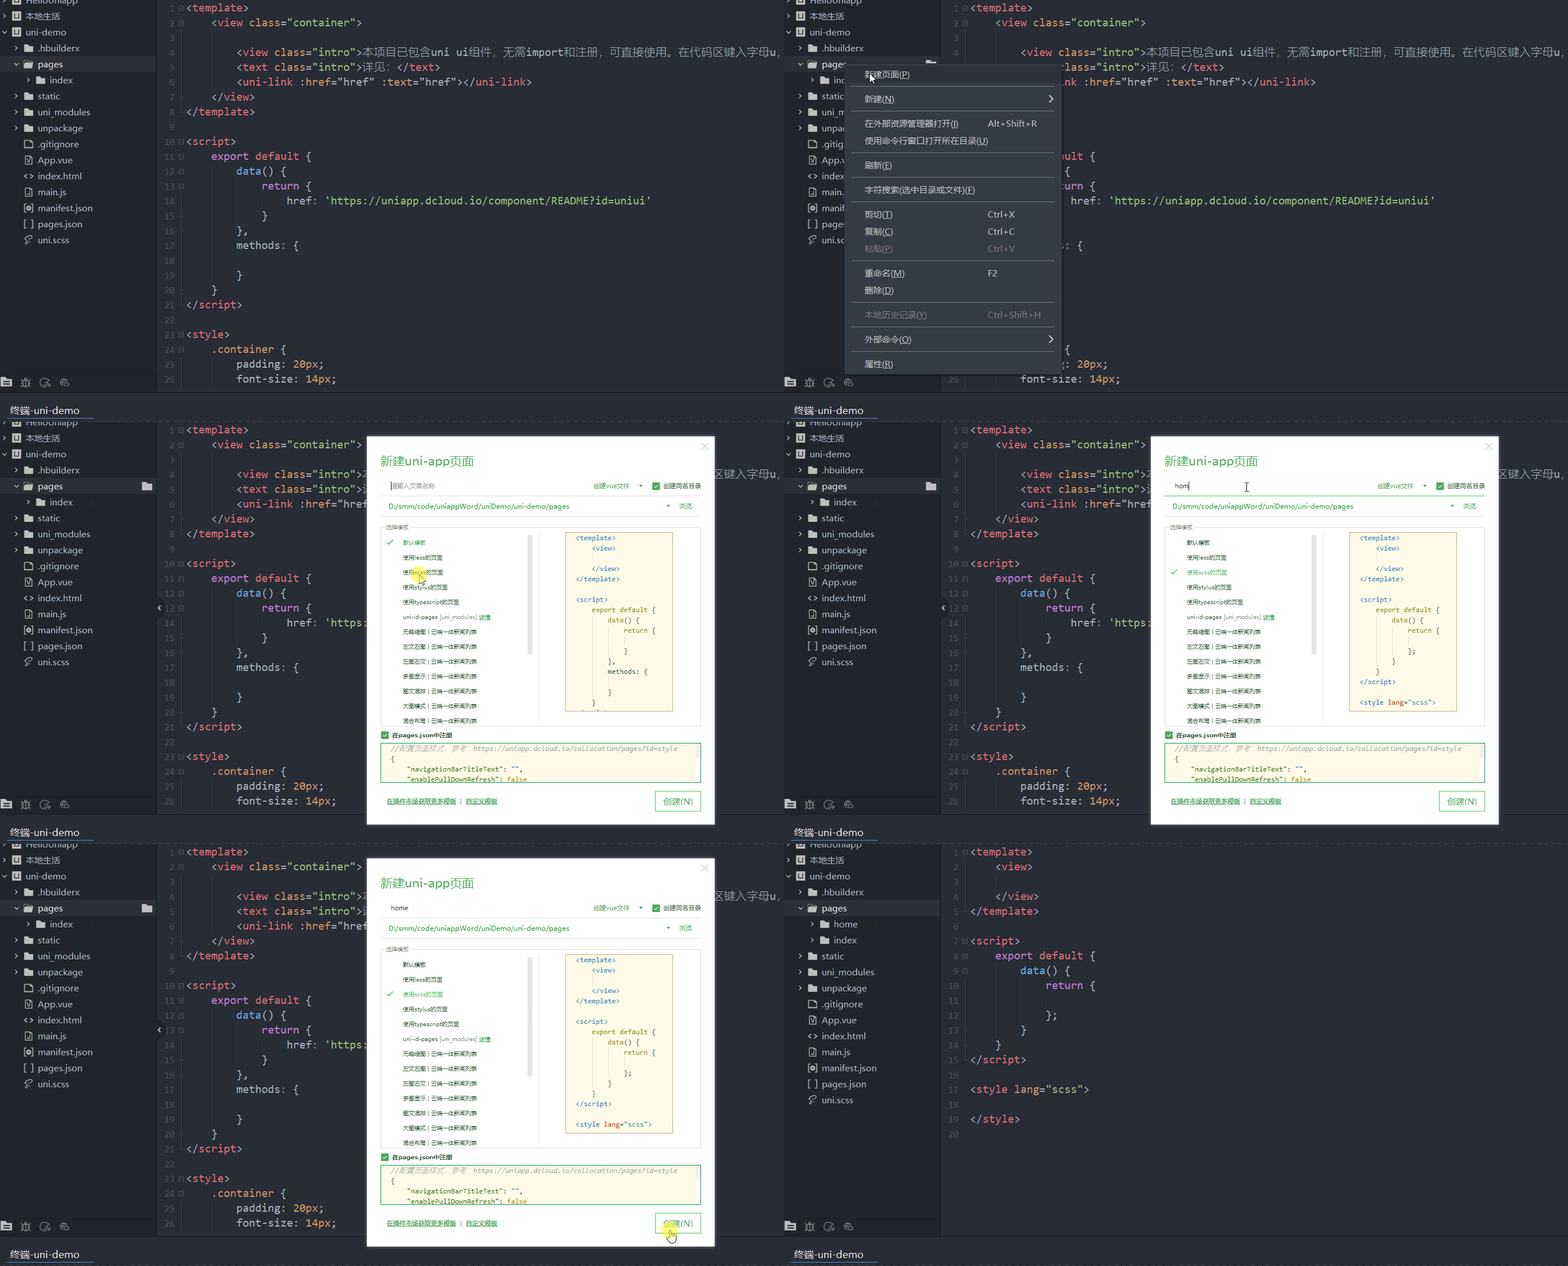
按照同样的步骤,依次创建 home [首页]、cate [分类]、cart [购物车]、my [我的] 对应的页面目录
配置 TabBar 栏目
使用下方的 static 文件夹的内容,替换原项目根目录中的 static 文件夹
修改项目根目录中的 pages.json 配置文件,移除默认的 index 界面目录和配置节点;新增 tabBar 的配置节点
{
    "pages": [
        {
            "path": "pages/home/home",
            "style": {
                "enablePullDownRefresh": false
            }
        },
        {
            "path": "pages/cate/cate",
            "style": {
                "enablePullDownRefresh": false
            }
        },
        {
            "path": "pages/cart/cart",
            "style": {
                "enablePullDownRefresh": false
            }
        },
        {
            "path": "pages/my/my",
            "style": {
                "enablePullDownRefresh": false
            }
        }
    ],
    "tabBar": {
        "selectedColor": "#C00000",
        "list": [
            {
                "pagePath": "pages/home/home",
                "text": "首页",
                "iconPath": "static/tab_icons/home.png",
                "selectedIconPath": "static/tab_icons/home-active.png"
            },
            {
                "pagePath": "pages/cate/cate",
                "text": "分类",
                "iconPath": "static/tab_icons/cate.png",
                "selectedIconPath": "static/tab_icons/cate-active.png"
            },
            {
                "pagePath": "pages/cart/cart",
                "text": "购物车",
                "iconPath": "static/tab_icons/cart.png",
                "selectedIconPath": "static/tab_icons/cart-active.png"
            },
            {
                "pagePath": "pages/my/my",
                "text": "我的",
                "iconPath": "static/tab_icons/my.png",
                "selectedIconPath": "static/tab_icons/my-active.png"
            }
        ]
    },
    "globalStyle": {
        "navigationBarTextStyle": "black",
        "navigationBarTitleText": "uni-app",
        "navigationBarBackgroundColor": "#F8F8F8",
        "backgroundColor": "#F8F8F8",
        "app-plus": {
            "background": "#efeff4"
        }
    }
}
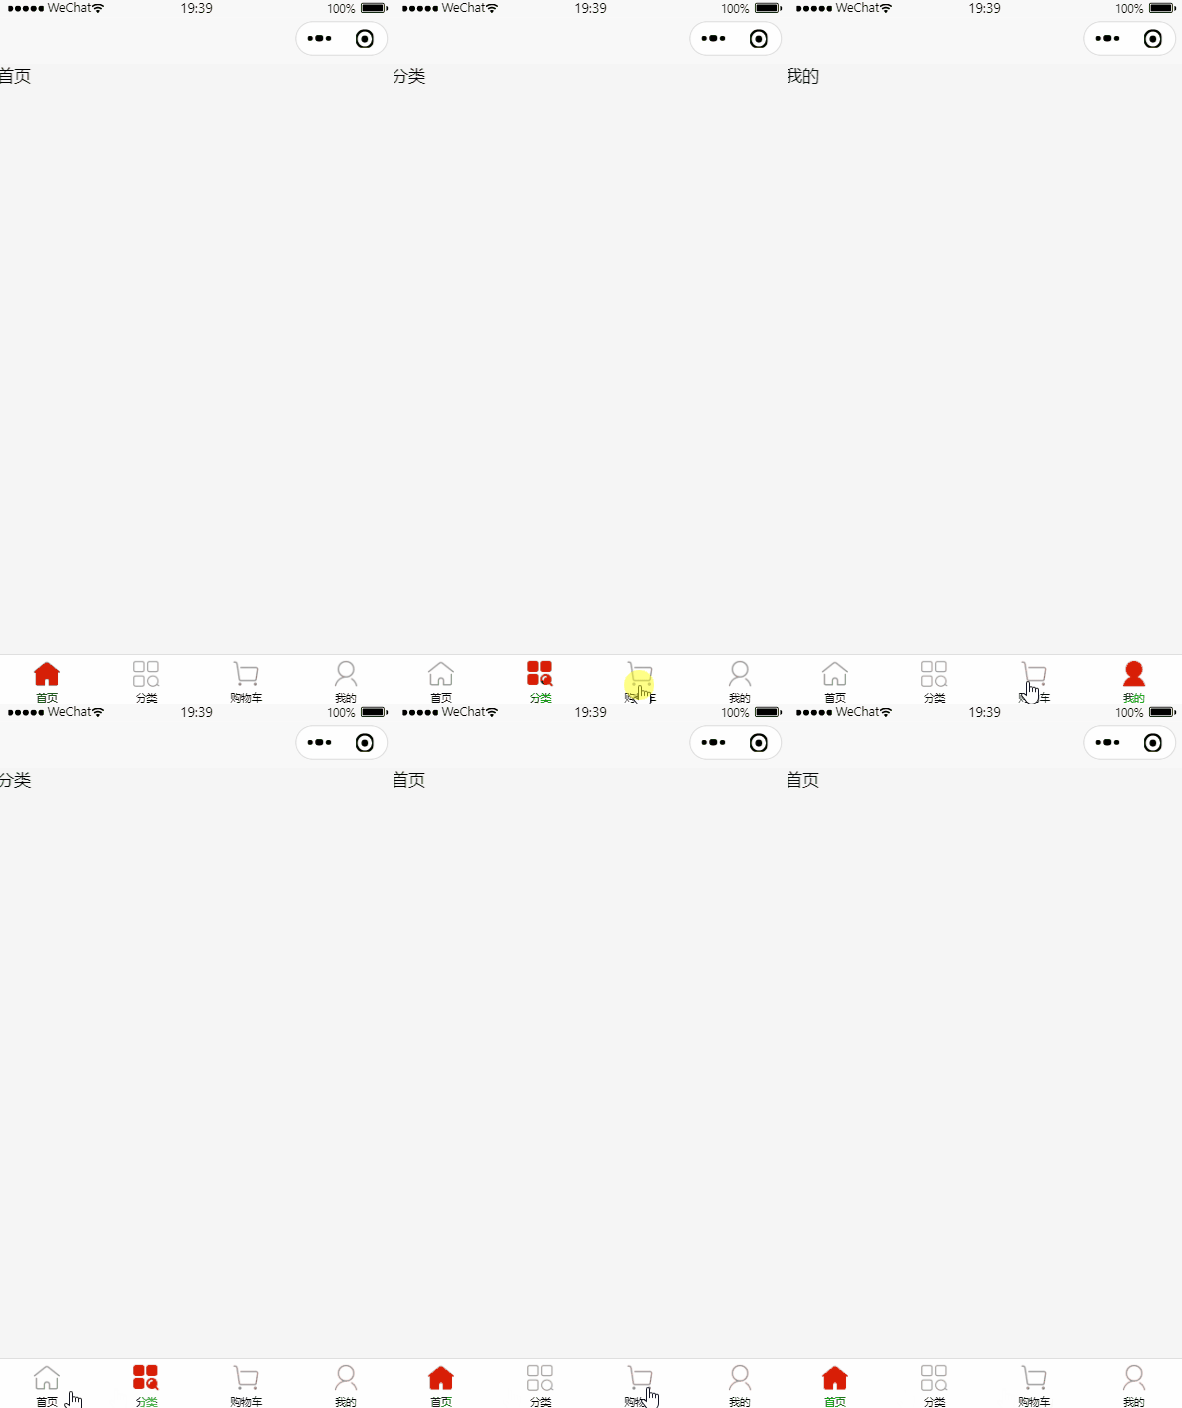
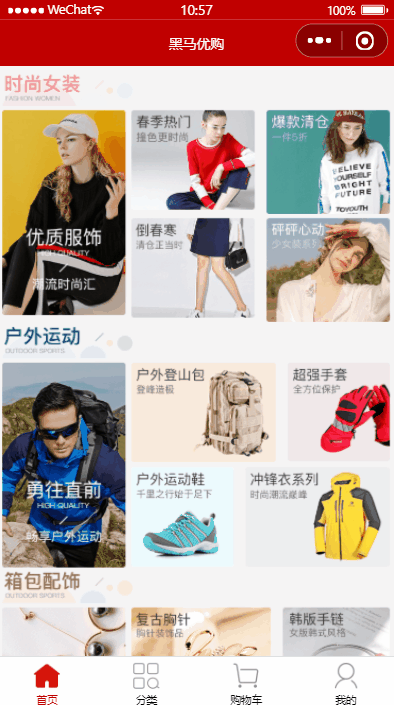
效果展示
修改导航条的样式效果
{
    // ...
    "globalStyle": {
        // 导航条 字体颜色
        "navigationBarTextStyle": "white",
        // 导航条 标题
        "navigationBarTitleText": "黑马优购",
        // 导航条 背景颜色
        "navigationBarBackgroundColor": "#C00000",
        // 背景颜色
        "backgroundColor": "#FFFFFF",
        "app-plus": {
            "background": "#efeff4"
        }
    }
}
* 问题:无法显示 导航栏问题的解决方案:相关文档 *
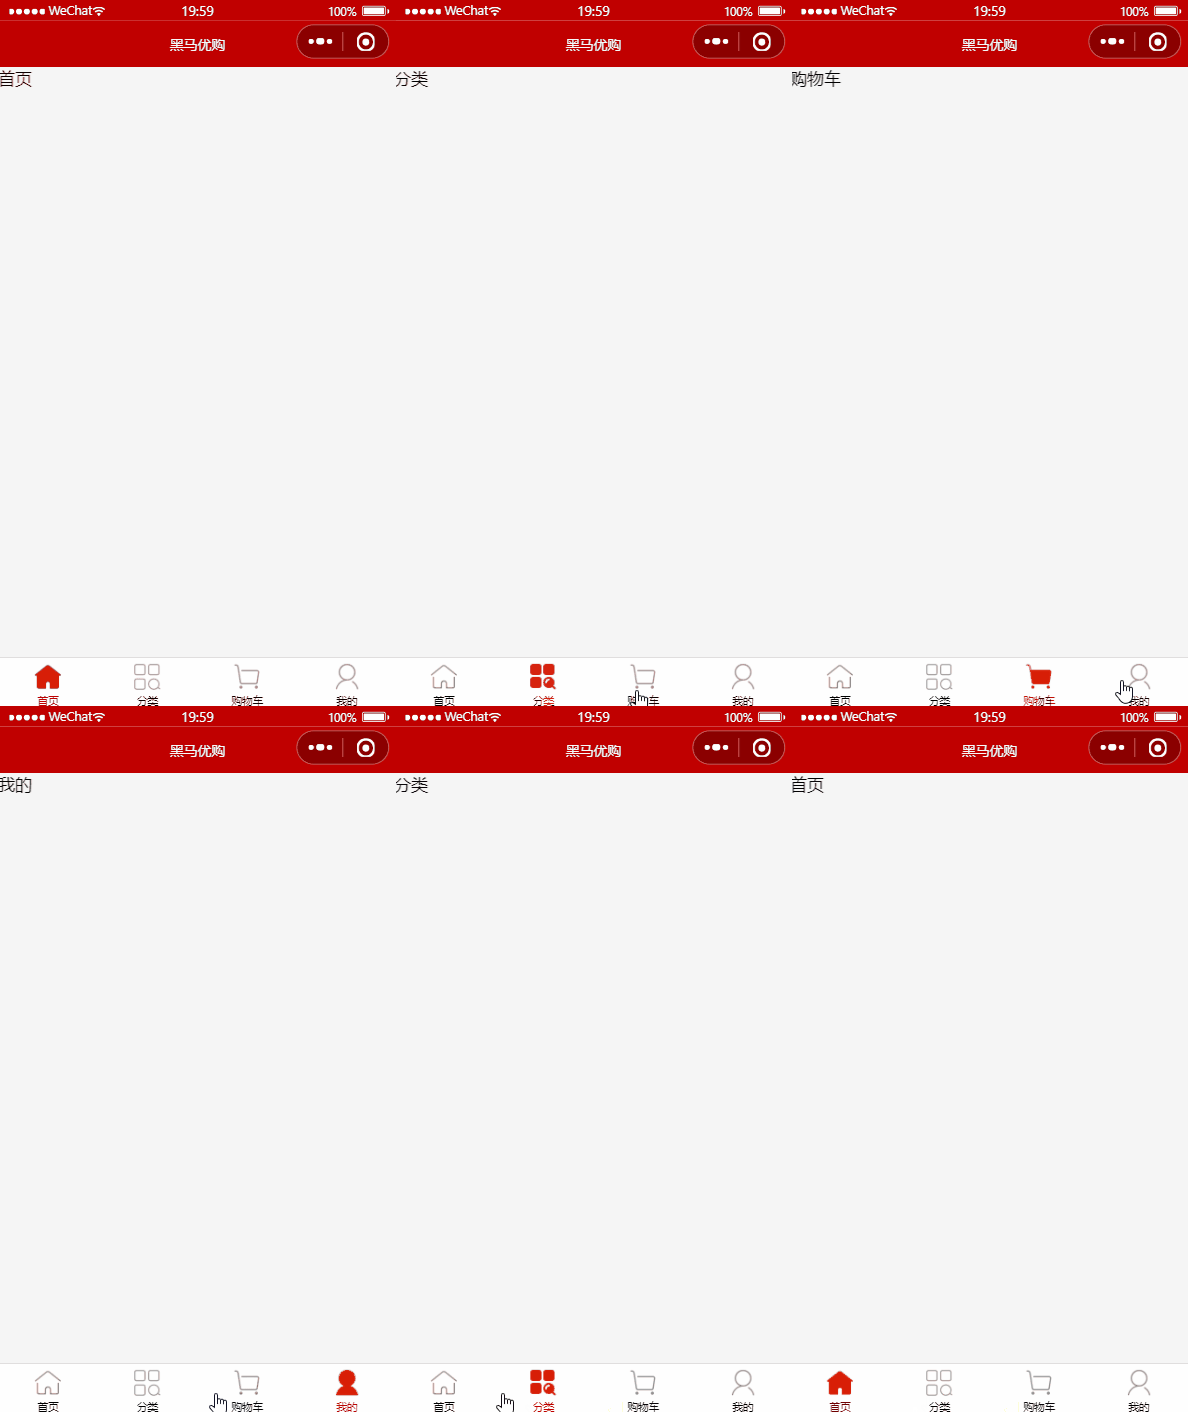
效果展示
合并与提交 Git 分支
本地提交到 Git
git add .
git commit -m "完成 tabBar 功能的开发"
提交到远程仓库
# 一键提交 并保存上传目标信息
git push --set-upstream origin tabbar
合并本地分支
# 切换分支到 main 主分支
git checkout main
# 在 main 分支上合并 tabbar 分支
git merge tabbar
删除本地 tabbar 分支
# 删除 tabbar 分支前需要当前在其他分支上
git branch -d tabbarGit 创建分支
# 创建 home 分支 并进入该分支
git checkout -b home
配置网络请求
由于平台的限制,小程序项目中不支持 axios,而且原生的 wx.request() API功能较为简单,
不支持拦截器等全局定制的功能。
因此,建议在 uni-app 项目中使用 @escook/request-miniprogram 第三方包发起网络数据请求
官方文档:https://www.npmjs.com/package/@escook/request-miniprogram
下载包
npm i @escook/request-miniprogram导入到项目的 main.js 入口文件中,配置如下:
// #ifndef VUE3
import Vue from 'vue'
import App from './App'

// 导入 网络请求包
import {
    $http
} from '@escook/request-miniprogram'

uni.$http = $http;

// 配置请求根路径
$http.baseUrl = "https://api-hmugo-web.itheima.net"

// [请求拦截器] 在发起网络请求之前 执行的操作
$http.beforeRequest = function (options) {
    uni.showLoading({
        title: '数据加载中...'
    })
}

// [响应拦截器] 在发起网络请求之后 执行的操作
$http.afterRequest = function () {
    uni.hideLoading();
}

Vue.config.productionTip = false

App.mpType = 'app'

const app = new Vue({
    ...App
})
app.$mount()
// #endif

// #ifdef VUE3
import {
    createSSRApp
} from 'vue'
import App from './App.vue'
export function createApp() {
    const app = createSSRApp(App)
    return {
        app
    }
}
// #endif获取轮播图数据
在 home 的 vue 页面文件中获取数据
- 在 data 中定义轮播图的数组
- 在 onLoad 生命周期函数中调用获取轮播图数据的方法
- 在 methods 中定义获取轮播图数据的方法
export default {
  data() {
    return {
      swiperList: [],
    };
  },
  methods: {
    async getSwiperList() {
      const {
        data: res
      } = await uni.$http.get('/api/public/v1/home/swiperdata');
      if (res.meta.status !== 200) {
        return uni.showToast({
          title: "数据请求失败!",
          duration: 5000,
          icon: "none"
        })
      }

      this.swiperList = res.message
    }
  },
  onLoad() {
      this.getSwiperList();
  }
}
渲染轮播图 UI 结构
使用 swiper 组件 并搭配 v-for 遍历 swiper-item 组件 实现轮播图样式的渲染
<template>
  <view>
        <!-- 轮播图区域 -->
      <swiper :indicator-dots="true"
       :autoplay="true" :interval="3000"
       :duration="1000"
       :circular="true">
         <!-- 循环轮播图的 item 项 -->
       <swiper-item
       v-for="(item, index) in swiperList"
       :key="index">
         <view class="swiper-item">
          <!-- 轮播图 图片 -->
          <image :src="item.image_src" mode="widthFix"></image>
         </view>
        </swiper-item>
       </swiper>
  </view>
</template>
<script>
export default {
data() {
return {
// 轮播图数据列表
swiperList: [],
};
},
methods: {
// 获取轮播图数据
async getSwiperList() {
const {
data: res
} = await uni.$http.get('/api/public/v1/home/swiperdata');
if (res.meta.status !== 200) {
return uni.showToast({
title: "数据请求失败!",
duration: 5000,
icon: "none"
})
}
this.swiperList = res.message
}
},
onLoad() {
// 调用 获取轮播图数据方法
this.getSwiperList();
}
}</script>
<style lang="scss">
swiper {
height: 330rpx;
}
.swiper-item,
image {
width: 100%;
}
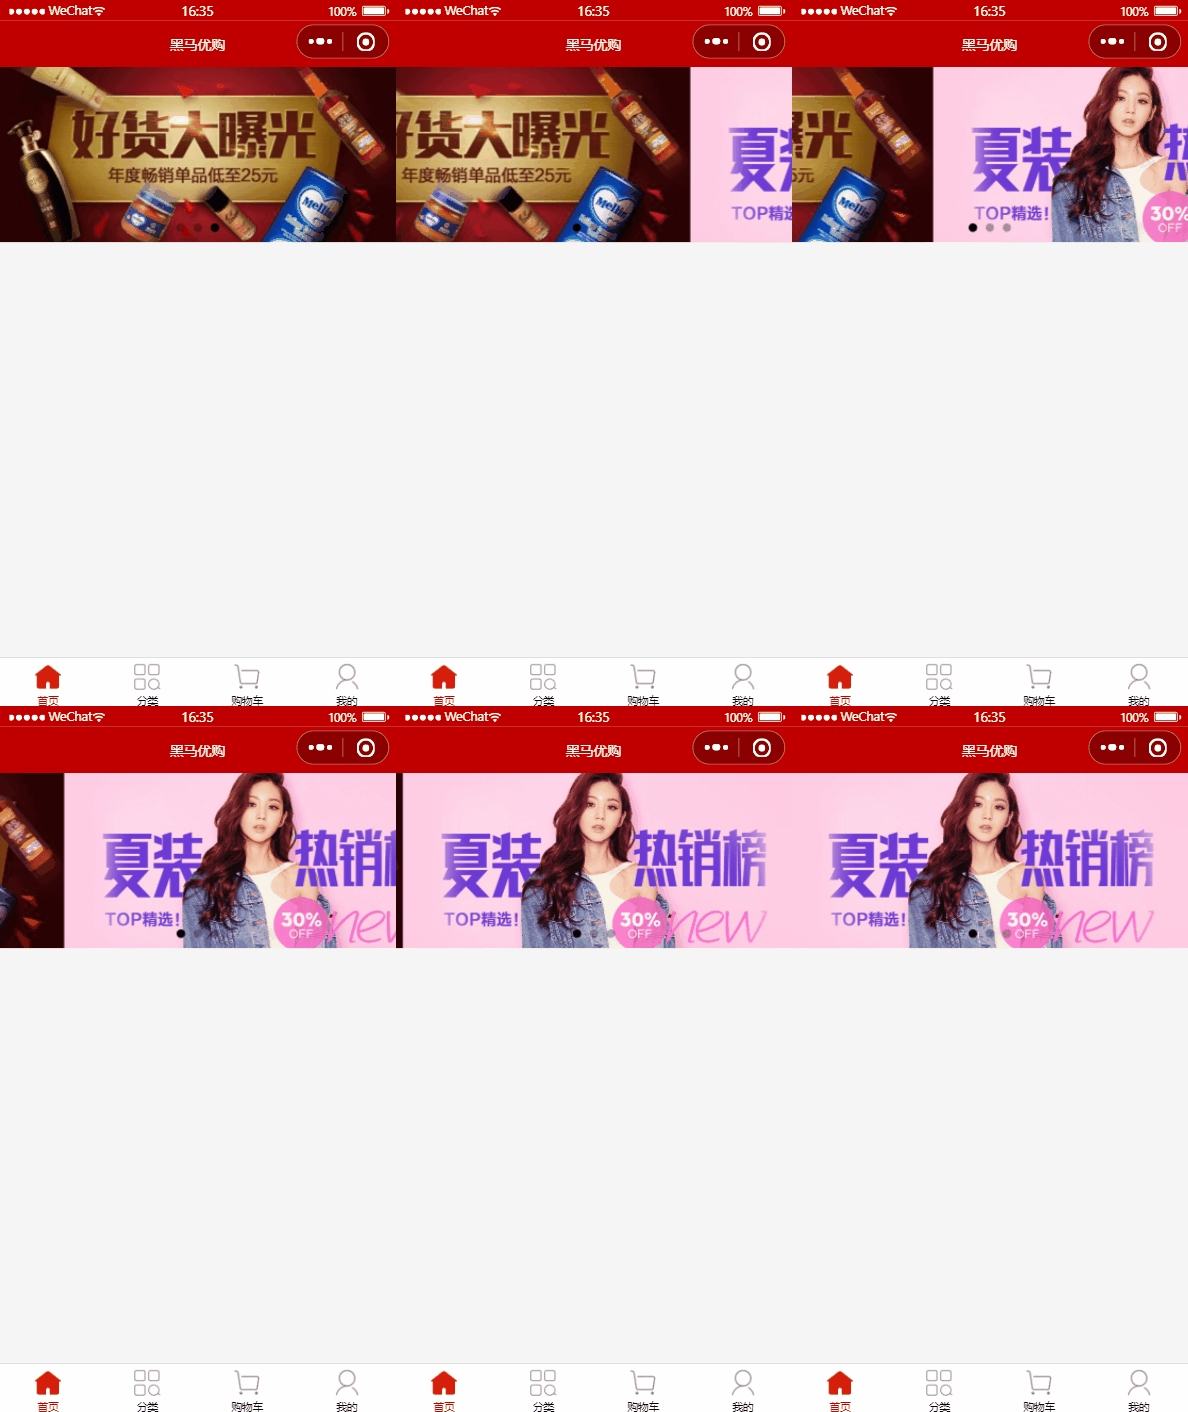
</style>效果展示
配置小程序分包
分包可以减少小程序首次启动的加载时间
为此,我们在项目中,把 tabBar 相关的 4 个页面放在主包上,其他页面 (例如:商品详情页、商品列表页) 放置在分包下:
- 在项目根目录中,创建分包的根目录,命名为 subpkg
- 在 page.json 中,和 pages 节点平级的位置声明 subPackages 节点。用来定义分包相关的结构:
{
    // ...
    "pages": [
        // ...
    ],
    "subPackages": [
        {
            "root": "subpkg",
            "pages": [],
        }
    ]
}
创建分包项目文件
创建 page.json 中对应的根目录 subpkg 文件夹,并在该文件夹右键 新建页面 → 勾选 subpkg分包
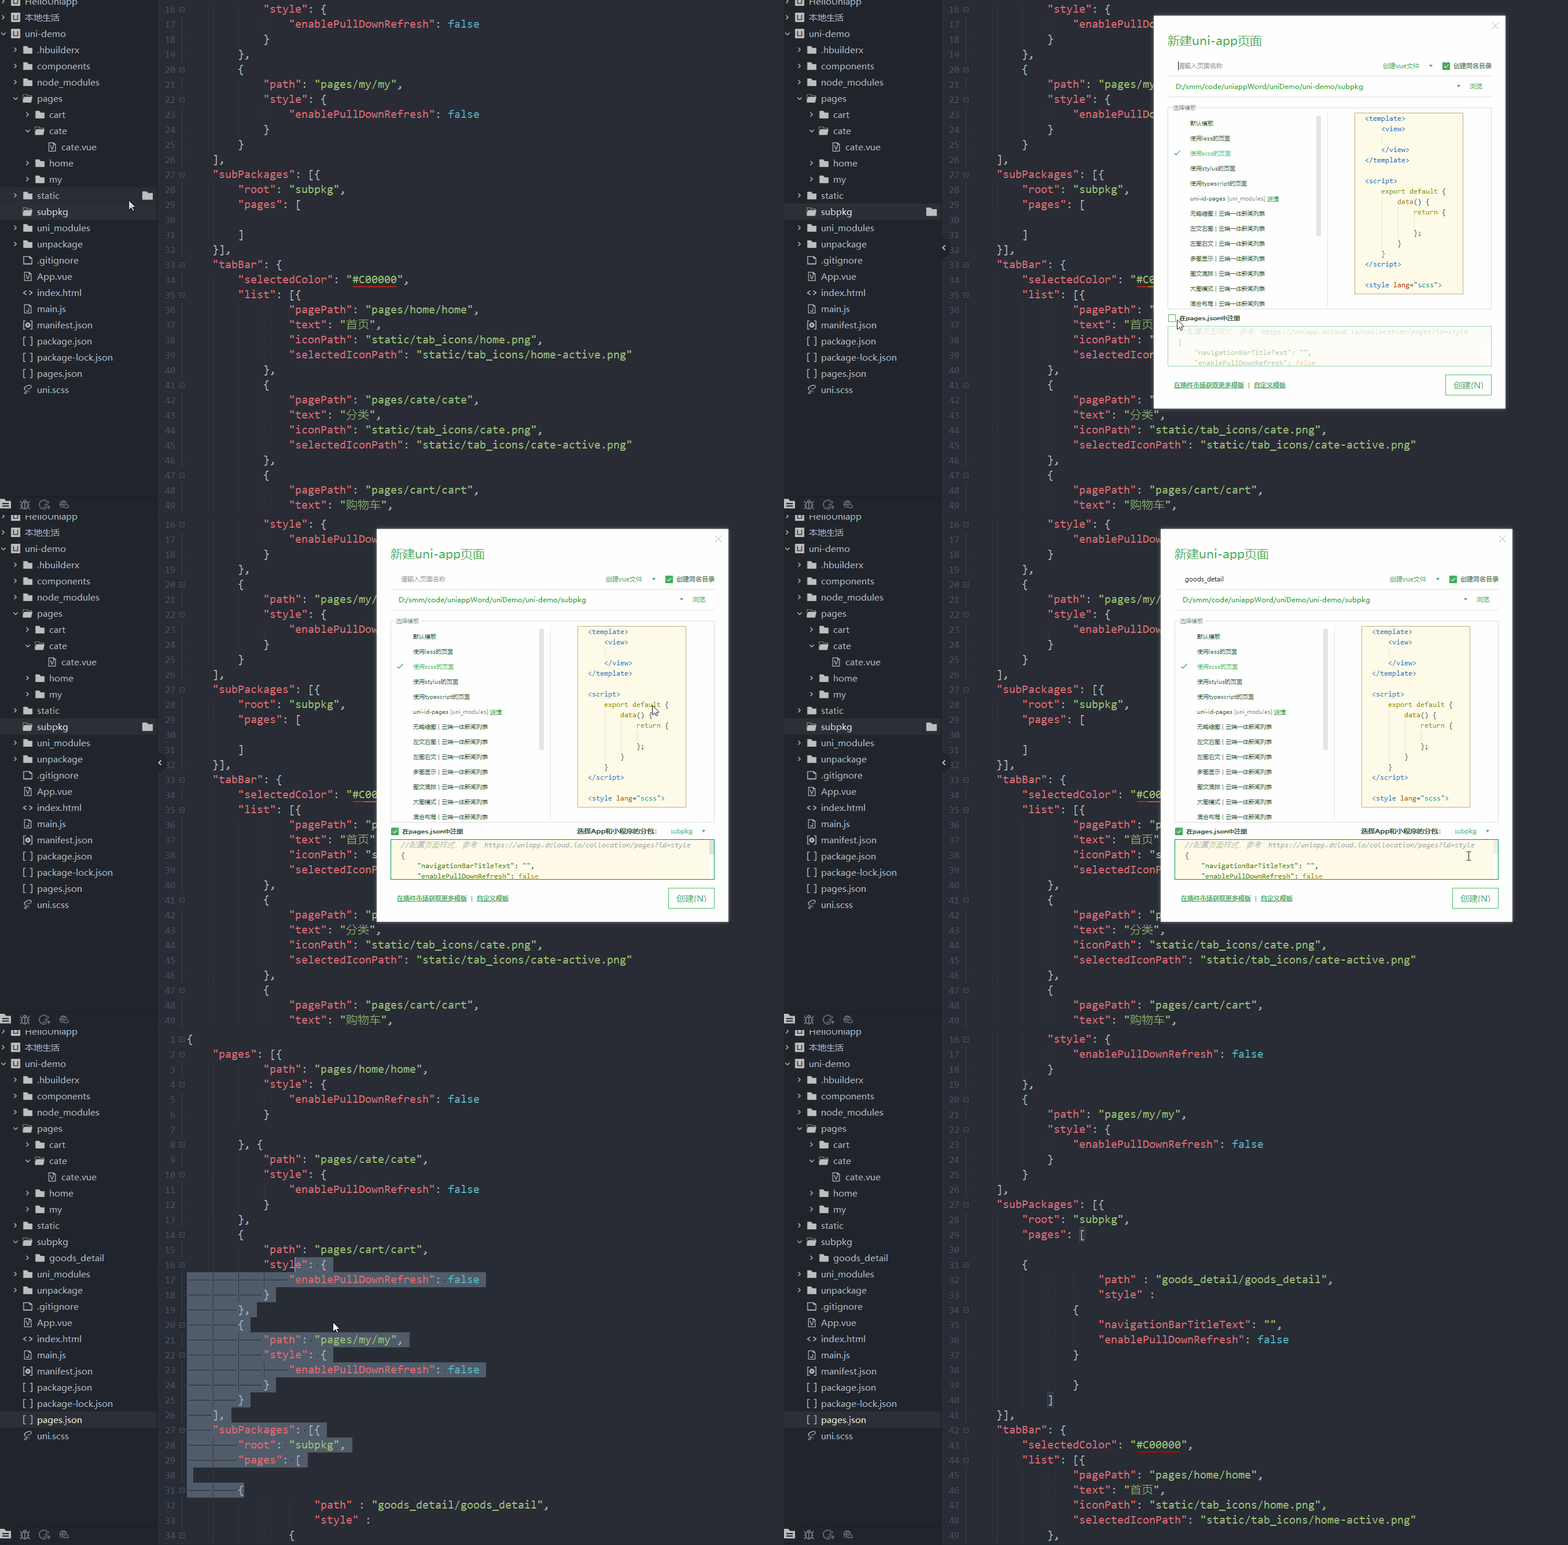
创建后,pages.json 会自动将分包文件夹下创建的 页面目录 配置在分包配置节点 中
点击轮播图跳转到商品详情页
改造 <swiper-item></swiper-item> 节点内的 view 组件,改为 navugator 导航组件,并动态绑定 url 属性的值
<template>
  <view>
        <!-- 轮播图区域 -->
      <swiper :indicator-dots="true"
       :autoplay="true" :interval="3000"
       :duration="1000"
       :circular="true">
         <!-- 循环轮播图的 item 项 -->
       <swiper-item
       v-for="(item, index) in swiperList"
       :key="index">
         <navigator
         class="swiper-item"
         :url="'/subpkg/goods_detail/goods_detail?goods_id=' + item.goods_id"
         >
          <!-- 轮播图 图片 -->
          <image :src="item.image_src" mode="widthFix"></image>
         </navigator>
        </swiper-item>
       </swiper>
  </view>
</template>
<script>
效果展示
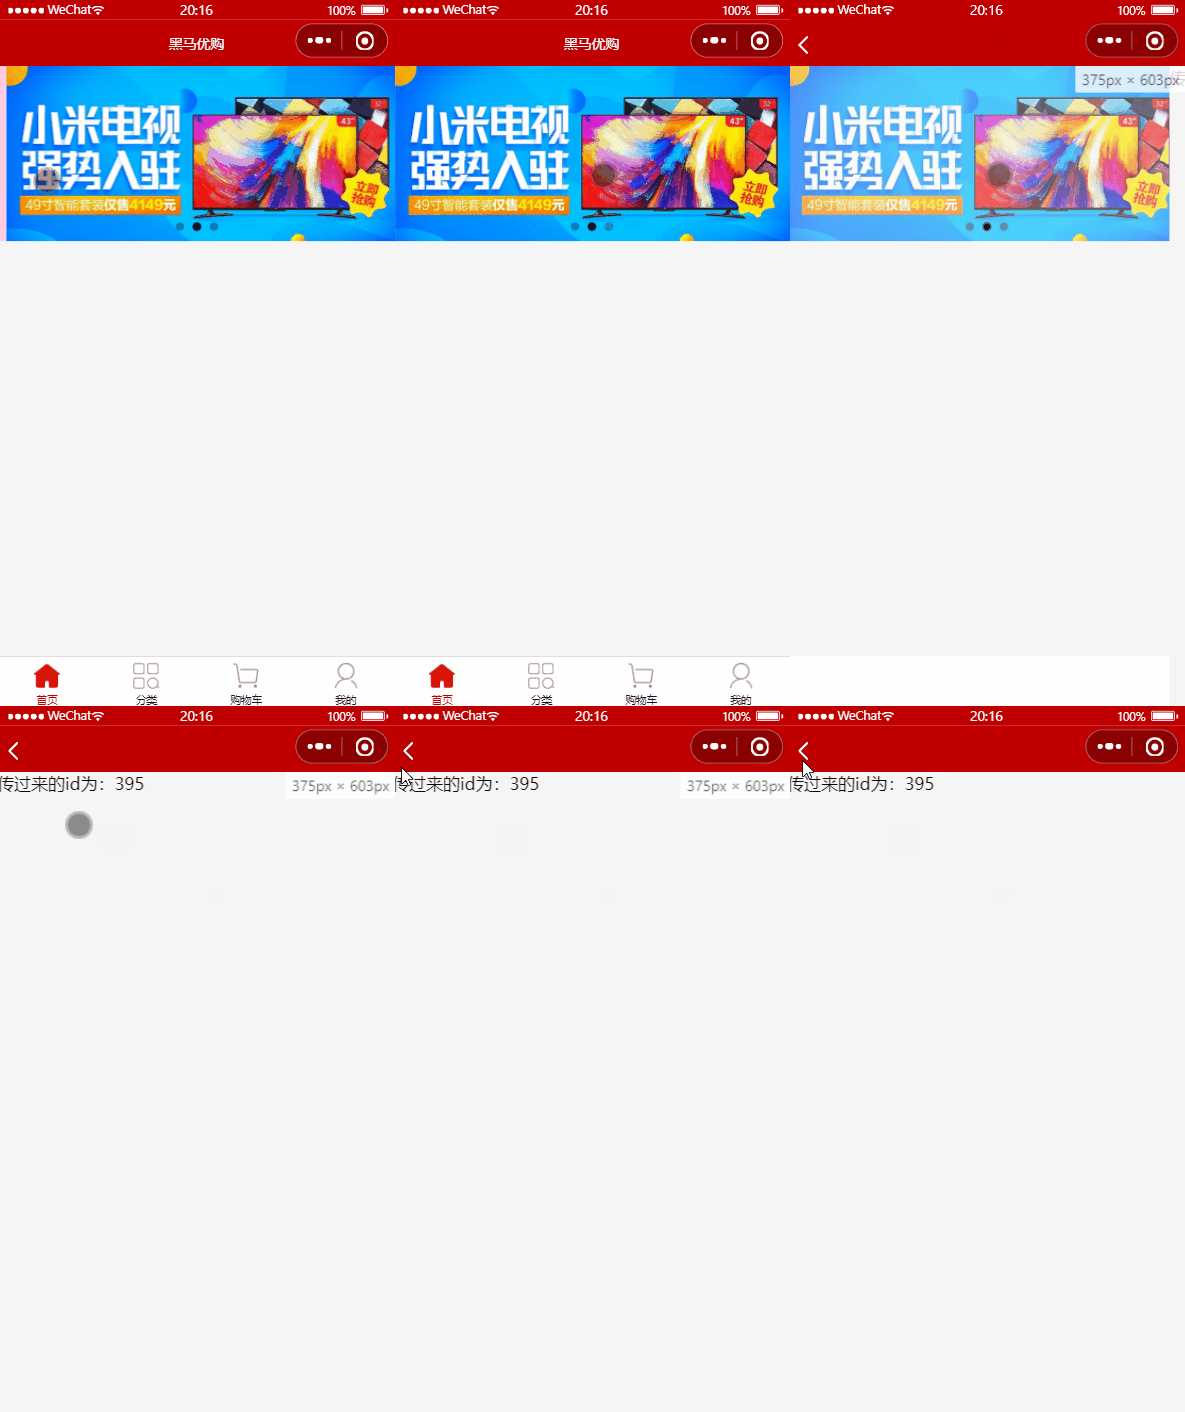
当数据请求失败后,经常需要调用 uni.showToast() 方法提示用户。可以在全局封装一个 uni.$showMsg() 方法,
来简化 uni.showToast() 方法调用
在 main.js 中,为 uni 对象挂载自定义的 $showMsg() 方法
uni.$showMsg = function(title = "数据加载失败!", duration = 1500) {
  uni.showToast({
    title,
    duration,
    icon: 'none'
   })
}
在之后需要提示消息时,直接调用 uni.$showMsg() 方法即可
export default {
  // ...
  methods: {
    // 获取轮播图数据
    async getSwiperList() {
      const {
        data: res
      } = await uni.$http.get('/api/public/v1/home/swiperdata');
      if (res.meta.status !== 200) return uni.$showMsg();
      this.swiperList = res.message
    }
  }
}
提示展示

获取分类导航数据
在 home 的 vue 页面文件中获取数据
- 在 data 中定义分类导航数据的数组
- 在 onLoad 生命周期函数中调用获取分类导航数据的方法
- 在 methods 中定义获取分类导航数据的方法
export default {
  data() {
    return {
      // 1. 分类导航的数据列表
      navList: [],
    }
  },
  onLoad() {
    // 2. 在 onLoad 中调用获取数据的方法
    this.getNavList()
  },
  methods: {
    // 3. 在 methods 中定义获取数据的方法
    async getNavList() {
      const { data: res } = await uni.$http.get('/api/public/v1/home/catitems')
      if (res.meta.status !== 200) return uni.$showMsg()
      this.navList = res.message
    },
  },
}
渲染分类导航的 UI 结构
使用 v-for 来循环渲染创建每一个 item 项,并用 css 美化样式
<template>
  <view>
   <!-- ... -->
    <!-- 分类导航区域 -->
    <view class="nav-list">
      <view class="nav-item" v-for="(item, index) in newList" :key="index">
        <image :src="item.image_src" mode="widthFix" class="nav-img"></image>
      </view>
    </view>
  </view>
</template>

<script>
export default {
  data() {
    return {
      // ...
      newList: []
    };
  },
  methods: {
    // ...
    async getNavList() {
      const {
        data: res
      } = await uni.$http.get('/api/public/v1/home/catitems');
      if (res.meta.status !== 200) return uni.$showMsg();
      this.newList = res.message;

    }
  },
  onLoad() {
    // ...
    // 调用 获取分类数据方法
    this.getNavList();
  }
}
</script>

<style lang="scss">
/* ... */
.nav-list {
  display: flex;
  justify-content: space-around;
  margin: 15rpx 0;
}

.nav-img {
  width: 128rpx;
  height: 140rpx;
}
</style>
效果展示
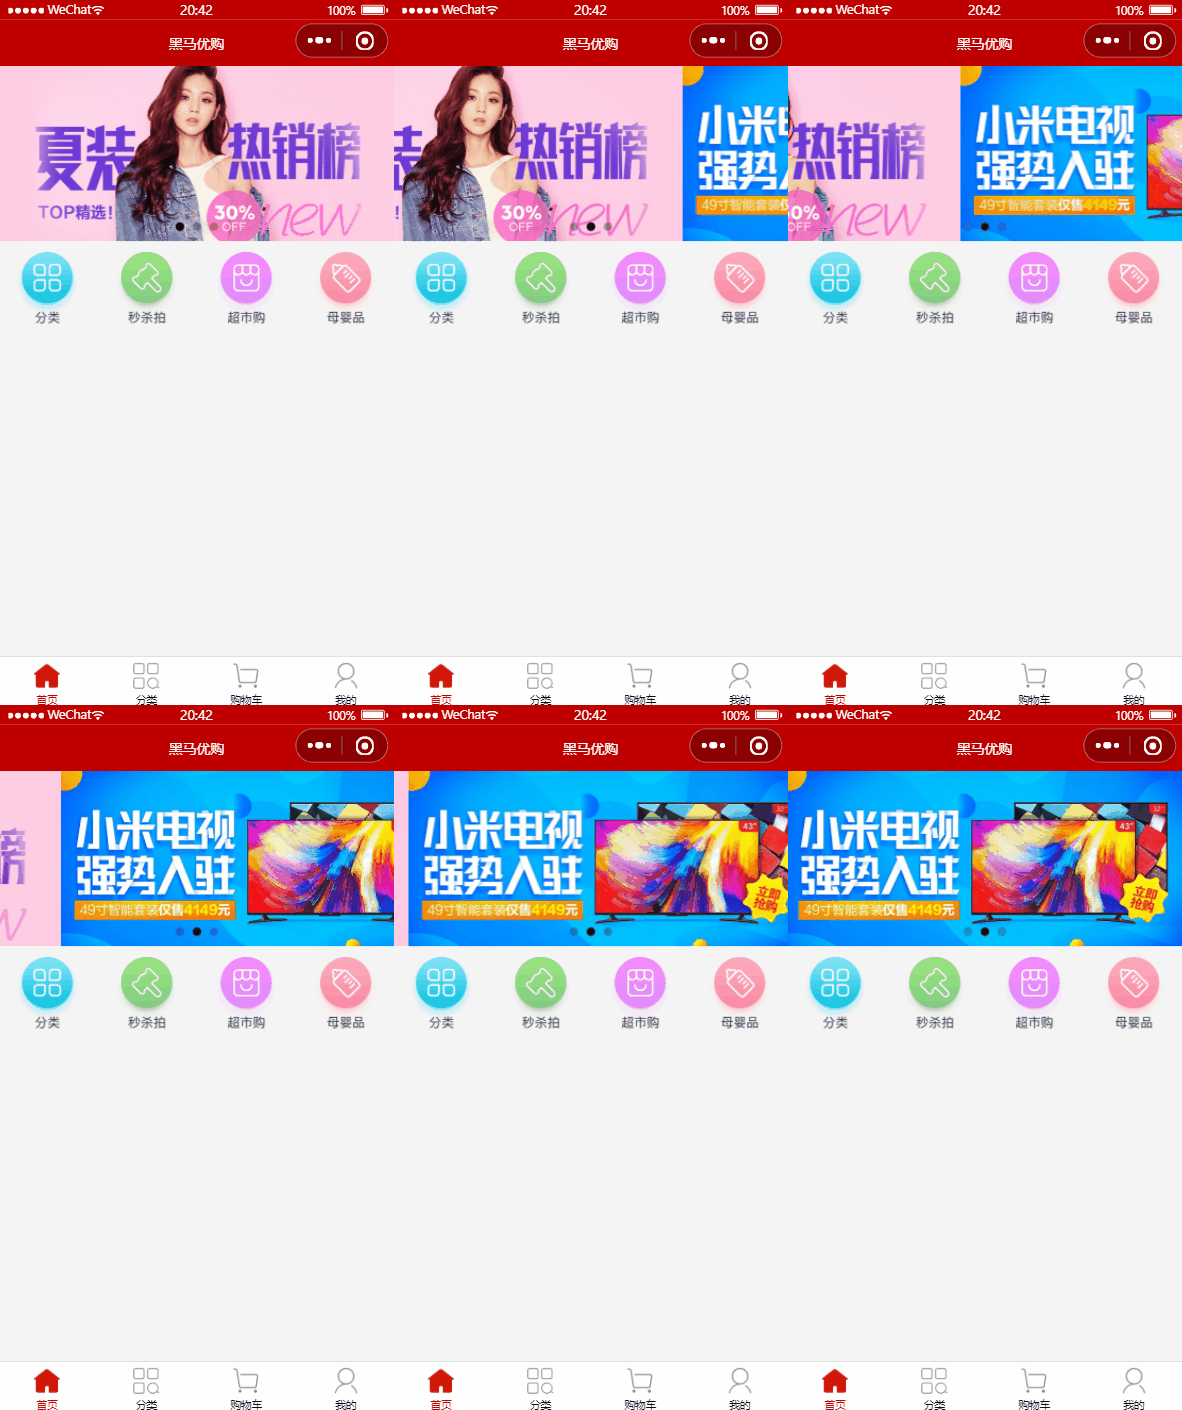
点击第一项切换到 分类页面
为 nav-item 绑定点击事件处理函数
<template>
<!-- 分类导航区域 -->
<view class="nav-list">
  <view class="nav-item"
  v-for="(item, index) in navList"
  :key="index"
  @click="navClickHandler(item)">
    <image :src="item.image_src" class="nav-img"></image>
  </view>
</view>
</template>
定义 navClickHandler 事件处理函数
export default {
  // ...
  methods: {
    // nav-item 项被点击时候的事件处理函数
    navClickHandler(item) {
      // 判断点击的是哪个 nav
      if (item.name === '分类') {
        uni.switchTab({
          url: '/pages/cate/cate'
        })
      }
    }
  },
}
效果展示
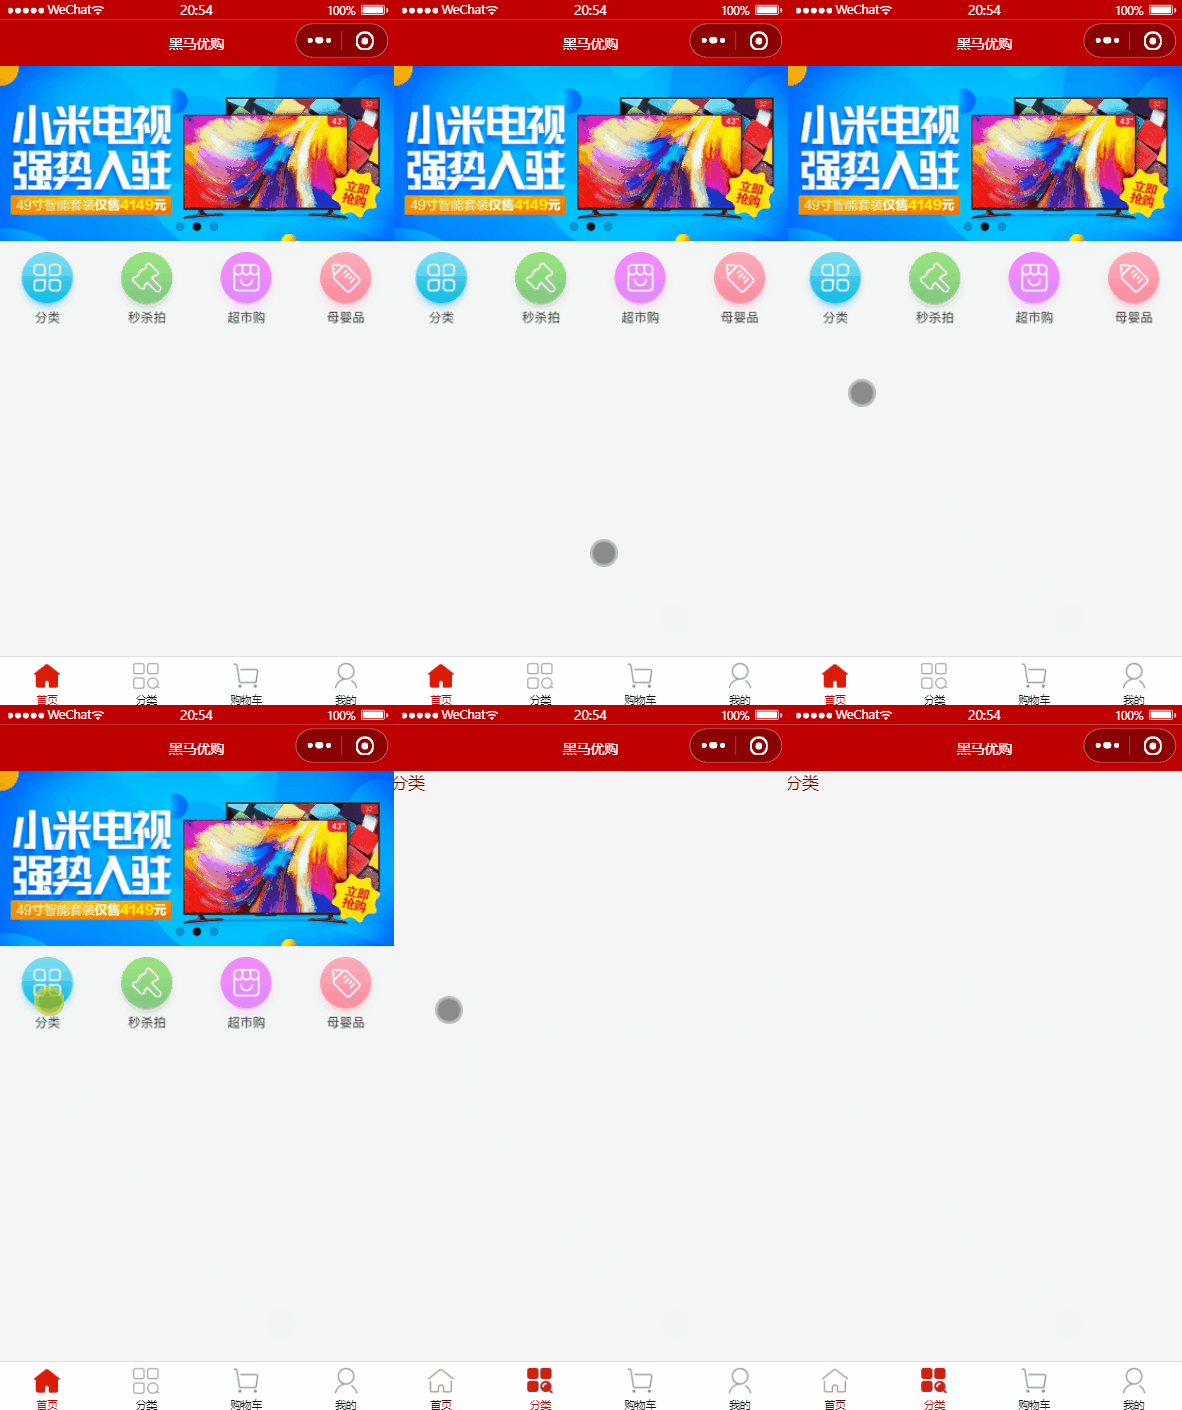
获取楼层数据
在 home 的 vue 页面文件中获取数据
- 在 data 中定义楼层数据的数组
- 在 onLoad 生命周期函数中调用获取楼层数据的方法
- 在 methods 中定义获取楼层数据的方法
export default {
  data() {
    return {
      // 1. 楼层的数据列表
      floorList: [],
    }
  },
  onLoad() {
    // 2. 在 onLoad 中调用获取楼层数据的方法
    this.getFloorList()
  },
  methods: {
    // 3. 定义获取楼层列表数据的方法
    async getFloorList() {
      const { data: res } = await uni.$http.get('/api/public/v1/home/floordata')
      if (res.meta.status !== 200) return uni.$showMsg()
      this.floorList = res.message
    },
  },
}
渲染楼层的标题
使用 v-for 渲染 ul 结构
<template>
<!-- 楼层区域 -->
<view class="floor-list">
  <!-- 楼层 item 项 -->
  <view class="floor-item" v-for="(item, i) in floorList" :key="i">
    <!-- 楼层标题 -->
    <image :src="item.floor_title.image_src" class="floor-title"></image>
  </view>
</view>
</template>
美化样式
<style>
.floor-title {
  height: 60rpx;
  width: 100%;
  display: flex;
}
</style>
渲染楼层图片区域
通过获取到的 floorList 数据中的 product_list 内容,将第一张作为主图,其他作为小图,并铺设到界面
- 图片区域分为 左侧主图,右侧小图
- 接口提供了图片的尺寸,引用该属性可直接作为 CSS 图片容器的宽度铺设到样式中
- 左侧进行 flex 布局,使用 justify-content: space-around; 铺设方式
<template>
    <!-- ... -->
    <!-- 楼层区域 -->
    <view class="floor-list">
      <!-- 每个楼层的 item 项 -->
      <view class="floor-item"
      v-for="(item, index) in floorList"
      :key="index">
        <image :src="item.floor_title.image_src"
        mode="widthFix"
        class="floor-title"></image>
        <!-- 楼层的 图片区域 -->
        <view class="floor-img-box">
          <!-- 左侧 大图 -->
          <view class="left-img-box">
            <image
            :src="item.product_list[0].image_src"
            :style="{ width: item.product_list[0].image_width + 'rpx' }"
              mode="widthFix"></image>
          </view>

          <!-- 右侧 小图 -->
          <view class="right-img-box">
            <view class="right-img-item"
            v-for="(item_2, index_2) in item.product_list"
            :key="index_2"
            v-if="index_2 !== 0">
              <image :src="item_2.image_src"
              mode="widthFix"
              :style="{ width: item_2.image_width + 'rpx' }">
              </image>
            </view>
          </view>
        </view>
      </view>
    </view>
</template>.right-img-box {
display: flex;
flex-wrap: wrap;
justify-content: space-around;
}
.floor-img-box {
display: flex;
padding-left: 10rpx;
}效果展示
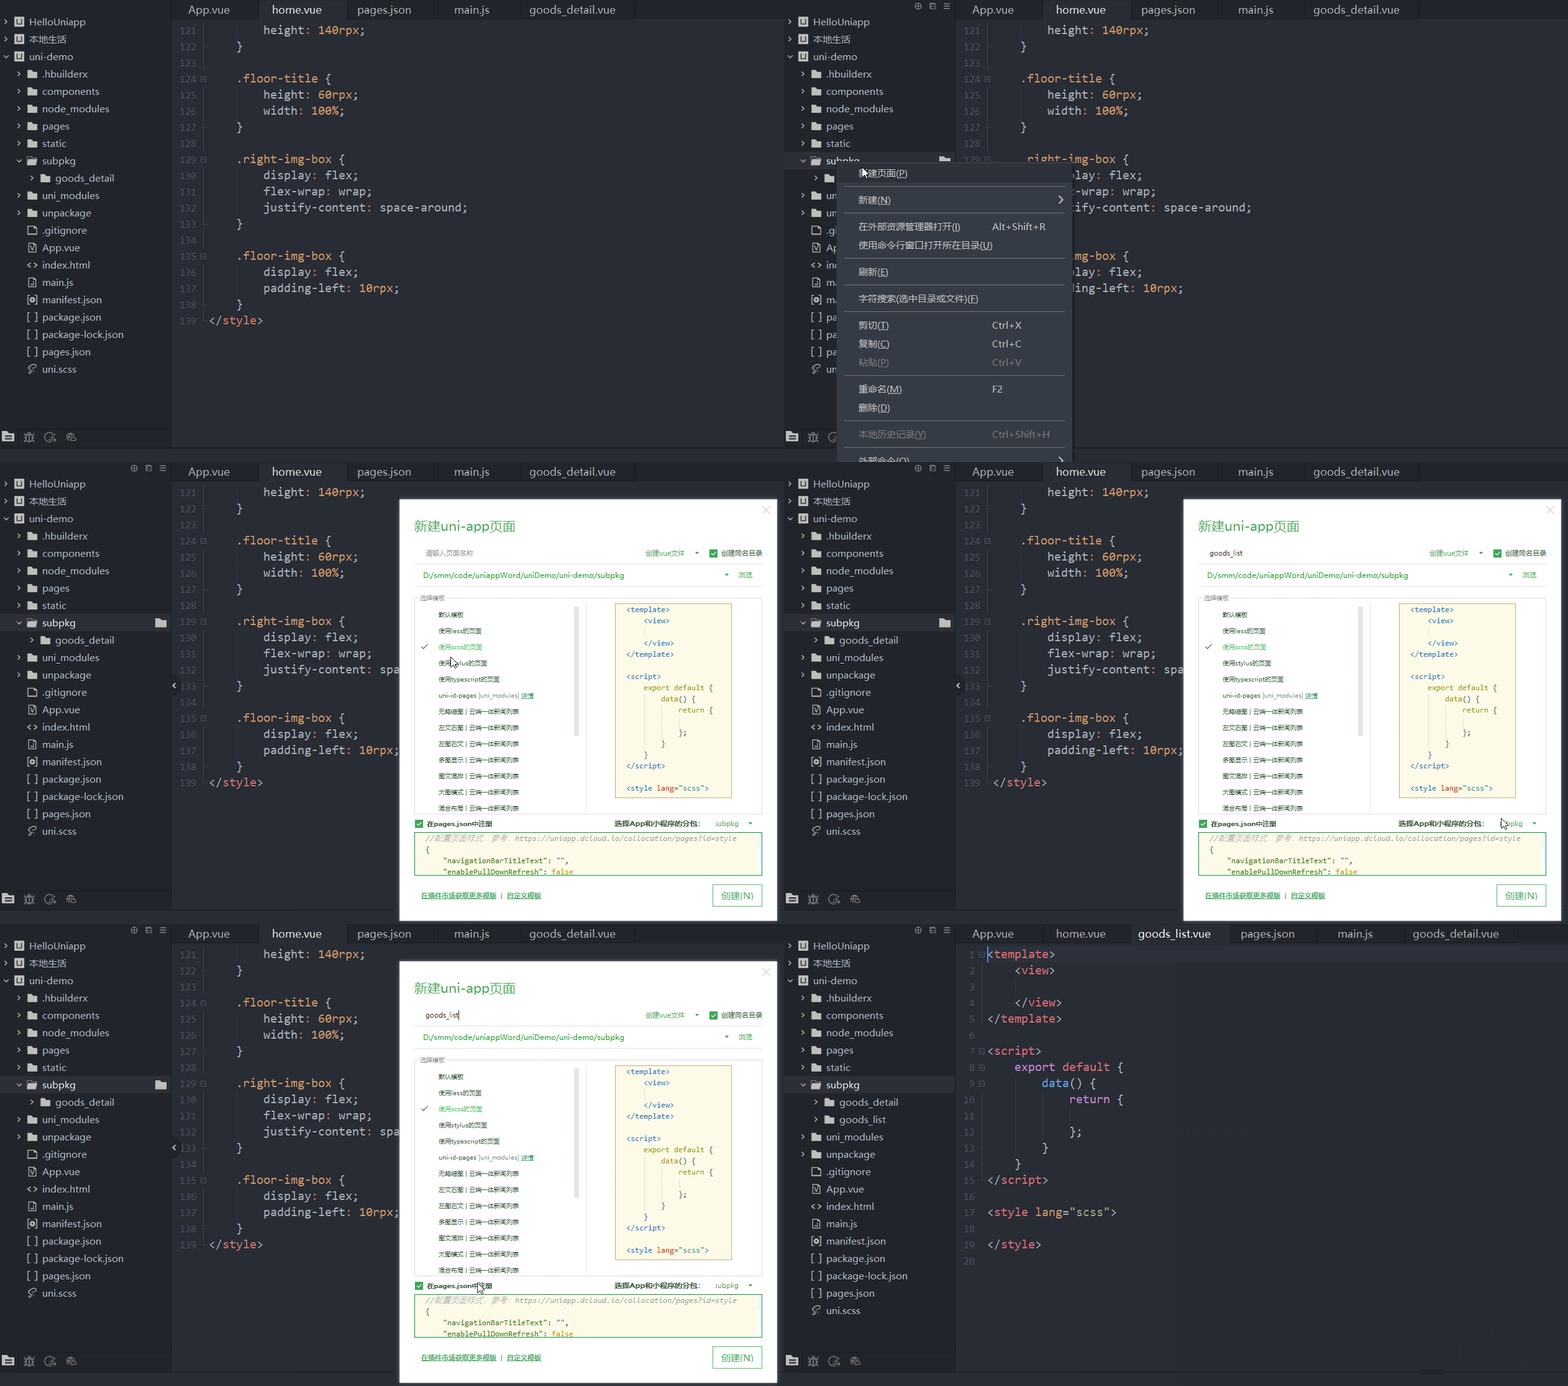
创建 商品列表 业务分包
在 subpkg 分包中,新建 goods_list 页面;注意勾选 “在 pages.json 中注册” 并选择小程序分包
修改接口提供的 navigator_url 属性
接口返回的 navigator_url 不符合项目的 路由路径,为使其作用于项目,需要使用 forEach 进行处理
export default {
  data() {
    return {
      // ...
      floorList: []
    };
  },
  methods: {
    // ...
    async getFloorList() {
      const {
        data: res
      } = await uni.$http.get('/api/public/v1/home/floordata');
      if (res.meta.status !== 200) return uni.$showMsg();

      /*
         接口提供的 navigator_url 不符合我们项目的 路由路径 [需要进行修改]
         通过双层 forEach 循环 处理 URL 地址
      */
      res.message.forEach(floor => {
        floor.product_list.forEach(prod => {
          prod.url = '/subpkg/goods_list/goods_list?' + prod.navigator_url.split('?')[1]
        })
      });

      // 处理后的结果 赋值到 floorList
      this.floorList = res.message;

    }
  },
  onLoad() {
    // ...
    // 调用 楼层数据方法
    this.getFloorList();
  }
}
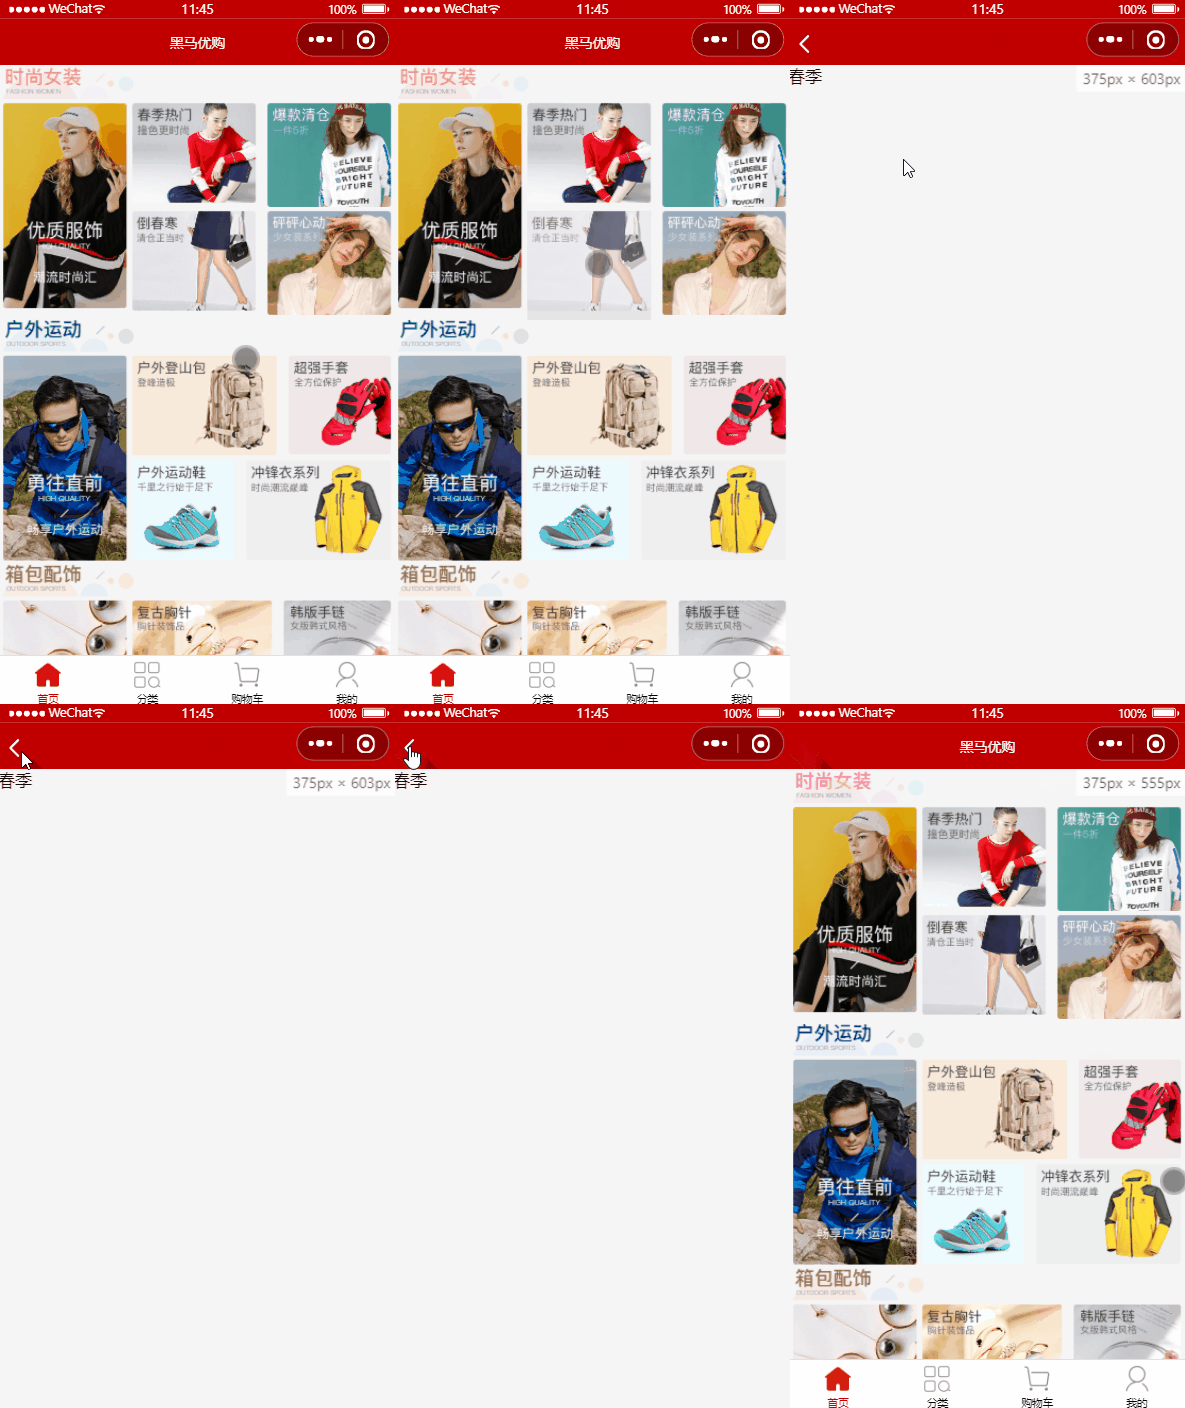
实现点击楼层图片区域 进行跳转
改造 view 为 navigator 组件,在该组件中传递上个步骤创建的 url 路径成员,实现路由跳转并传值
改造前
<template>
 <view>
  <!-- ... -->
  <!-- 左侧 大图 -->
  <view
   class="left-img-box">
   <image
   :src="item.product_list[0].image_src"
   :style="{ width: item.product_list[0].image_width + 'rpx' }"
   mode="widthFix"></image>
  </view>
  <!-- 右侧 小图 -->
  <view
  class="right-img-item"
  v-for="(item_2, index_2) in item.product_list"
  :key="index_2"
  v-if="index_2 !== 0">
    <image
    :src="item_2.image_src"
    mode="widthFix"
    :style="{ width: item_2.image_width + 'rpx' }">
    </image>
  </view>
 </view>
</template>
改造后
<template>
 <view>
  <!-- ... -->
  <!-- 左侧 大图 -->
  <navigator
   class="left-img-box"
   :url="item.product_list[0].url">
   <image
   :src="item.product_list[0].image_src"
   :style="{ width: item.product_list[0].image_width + 'rpx' }"
   mode="widthFix"></image>
  </navigator>
  <!-- 右侧 小图 -->
  <navigator
  class="right-img-item"
  v-for="(item_2, index_2) in item.product_list"
  :key="index_2"
  :url="item_2.url"
  v-if="index_2 !== 0">
    <image
    :src="item_2.image_src"
    mode="widthFix"
    :style="{ width: item_2.image_width + 'rpx' }">
    </image>
  </navigator>
 </view>
</template>
效果展示
合并与提交 Git 分支
本地提交到 Git
git add .
git commit -m "完成 首页功能 的开发"
提交到远程仓库
# 一键提交 把本地的 home 分支提交到 远程仓库
git push -u origin home
合并本地分支
# 切换分支到 main 主分支
git checkout main
# 在 main 分支上合并 home 分支
git merge home
删除本地 home 分支
# 删除 tabbar 分支前需要当前在其他分支上
git branch -d home
创建 cate 分支
运行 Git 命令,基于 main 分支在本地创建 cate 子分支,用来开发 分类页面 相关功能
# 创建并切换到 cate 分支
git checkout -b cate
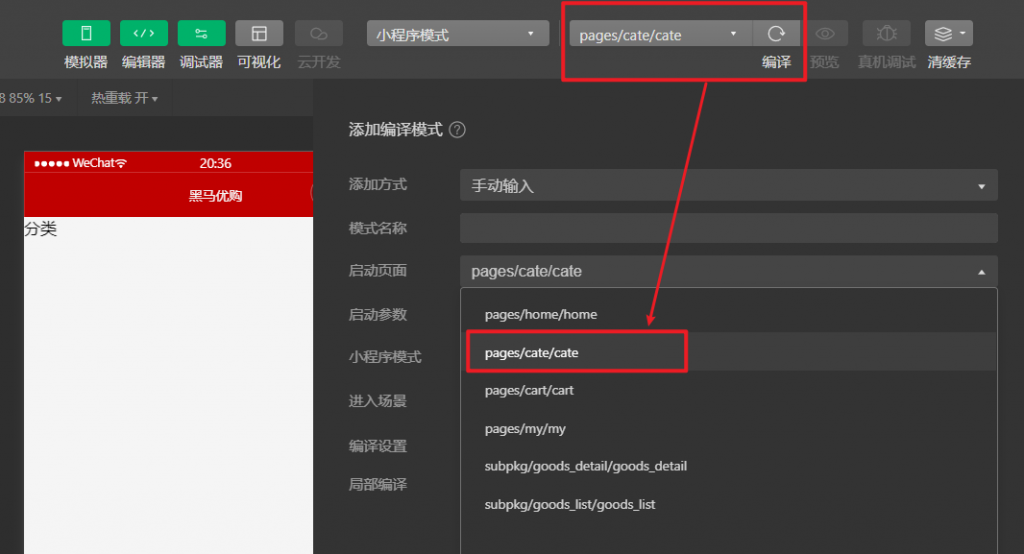
添加编译模式
为方便开发分类页面项目,使得每次编译后自动切换到 分类页面,可在小程序中添加 编译模式,内容如下
实现左右侧业务滚动
定义页面结构如下,通过 scroll-view 的滚动支持,实现区域的上下滑动
<template>
  <view>
    <view class="scroll-view-container">
      <!-- 左侧的滚动视图区域 -->
      <scroll-view class="left-scroll-view" scroll-y="true" style="height:200px;">
        <view class="left-scroll-view-item active">XXX</view>
        <view class="left-scroll-view-item">XXX</view>
        <view class="left-scroll-view-item">XXX</view>
        <view class="left-scroll-view-item">XXX</view>
        <view class="left-scroll-view-item">XXX</view>
        <view class="left-scroll-view-item">XXX</view>
        <view class="left-scroll-view-item">XXX</view>
        <view class="left-scroll-view-item">XXX</view>
        <view class="left-scroll-view-item">XXX</view>
        <view class="left-scroll-view-item">XXX</view>
        <view class="left-scroll-view-item">XXX</view>
        <view class="left-scroll-view-item">XXX</view>
      </scroll-view>
      <!-- 右侧的滚动视图区域 -->
      <scroll-view class="right-scroll-view" scroll-y="true" style="height:200px;">
        <view class="right-scroll-view-item active">XXX</view>
        <view class="right-scroll-view-item">YYY</view>
        <view class="right-scroll-view-item">YYY</view>
        <view class="right-scroll-view-item">YYY</view>
        <view class="right-scroll-view-item">YYY</view>
        <view class="right-scroll-view-item">YYY</view>
        <view class="right-scroll-view-item">YYY</view>
        <view class="right-scroll-view-item">YYY</view>
        <view class="right-scroll-view-item">YYY</view>
        <view class="right-scroll-view-item">YYY</view>
        <view class="right-scroll-view-item">YYY</view>
        <view class="right-scroll-view-item">YYY</view>
        <view class="right-scroll-view-item">YYY</view>
      </scroll-view>
    </view>
  </view>
</template>

<script>
export default {
  data() {
    return {

    };
  }
}
</script>

<style lang="scss">
.scroll-view-container {
  display: flex;

  .left-scroll-view {
    width: 120px;
  }

  .right-scroll-view {
    flex: 1;
  }
}
</style>
效果展示
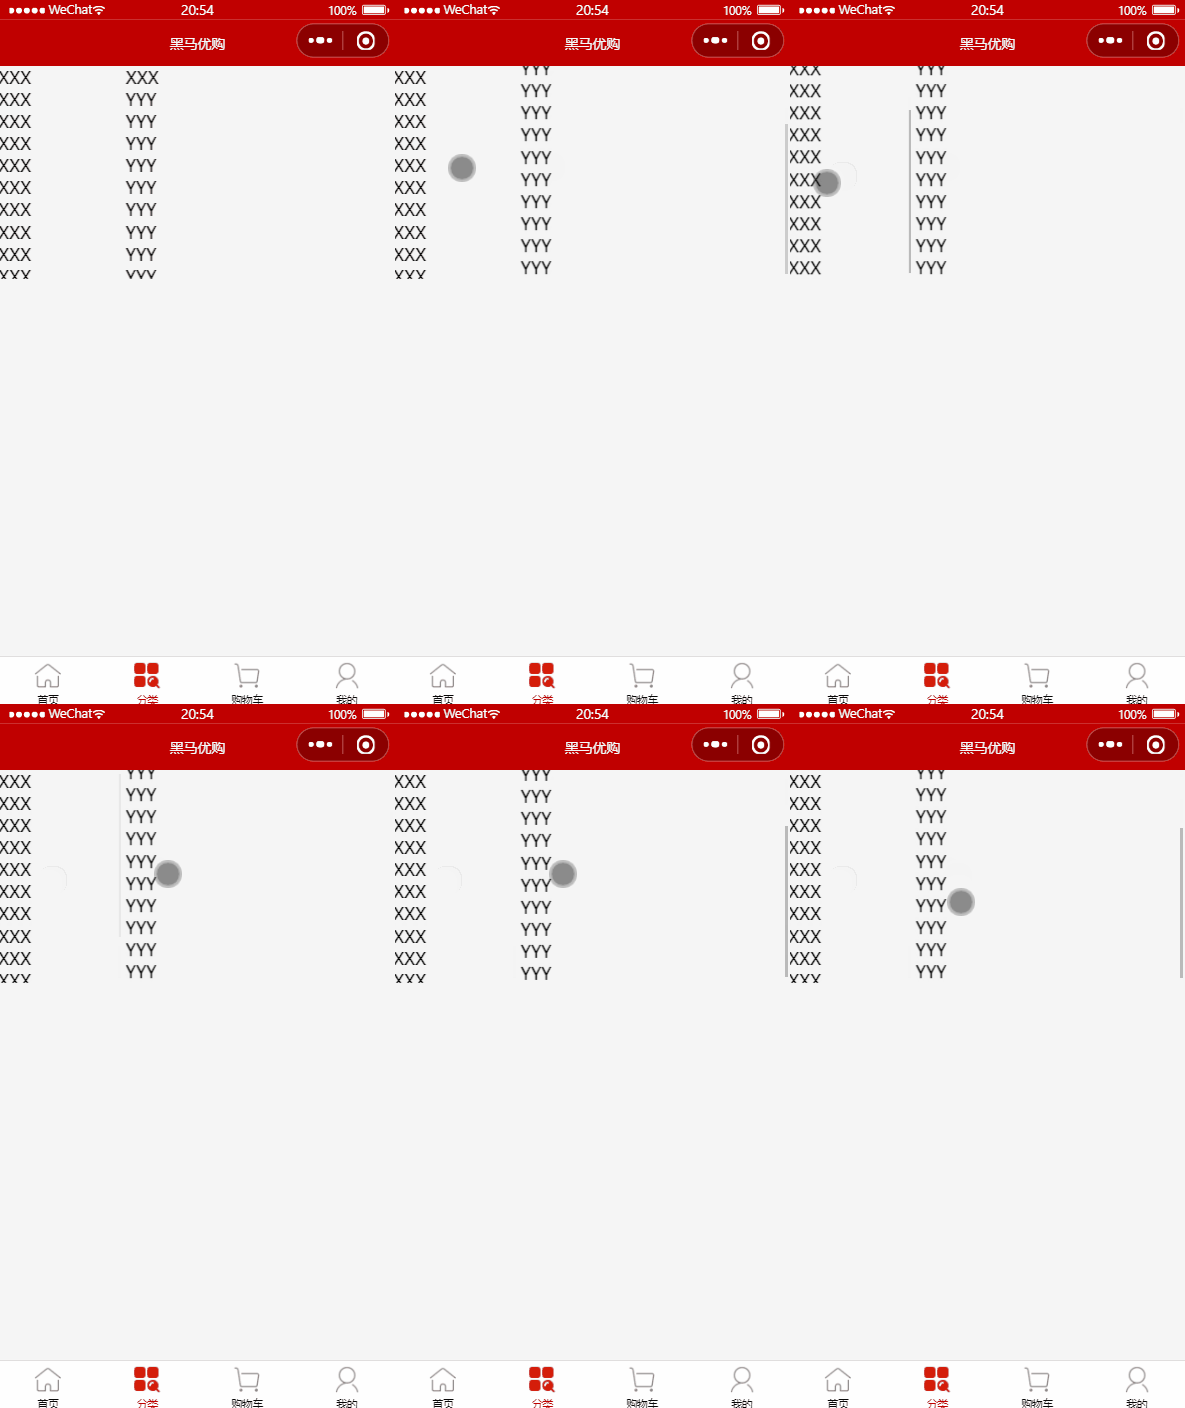
动态设置 scroll-view 组件高度
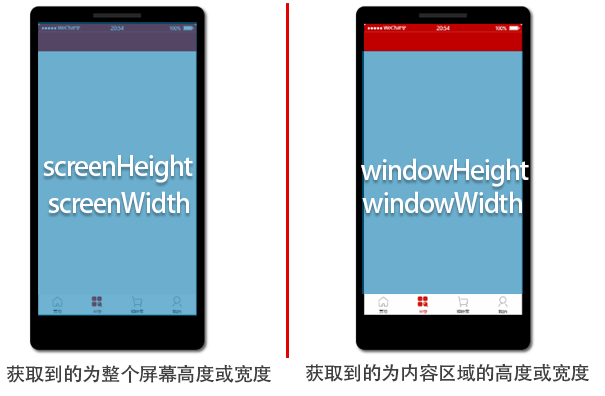
如若需要组件设置占满高度,为了兼容所有机型高度,使用 uni.getSystemInfoSync() 获取设备高度
关于 uni.getSystemInfoSync() 相关文档
screenHeight 屏幕高度、windowHeight 可使用窗口高度 两个参数不同
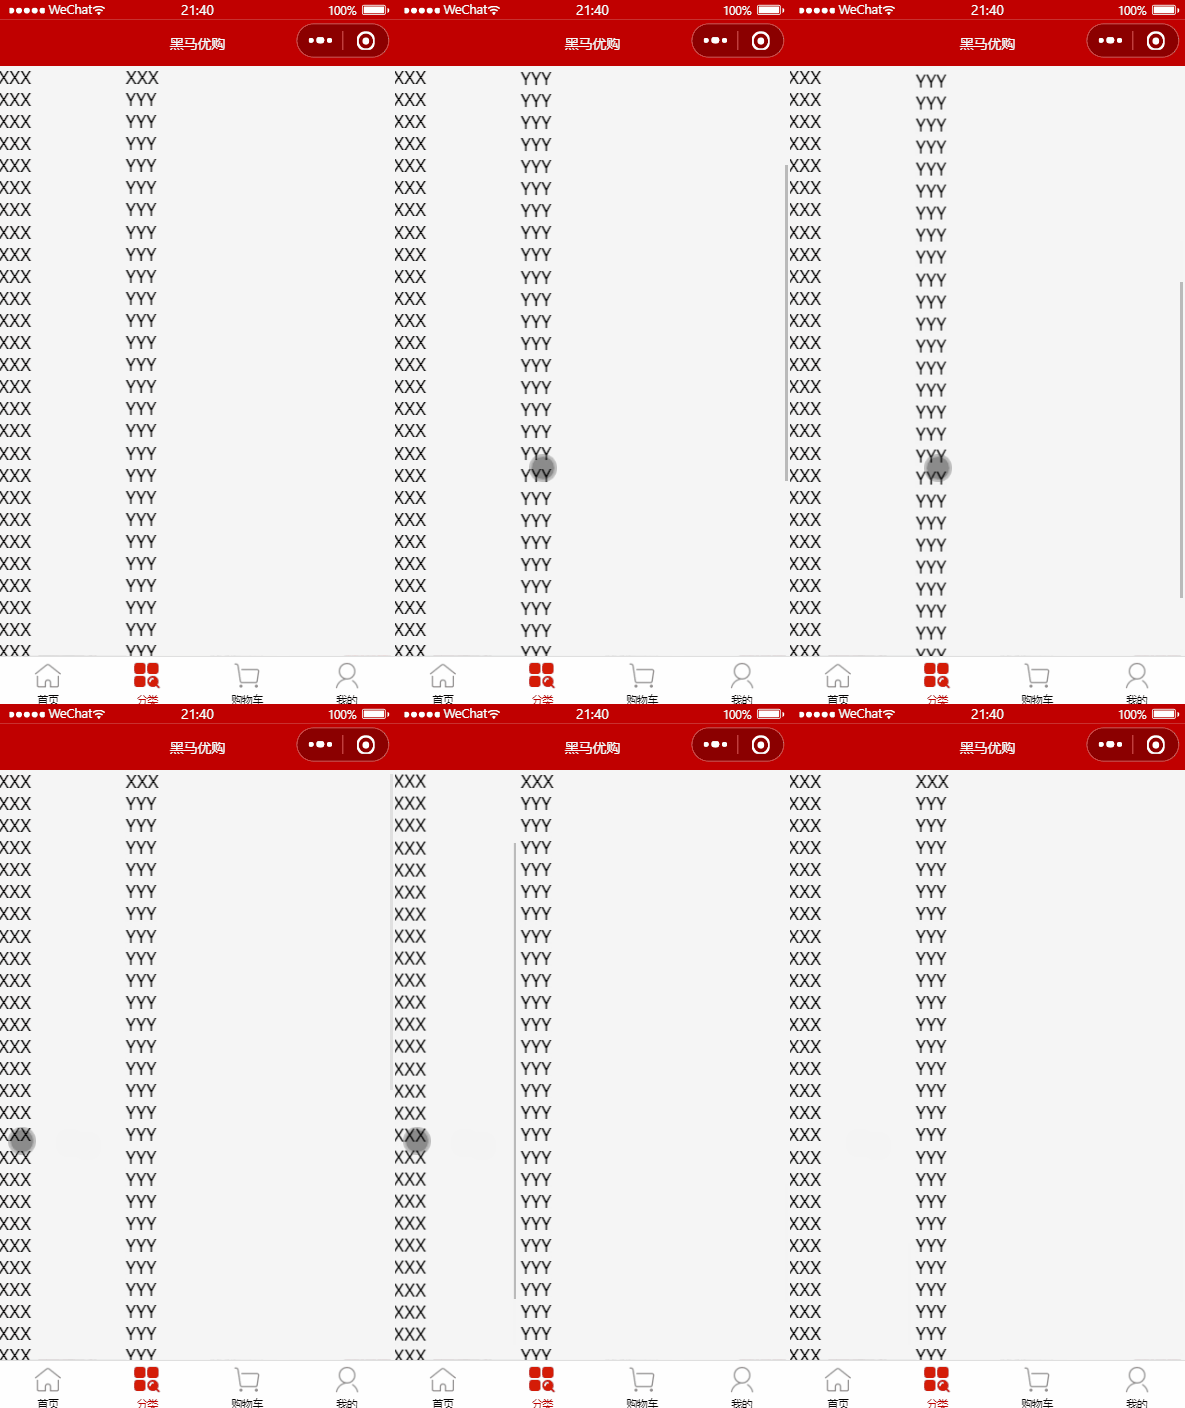
动态获取高度后,给组件设置高度
<template>
  <view>
    <view class="scroll-view-container">
      <!-- 左侧的滚动视图区域 -->
      <scroll-view class="left-scroll-view" scroll-y="true" :style="{height:wh + 'px'}">
        <view class="left-scroll-view-item active">XXX</view>
        <!-- ... -->
      </scroll-view>
      <!-- 右侧的滚动视图区域 -->
      <scroll-view class="right-scroll-view" scroll-y="true" :style="{height:wh + 'px'}">
        <view class="right-scroll-view-item active">XXX</view>
        <!-- ... -->
      </scroll-view>
    </view>
  </view>
</template>

<script>
export default {
  data() {
    return {
      wh: 0
    };
  },
  // 页面加载完成后
  onLoad() {
    // 获取设备信息
    const info = uni.getSystemInfoSync();
    // 为当前 可用高度对应变量进行赋值
    this.wh = info.windowHeight;
  }
}
</script>

<style lang="scss">
/* ... */
</style>
效果展示
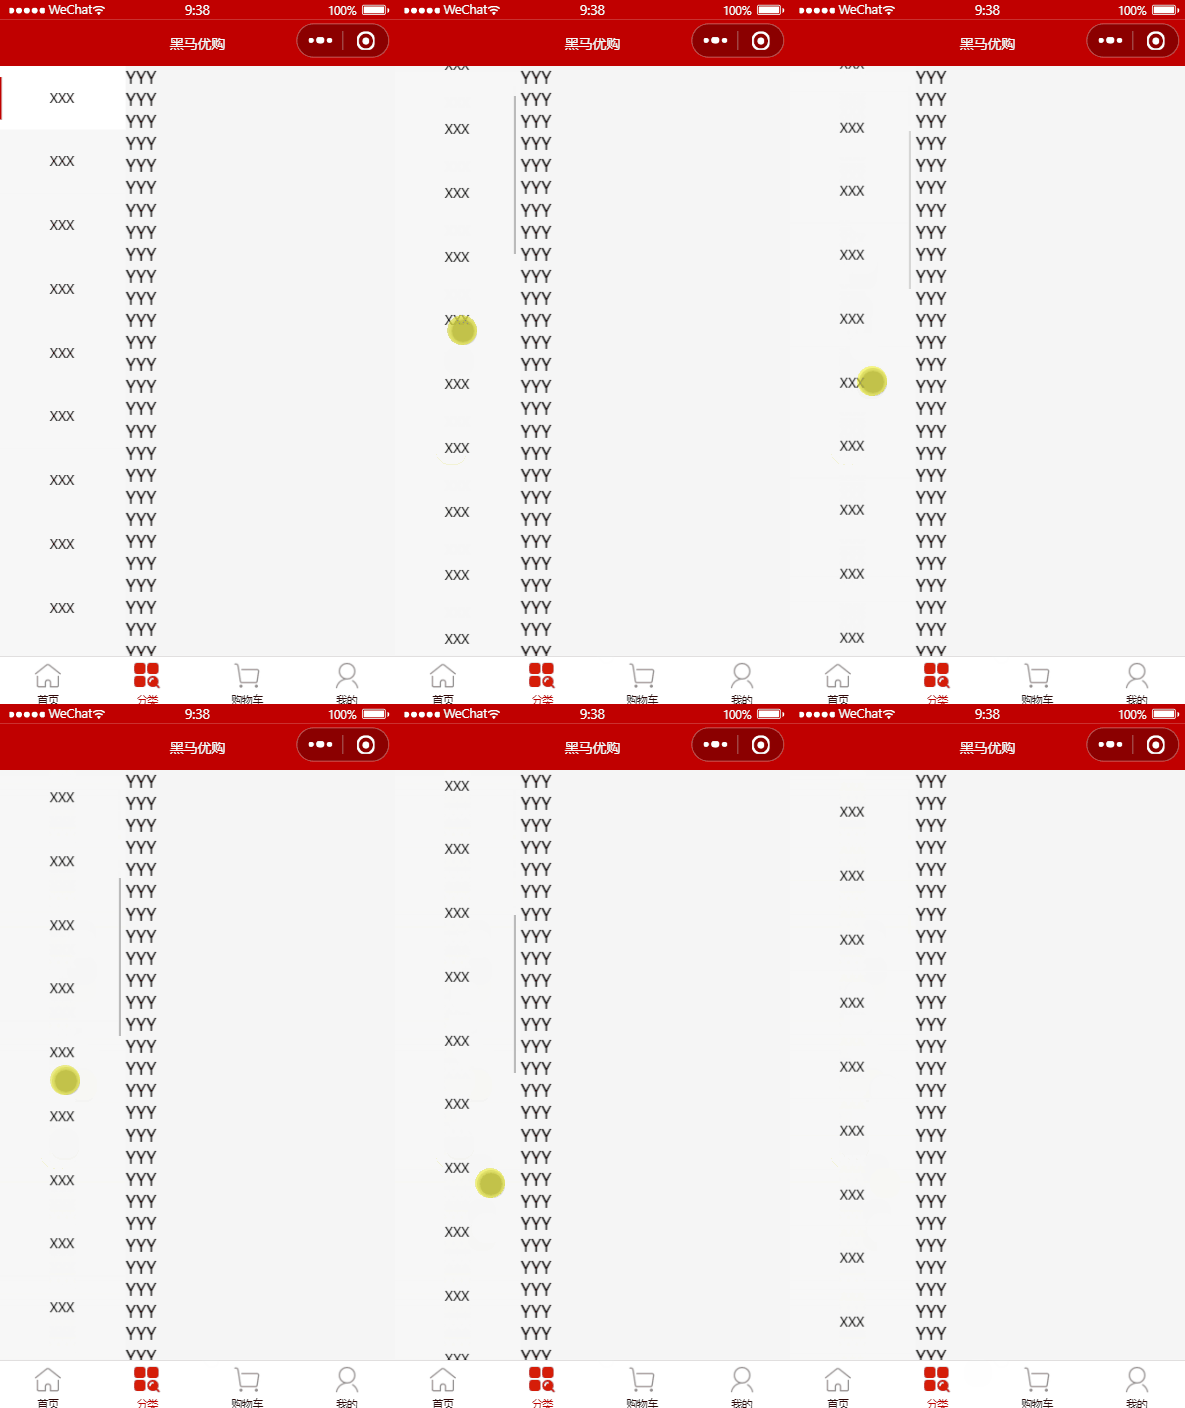
美化样式
为每一个滚动的子项目添加 left-scroll-view-item 类,并在选中的项目额外添加 active 激活类。在 CSS 中修饰样式
scss 允许像 less 一样嵌套的格式作为关系继承的写法,并可以在使用 & 来代替上一层类名
例如: .menu { &::before { } } 等同于 .menu { } .menu::before{ }
</script>

<style lang="scss">
.scroll-view-container {
  display: flex;

  .left-scroll-view {
    width: 120px;

    .left-scroll-view-item {
      position: relative;
      background-color: #f7f7f7;
      line-height: 60px;
      text-align: center;
      font-size: 12px;

      &.active {
        background-color: #ffffff;

        &::before {
          position: absolute;
          content: ' ';
          display: block;
          width: 3px;
          height: 40px;
          top: 50%;
          left: 0;
          transform: translateY(-50%);
          background-color: #c00000;
        }
      }
    }

  }

  .right-scroll-view {
    flex: 1;
  }
}
</style>
效果展示
获取分类列表数据
在页面加载完成后发起网络请求,将得到的数据存放在创建的 cateList 中
<script>
export default {
  data() {
    return {
      // 存放分类数据
      cateList: []
    };
  },
  onLoad() {
    // 调用分类列表数据
    this.getCateList();
  },
  methods: {
    async getCateList() {
      // 发起请求 获取数据
      const {
        data: res
      } = await uni.$http.get('/api/public/v1/categories');
      // 判断是否请求失败
      if (res.meta.status !== 200) return uni.$showMsg();
      // 赋值数据
      this.cateList = res.message;
    }
  }
}
</script>动态渲染左侧一级列表界面
将得到的对应数据,创建 block 标签,并在它中使用 v-for 渲染界面,并创建 active 变量用于判断用户单击选中项
<template>
  <view>
    <view class="scroll-view-container">
      <!-- 左侧的滚动视图区域 -->
      <scroll-view
      class="left-scroll-view"
      scroll-y="true"
      :style="{ height: wh + 'px' }">
        <block
        v-for="(item, index) in cateList"
        :key="index">
          <view
          :class="['left-scroll-view-item', index === active ? 'active' : '']"
          @click="activeChaged(index)">
            {{ item.cat_name }}
          </view>
        </block>
      </scroll-view>
      <!-- 右侧的滚动视图区域 -->
      <scroll-view
      class="right-scroll-view"
      scroll-y="true"
      :style="{ height: wh + 'px' }">
        <!-- ... -->>
      </scroll-view>
    </view>
  </view>
</template>

<script>
export default {
  data() {
    return {
      // ...
      cateList: [],
      active: 0
    };
  },
  onLoad() {
    // ...
    // 调用分类列表数据
    this.getCateList();
  },
  methods: {
    async getCateList() {
      // 发起请求 获取数据
      const {
        data: res
      } = await uni.$http.get('/api/public/v1/categories');
      // 判断是否请求失败
      if (res.meta.status !== 200) return uni.$showMsg();
      // 赋值数据
      this.cateList = res.message;
    },

    // 用户点击左侧一级列表后 事件处理函数
    activeChaged(index) {
      this.active = index;
    }
  }
}
</script>
效果展示
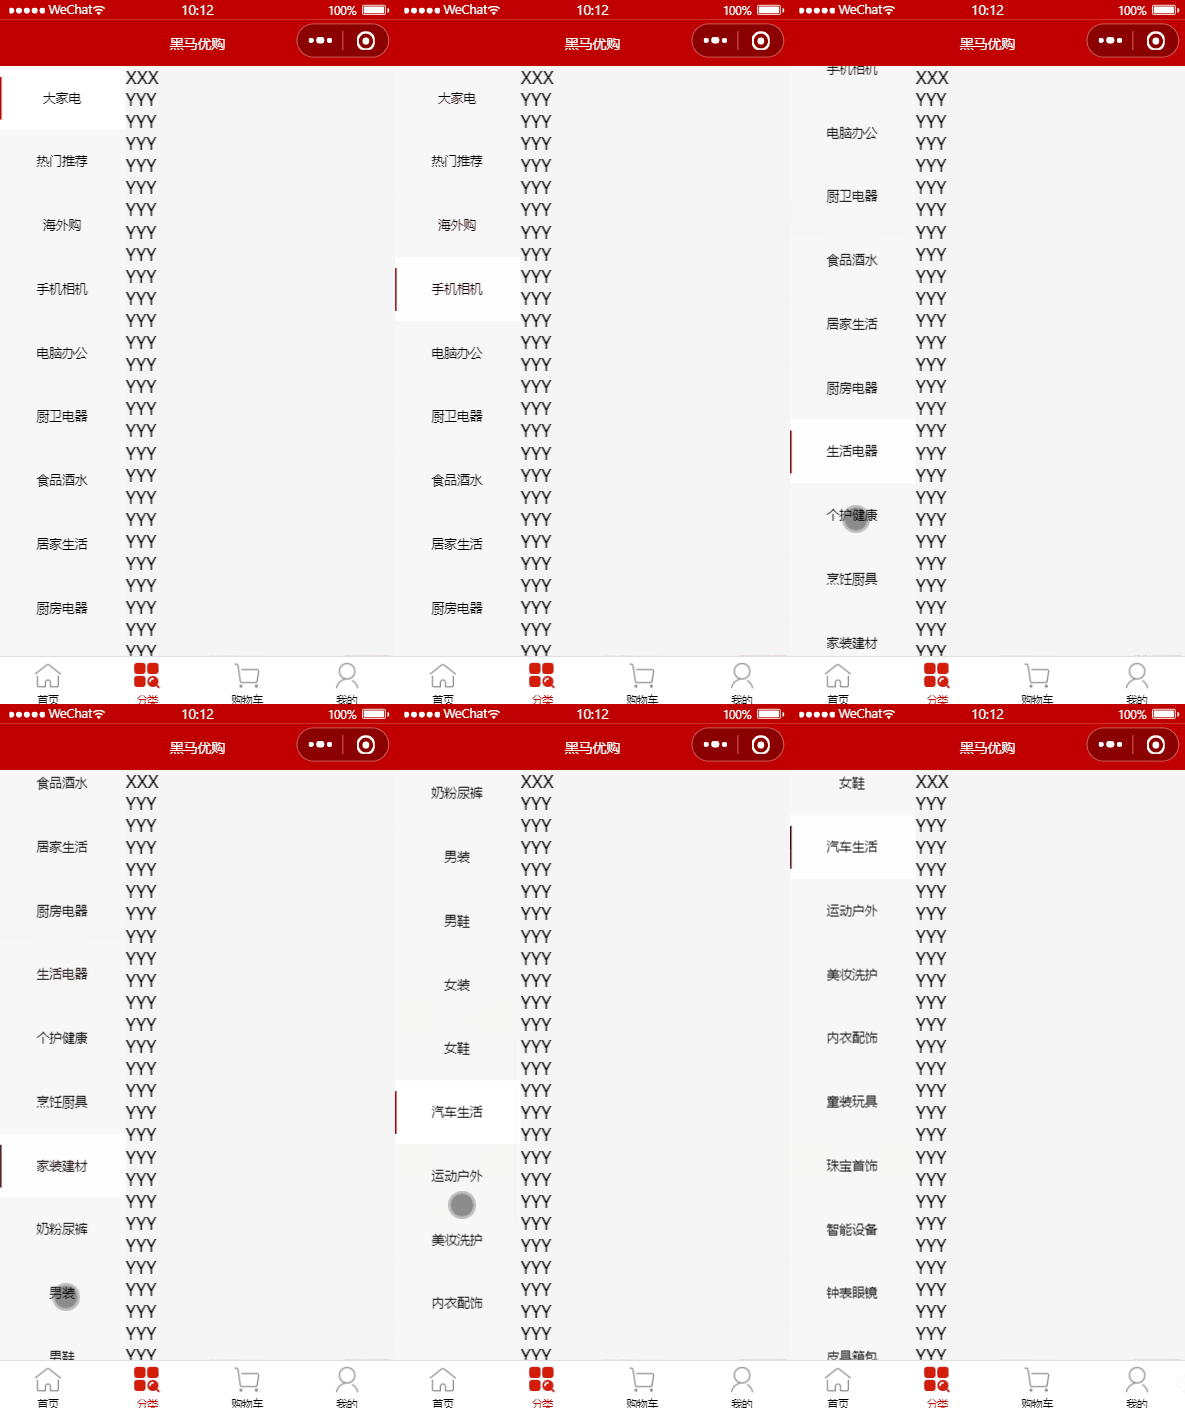
获取右侧二级分类数据
cateList 中的 children 成员中包含了右侧二级分类页面,通过切换的下标,替换 cateLevel2 右侧分类对应 cateList 下标的值
<script>
export default {
  data() {
    return {
      cateList: [],
      cateLevel2: [],
      active: 0
    };
  },
  onLoad() {
    // 调用分类列表数据
    this.getCateList();
  },
  methods: {
    async getCateList() {
      // 发起请求 获取数据
      const {
        data: res
      } = await uni.$http.get('/api/public/v1/categories');
      // 判断是否请求失败
      if (res.meta.status !== 200) return uni.$showMsg();
      // 赋值数据
      this.cateList = res.message;
      // 为 二级分类 赋值 默认为下标 0
      this.cateLevel2 = res.message[0].children;

    },
    // 用户点击左侧一级列表后 事件处理函数
    activeChaged(index) {
      this.active = index;
      // 重新为 二级分类 赋值
      this.cateLevel2 = this.cateList[index].children;
    }
  }
}
</script>
效果展示
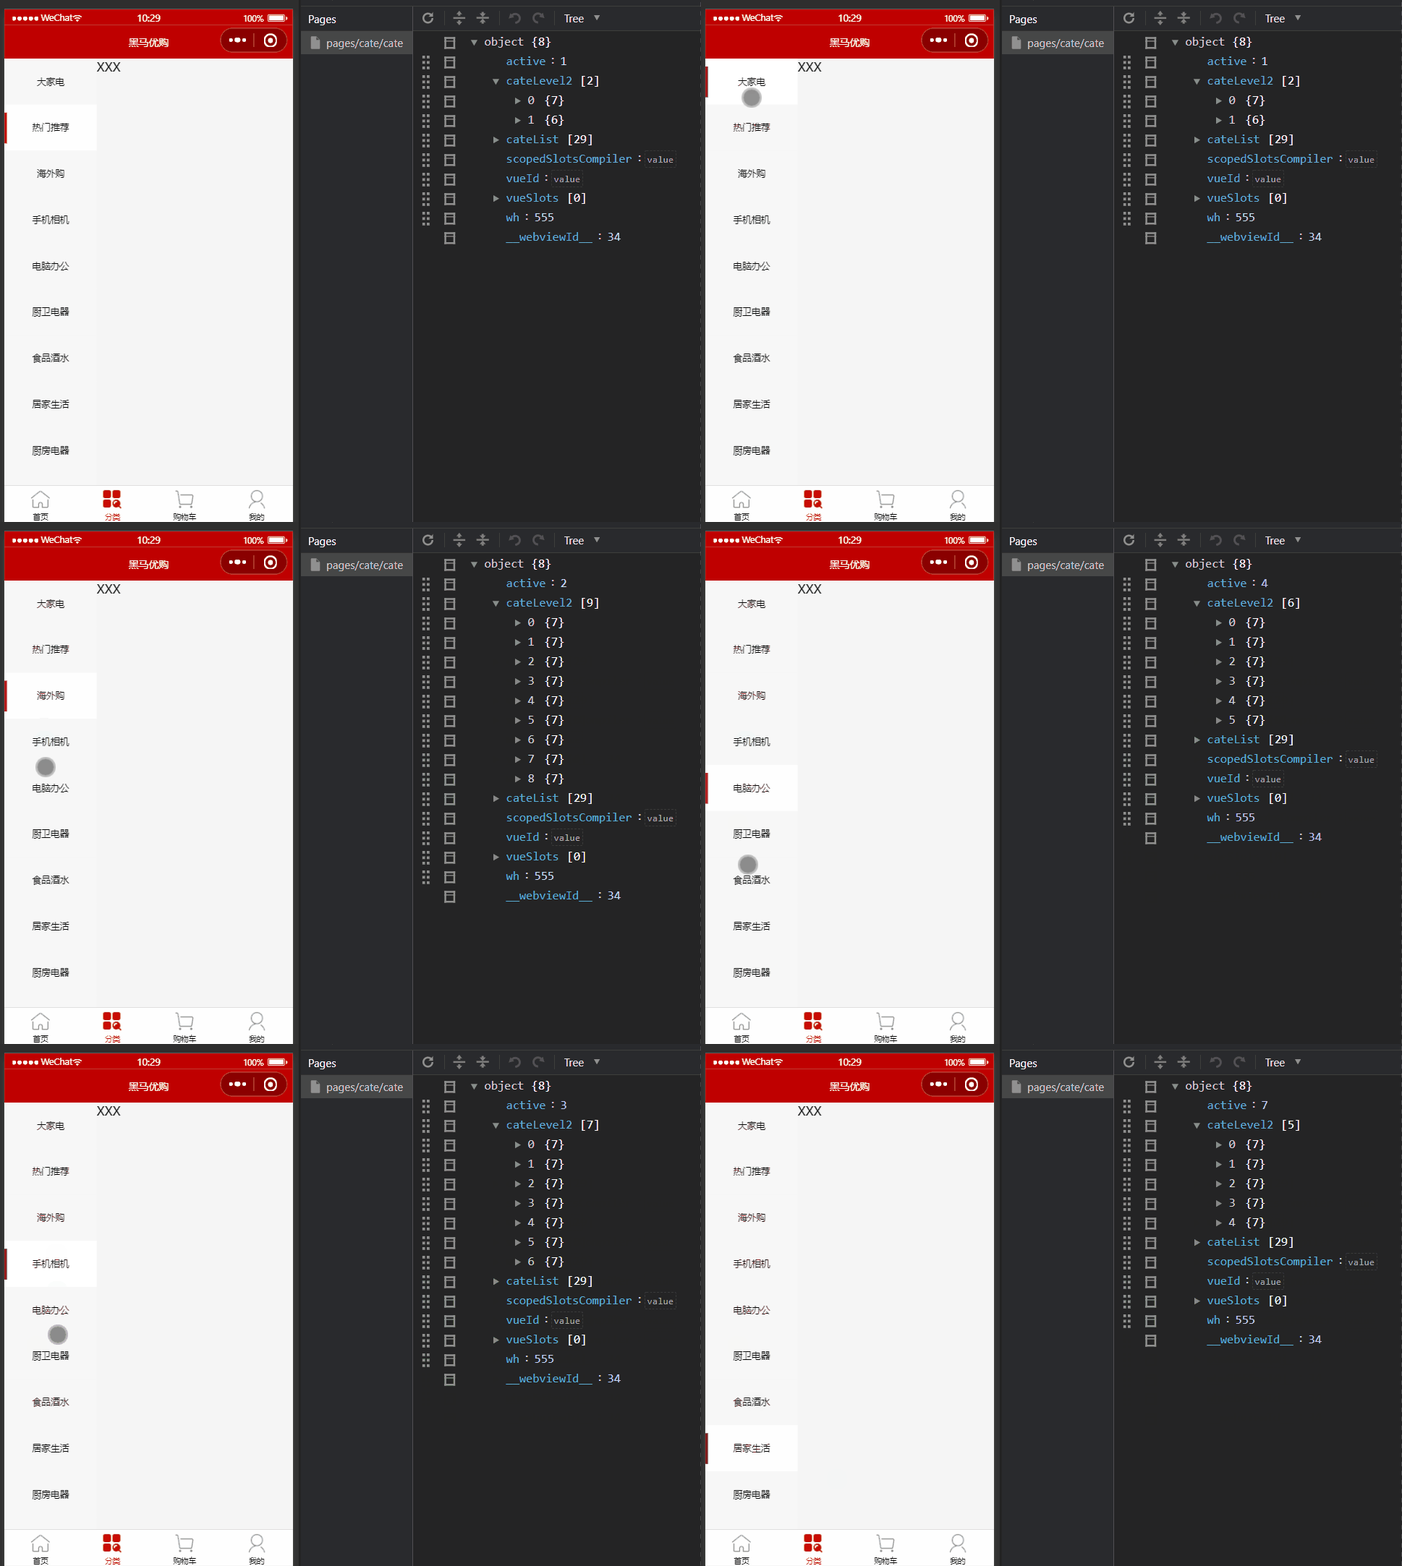
动态渲染右侧二级、三级列表界面
cateLevel2 通过 v-for 的渲染,分别渲染出 二级列表标题 和对应的 三级列表图片组内容
<template>
  <view>
    <view class="scroll-view-container">
      <!-- 左侧的滚动视图区域 -->
      <scroll-view>
          <!-- .. -->
      </scroll-view>
      <!-- 右侧的滚动视图区域 -->
      <scroll-view
      class="right-scroll-view"
      scroll-y="true"
      :style="{ height: wh + 'px' }">
        <view class="cate-lv2"
        v-for="(item, index) in cateLevel2"
        :key="index">
          <!-- 二级分类 标题 -->
          <view class="cate-lv2-title">/ {{ item.cat_name }} /</view>
          <!-- 三级分类列表数据 -->
          <view class="cate-lv3-list">
            <!-- 二级分类 Item 项 -->
            <view class="cate-lv3-item"
            v-for="(item_2, index_2) in item.children"
            :key="index_2">
              <!-- Item 项 图标图片 -->
              <image
              :src="item_2.cat_icon"
              ></image>
              <!-- Item 项 图标文本 -->
              <text>{{ item_2.cat_name }}</text>
            </view>
          </view>
        </view>
      </scroll-view>
    </view>
  </view>
</template>/* ... */
.right-scroll-view {
background-color: #ffffff;
flex: 1;
.cate-lv2-title {
font-size: 12px;
font-weight: bold;
text-align: center;
padding: 15px 0;
}
.cate-lv3-list {
display: flex;
flex-wrap: wrap;
.cate-lv3-item {
width: 33.33%;
margin-bottom: 10px;
display: flex;
flex-direction: column;
align-items: center;
image {
width: 60px;
height: 60px;
}
text {
font-size: 12px;
}
}
}
}效果展示
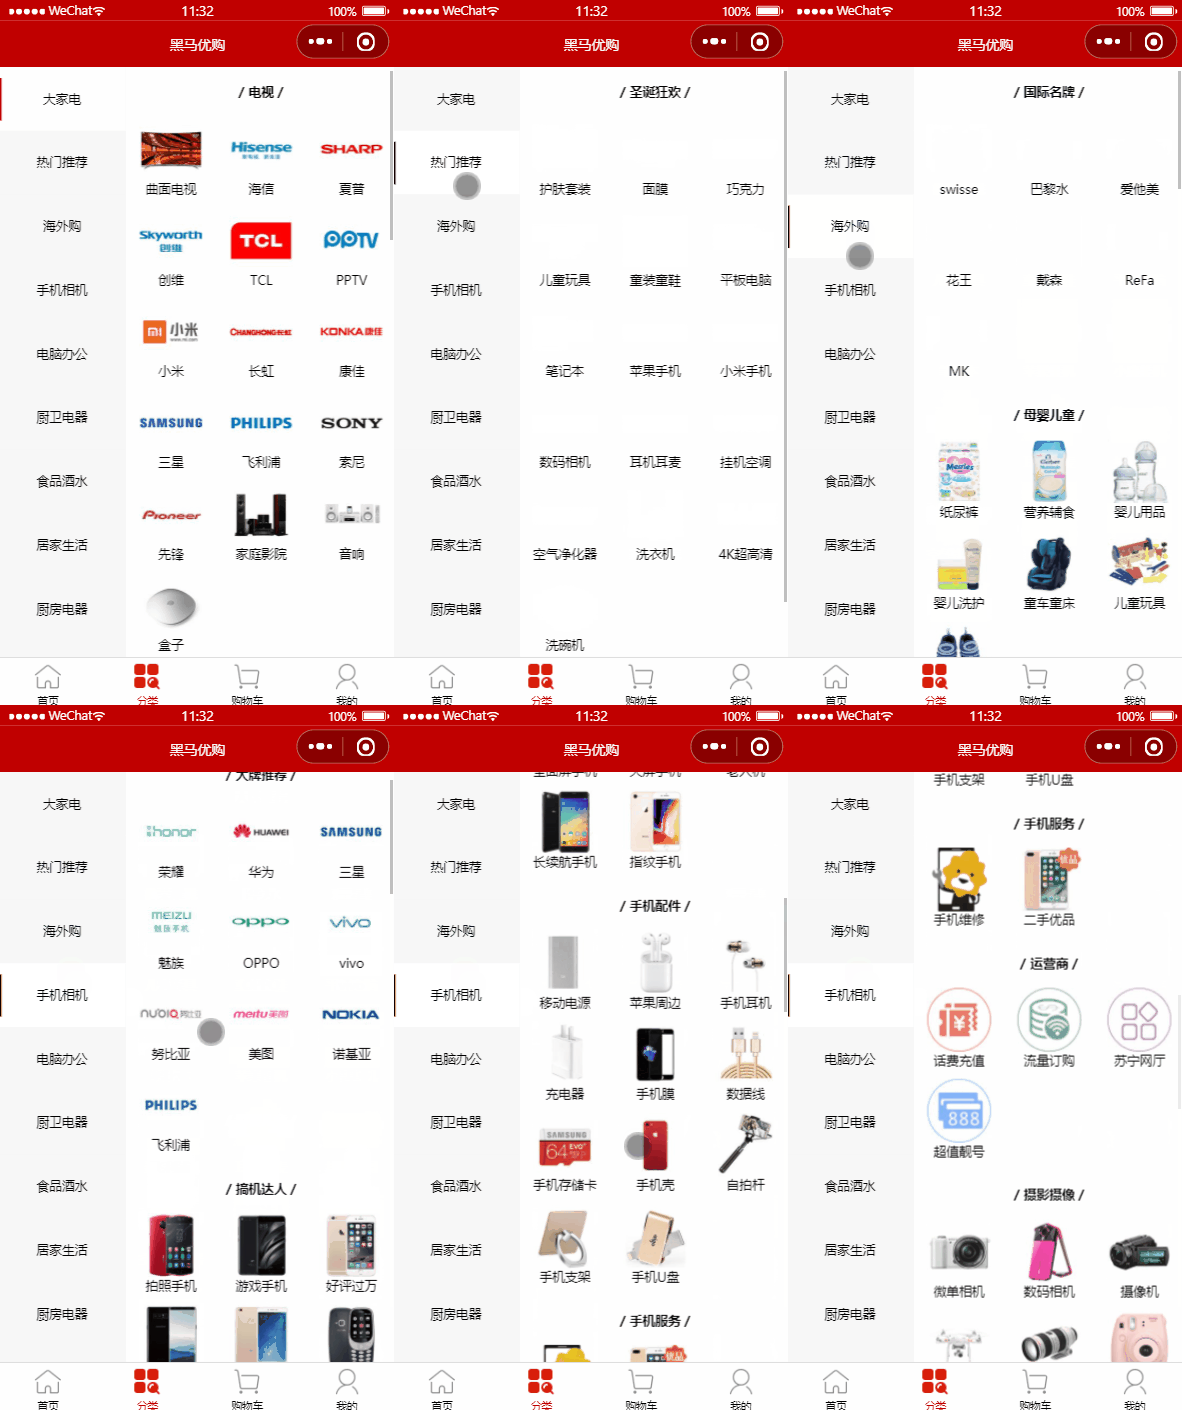
每次切换一级菜单时,应让右侧二级、三级的界面的滚动条返回至顶部区域;
scroll-view 有 scroll-top 属性,可以修改 滚动区域 在顶部的距离,通过重新赋值渲染组件,实现返回顶部
在 data 中定义 scrollTop
data() {
  return {
    // 滚动条距离顶部的距离
    scrollTop: 0
  }
}
动态为右侧的 组件绑定 scroll-top 属性的值:
<!-- 右侧的滚动视图区域 -->
<scroll-view
class="right-scroll-view"
scroll-y
:style="{height: wh + 'px'}"
:scroll-top="scrollTop"
></scroll-view>
切换一级分类时,动态设置 scrollTop 的值:
// 选中项改变的事件处理函数
activeChanged(i) {
  this.active = i
  this.cateLevel2 = this.cateList[i].children

  // 让 scrollTop 的值在 0 与 1 之间切换
  // 只有值发生变化后 才会重新渲染组件
  this.scrollTop = this.scrollTop === 0 ? 1 : 0

  // 可以简化为如下的代码:
  // this.scrollTop = this.scrollTop ? 0 : 1
}
效果展示
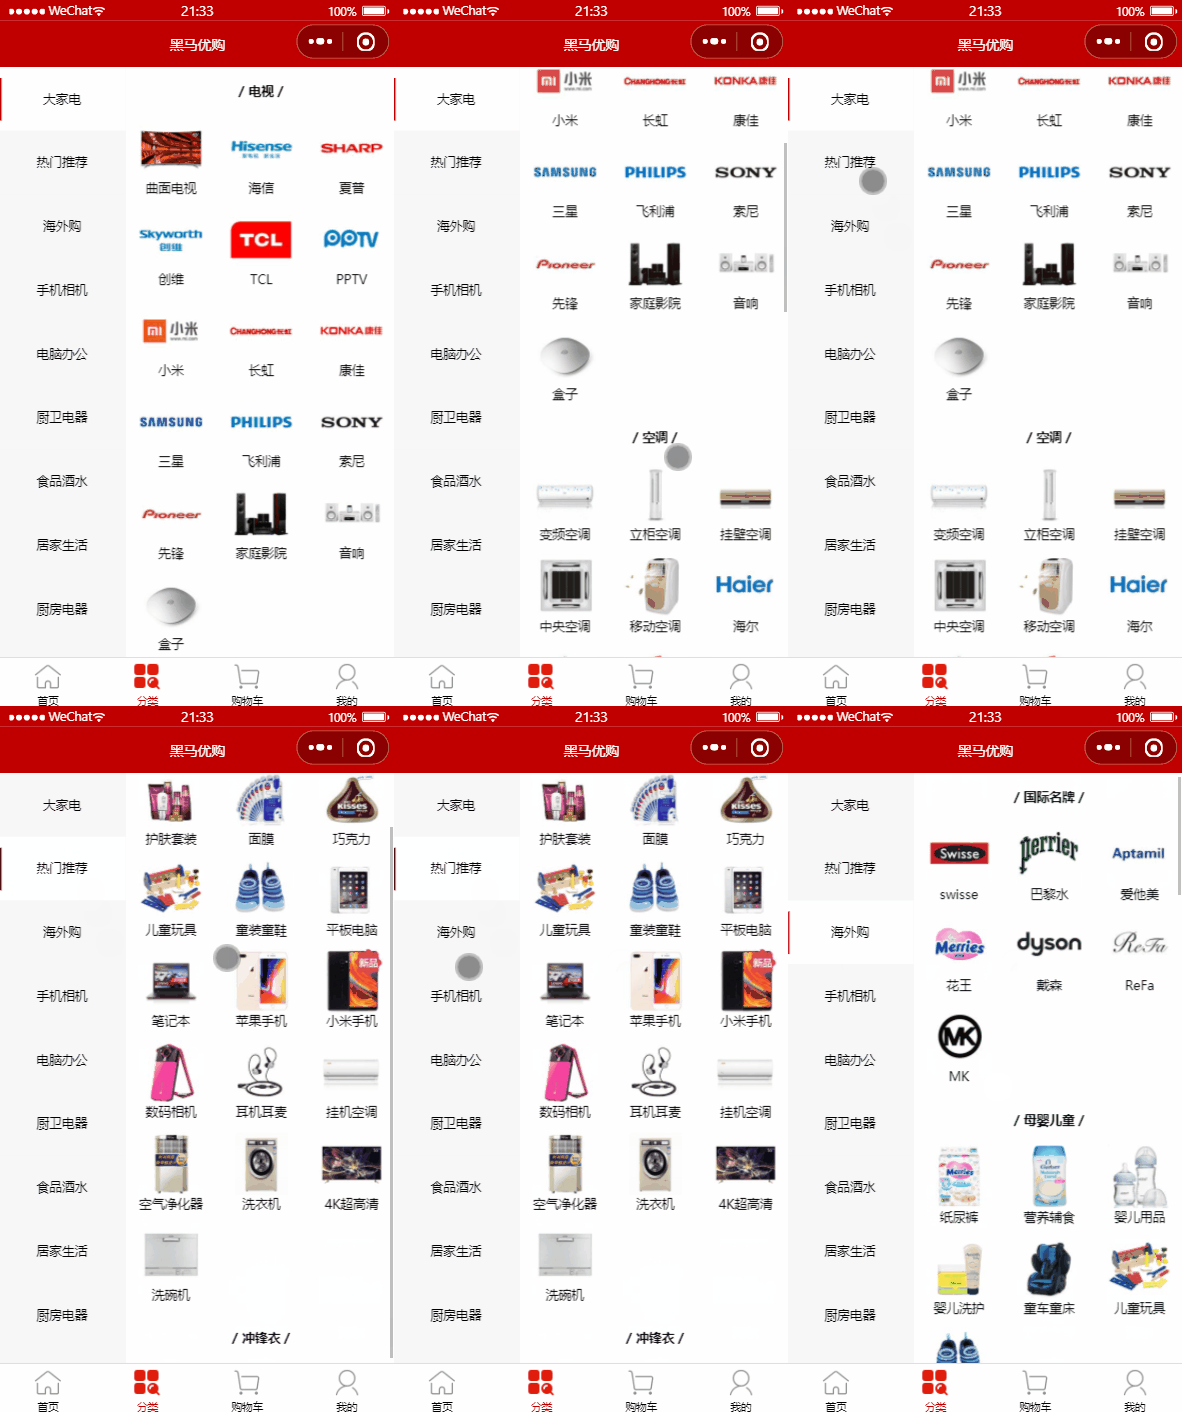
通过给三级分类的每一个 view 绑定单击事件,并传递 v-for 遍历的 item 参数,使用 navigateTo 实现跳转传参
<template>
  <view>
      <!-- ... -->
      <!-- 右侧的滚动视图区域 -->
      <scroll-view
      class="right-scroll-view"
      scroll-y="true"
      :style="{ height: wh + 'px' }"
      :scroll-top="scrollTop">
        <view
        class="cate-lv2"
        v-for="(item, index) in cateLevel2"
        :key="index">
          <!-- 二级分类 标题 -->
          <view
          class="cate-lv2-title"
          >
          / {{ item.cat_name }} /
          </view>
          <!-- 三级分类列表数据 -->
          <view
          class="cate-lv3-list">
            <!-- 三级分类 Item 项 -->
            <view
            class="cate-lv3-item"
            v-for="(item_2, index_2) in item.children"
            :key="index_2"
            @click="gotoGoodsList(item_2)">
              <!-- Item 项 图标图片 -->
              <image :src="item_2.cat_icon"></image>
              <!-- Item 项 图标文本 -->
              <text>{{ item_2.cat_name }}</text>
            </view>
          </view>
        </view>
      </scroll-view>
    </view>
</template>

<script>
export default {
  // ...
  methods: {
    // ...
    gotoGoodsList(item) {
      uni.navigateTo({
        url: '/subpkg/goods_list/goods_list?cid=' + item.cat_id
      })
    }
  }
}
</script>
效果展示
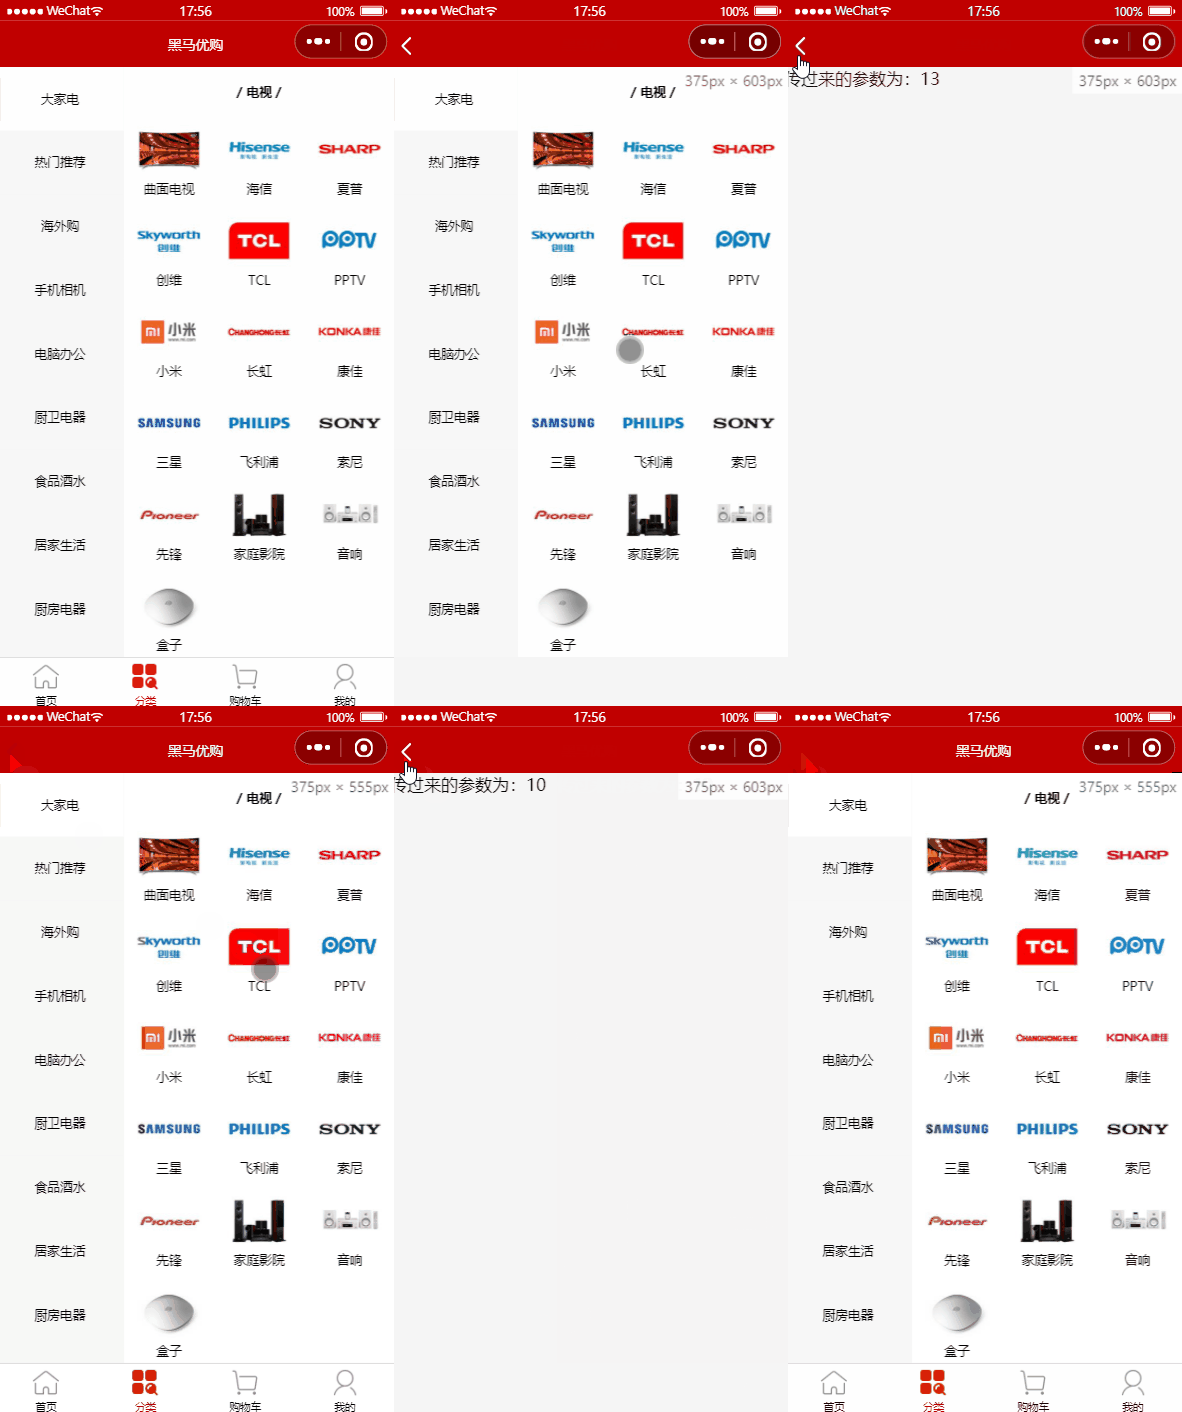
将 cate 分支进行本地提交
git add .
git commit -m "完成 分类页面 的开发"
将本地分支推送到远程仓库
git push -u origin cate将本地分支中的代码合并到 mian 分支
git checkout main
# 合并分支
git merge cate
# 提交到远程 main 分支
# git 可能需要 再提交一次 main 分支才可以合并
git push
删除本地分支
git branch -d cate完成 自定义搜索组件、搜索建议、搜索历史 等业务
Git 创建分支
在 mian 分支上创建 search 分支并跳转到该分支上
git checkout -b search自定义 搜索组件
在项目根目录中创建 components 目录上,选择新建组件。填写组件信息后,最后点击 创建 按钮
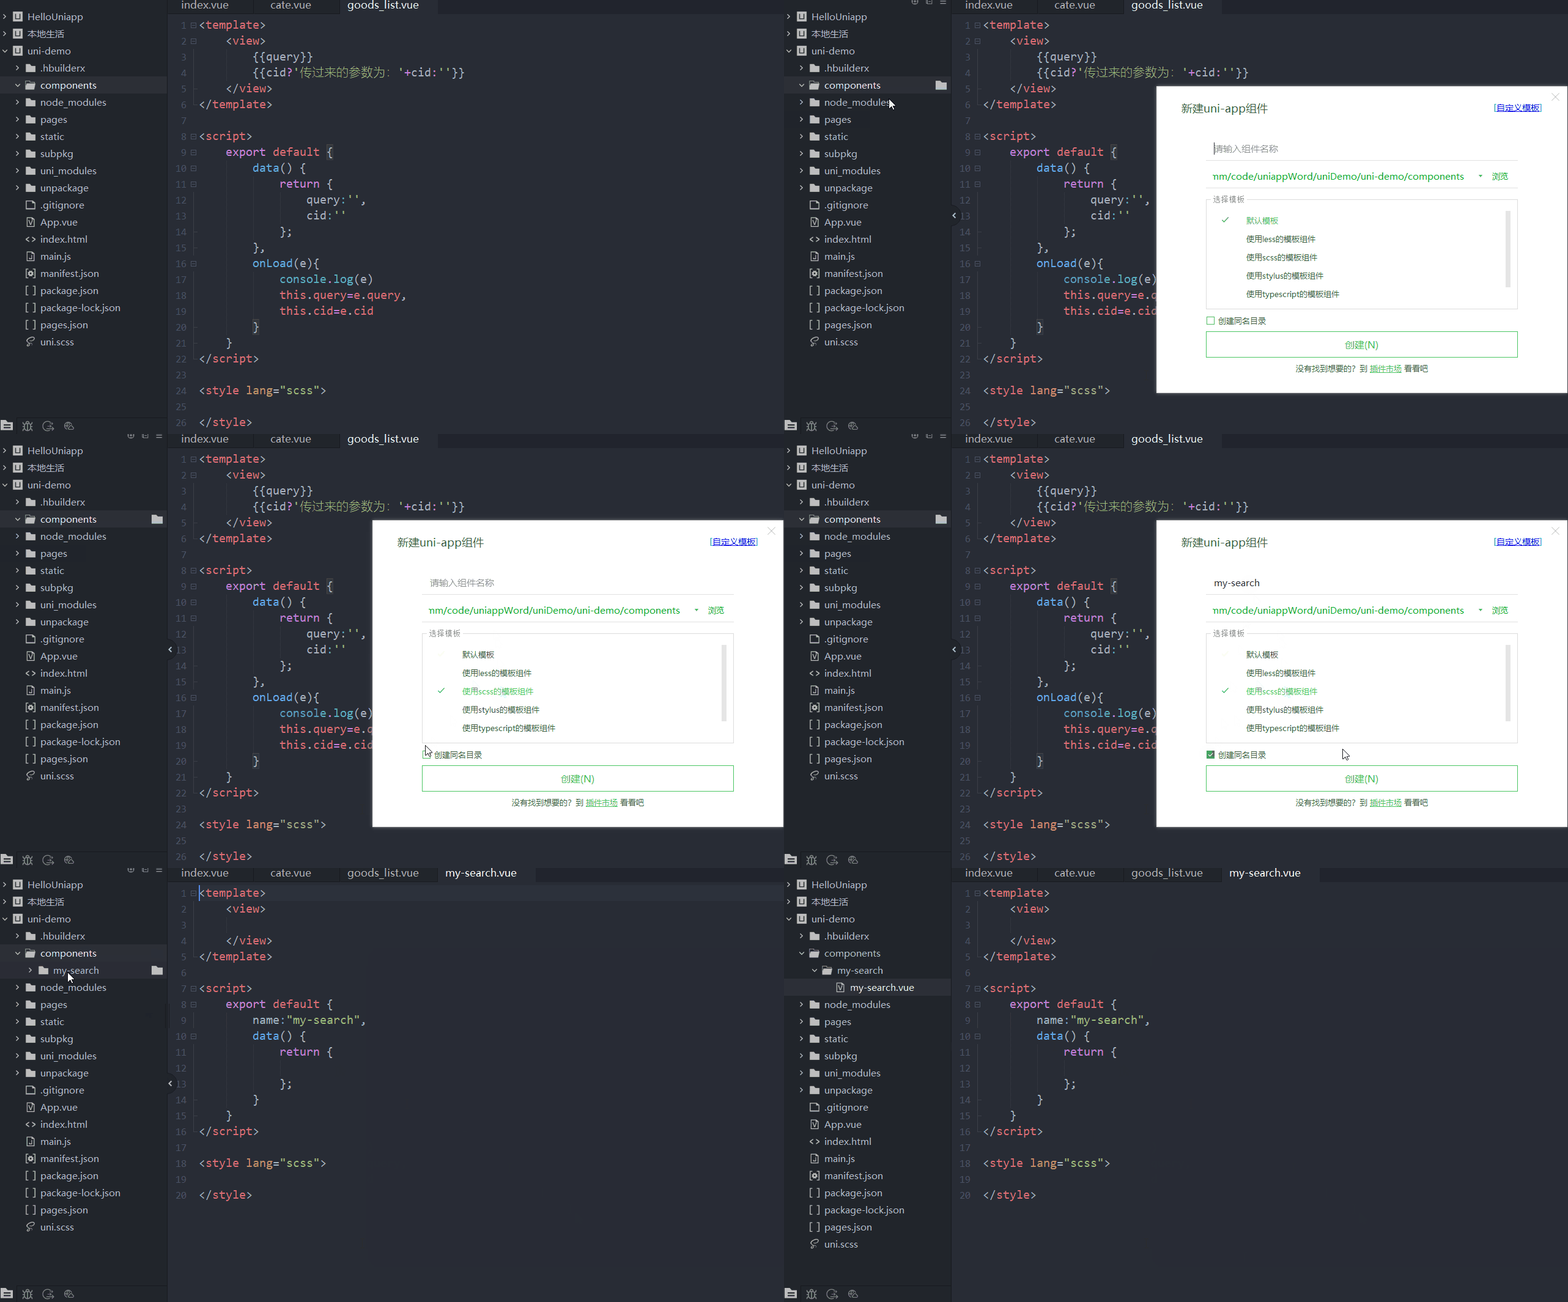
在分类页面中,直接以标签形式使用 <my-search> 自定义组件
<!-- 使用自定义搜索组件 -->
<my-search></my-search>创建一个 搜索框 样式的 view 界面,实际上不是真正意义的搜索框,只是样式模拟了 input 输入框的样式
<template>
  <view class="my-search-container">
    <!-- 使用 view 组件模拟 input 输入框样式 -->
    <view class="my-search-box">
      <uni-icons type="search" size="17"></uni-icons>
      <text class="placeholder">搜索</text>
    </view>
  </view>
</template>

<script>
export default {
  name: "my-search",
  data() {
    return {

    };
  }
}
</script>

<style lang="scss">
.my-search-container {
  background-color: #c00000;
  height: 50px;
  padding: 0 10px;
  display: flex;
  align-items: center;

  .my-search-box {
    height: 36px;
    background-color: #ffffff;
    border-radius: 15px;
    width: 100%;
    display: flex;
    align-items: center;
    justify-content: center;
  }

  .placeholder {
    font-size: 15px;
    margin-left: 5px;
  }
}
</style>
效果展示
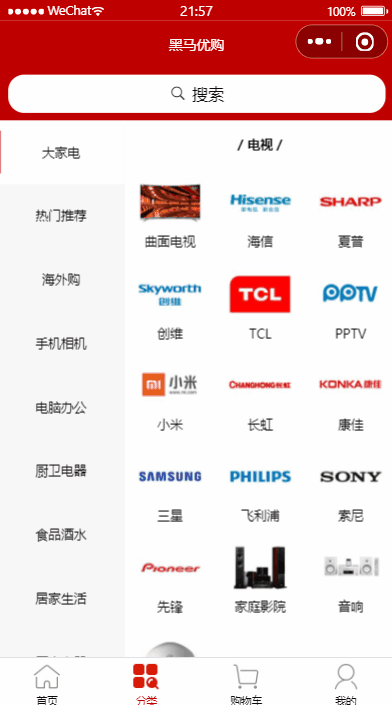
修复 高度问题导致的 BUG
因在分类栏目上方增加了 50px 区域的搜索栏目,导致实际使用 uni.getSystemInfoSync() 中获取的高度有误
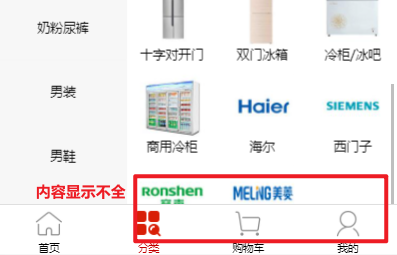
【BUG解析】 额外计算了50px高度后,导致与 tabBar 的区域重合,因此滚动区域下方就会显示不完整
<script>
export default {
  // ...
  data() {
    return {
      // ...
      wh: 0
    };
  },
  onLoad() {
    // 获取设备信息 并将内容区域高度赋值
    const info = uni.getSystemInfoSync();
    this.wh = info.windowHeight;
  }
}
</script>
获取到内容高度后,需扣除顶部搜索栏占用的高度,得到实际使用高度
<script>
export default {
  // ...
  data() {
    return {
      // ...
      wh: 0
    };
  },
  onLoad() {
    // 获取设备信息 并将内容区域高度赋值
    const info = uni.getSystemInfoSync();
    this.wh = info.windowHeight - 50;
  }
}
</script>
效果展示
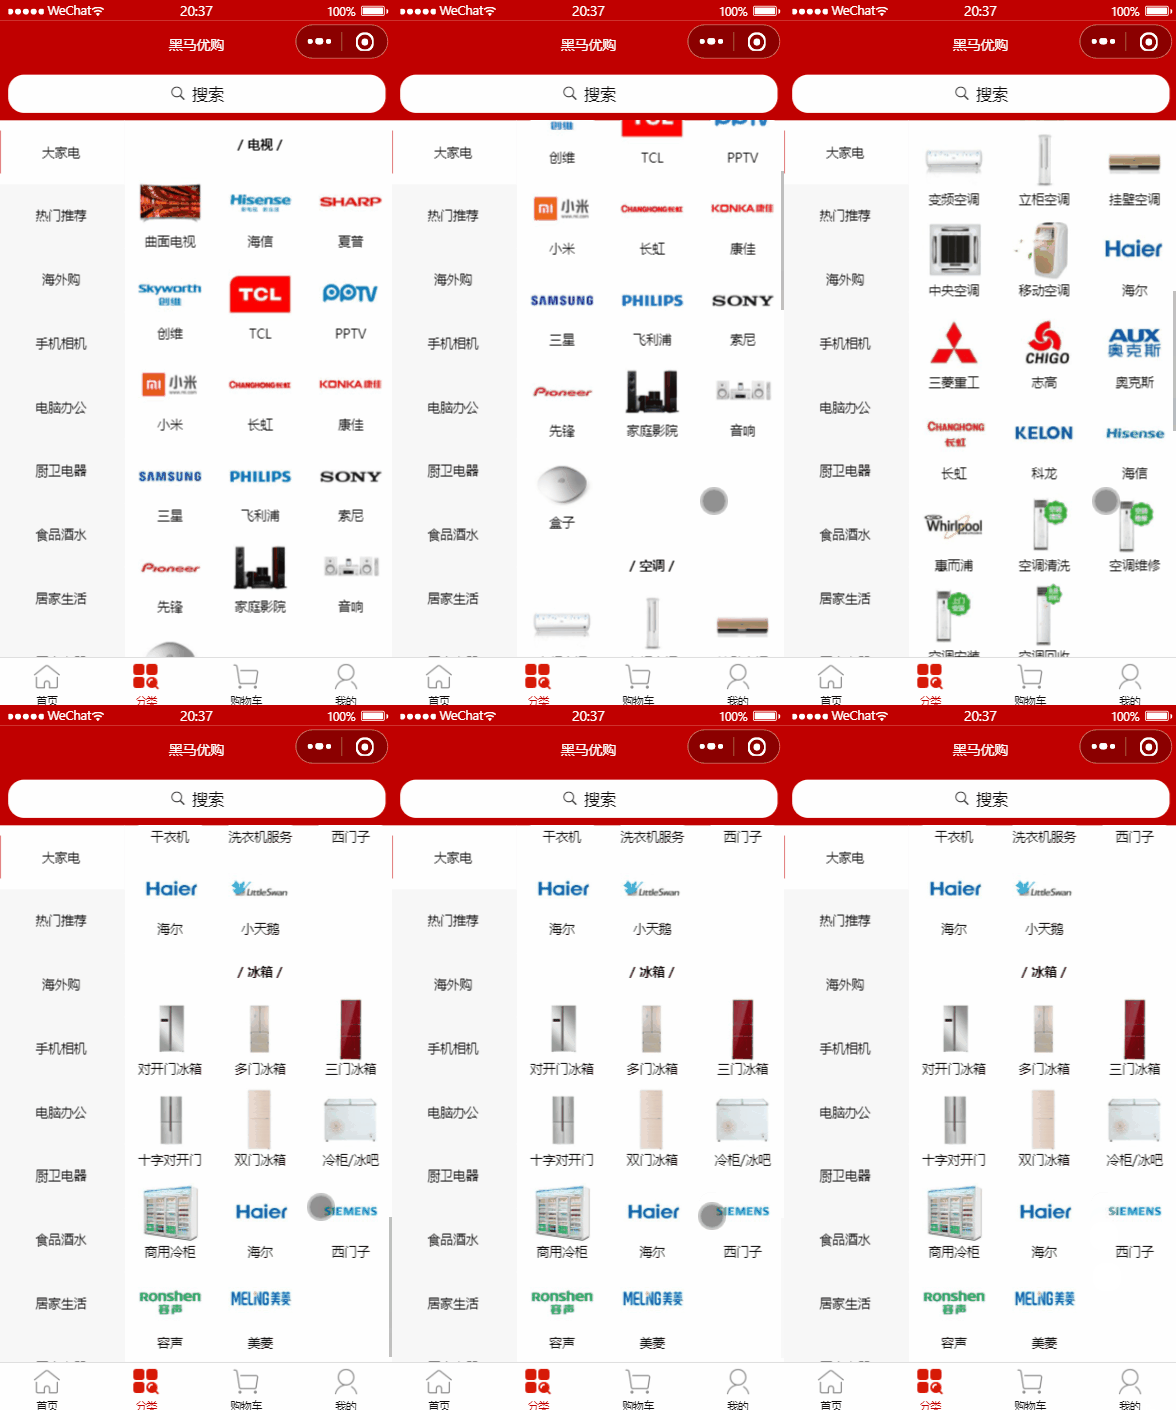
通过自定义属性 增强组件的通用性
为了实现该自定义搜索组件的通用性,应允许使用者修该其 背景颜色 和 圆角尺寸。使用 props 定义 自定义属性
<template>
  <view
  class="my-search-container"
  :style="{ 'background-color': bgcolor }"
  >
    <!-- 使用 view 组件模拟 input 输入框样式 -->
    <view
    class="my-search-box"
    :style="{ 'border-radius': radius + 'px' }"
    >
      <uni-icons type="search" :size="17"></uni-icons>
      <text class="placeholder">搜索</text>
    </view>
  </view>
</template>

<script>
export default {
  name: "my-search",
  props: {
    bgcolor: {
      type: String,
      default: '#C00000'
    },
    radius: {
      type: Number,
      default: 18
    }
  },
  data() {
    return {

    };
  }
}
</script>

<style lang="scss">
.my-search-container {
  // background-color: #c00000;
  height: 50px;
  padding: 0 10px;
  display: flex;
  align-items: center;

  .my-search-box {
    height: 36px;
    background-color: #ffffff;
    // border-radius: 15px;
    width: 100%;
    display: flex;
    align-items: center;
    justify-content: center;
  }

  .placeholder {
    font-size: 15px;
    margin-left: 5px;
  }
}
</style>
模拟父级给 自定义搜索组件 的传值,去按需改变其样式
<template>
<my-search :bgcolor="'#66ccff'" :radius="0"></my-search>
<!-- ... -->
</template>
效果展示
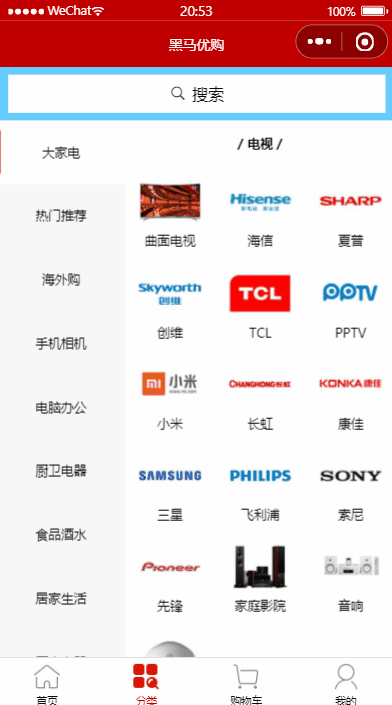
通过父向子组件传参实现自定样式
为 自定义搜索组件 绑定 click 事件
父级页面不能直接给 自定义组件 增加 @click=’‘ 绑定事件操作,
因为默认的 view 等组件实际上都是已经封装好了点击事件并传给父级 click 事件进行响应,但 自定义组件 并没有
子组件可创建单击事件并使用 this.$emit(‘click‘) 来触发外界通过 @cilck 所绑定的事件
<template>
  <view class="my-search-container"
  :style="{ 'background-color': bgcolor }"
  @click="searchBoxHandler"
  >
    <!-- 使用 view 组件模拟 input 输入框样式 -->
    <view
    class="my-search-box"
    :style="{ 'border-radius': radius + 'px' }"
    >
      <uni-icons
      type="search"
      :size="17"
      ></uni-icons>
      <text
      class="placeholder"
      >搜索</text>
    </view>
  </view>
</template>

<script>
export default {
  // ...
  name: "my-search",
  methods: {
    searchBoxHandler() {
      uni.showToast({
        title: '我是 my-search'
      });
      this.$emit('click');
    }
  }
}
</script>
父级通过子级 this.$emit() 去触发所绑定的对应事件来响应 事件处理函数
<template>
  <view>
    <my-search @click='gotoSearch'></my-search>
  <!-- ... -->
  </view>
</template>

<script>
export default {
  // ...
  methods: {
    // ...
    gotoSearch() {
      setTimeout(function () {
        uni.showToast({
          title: '我是父级界面'
        })
      }, 2000);
    }
  }
}
效果展示
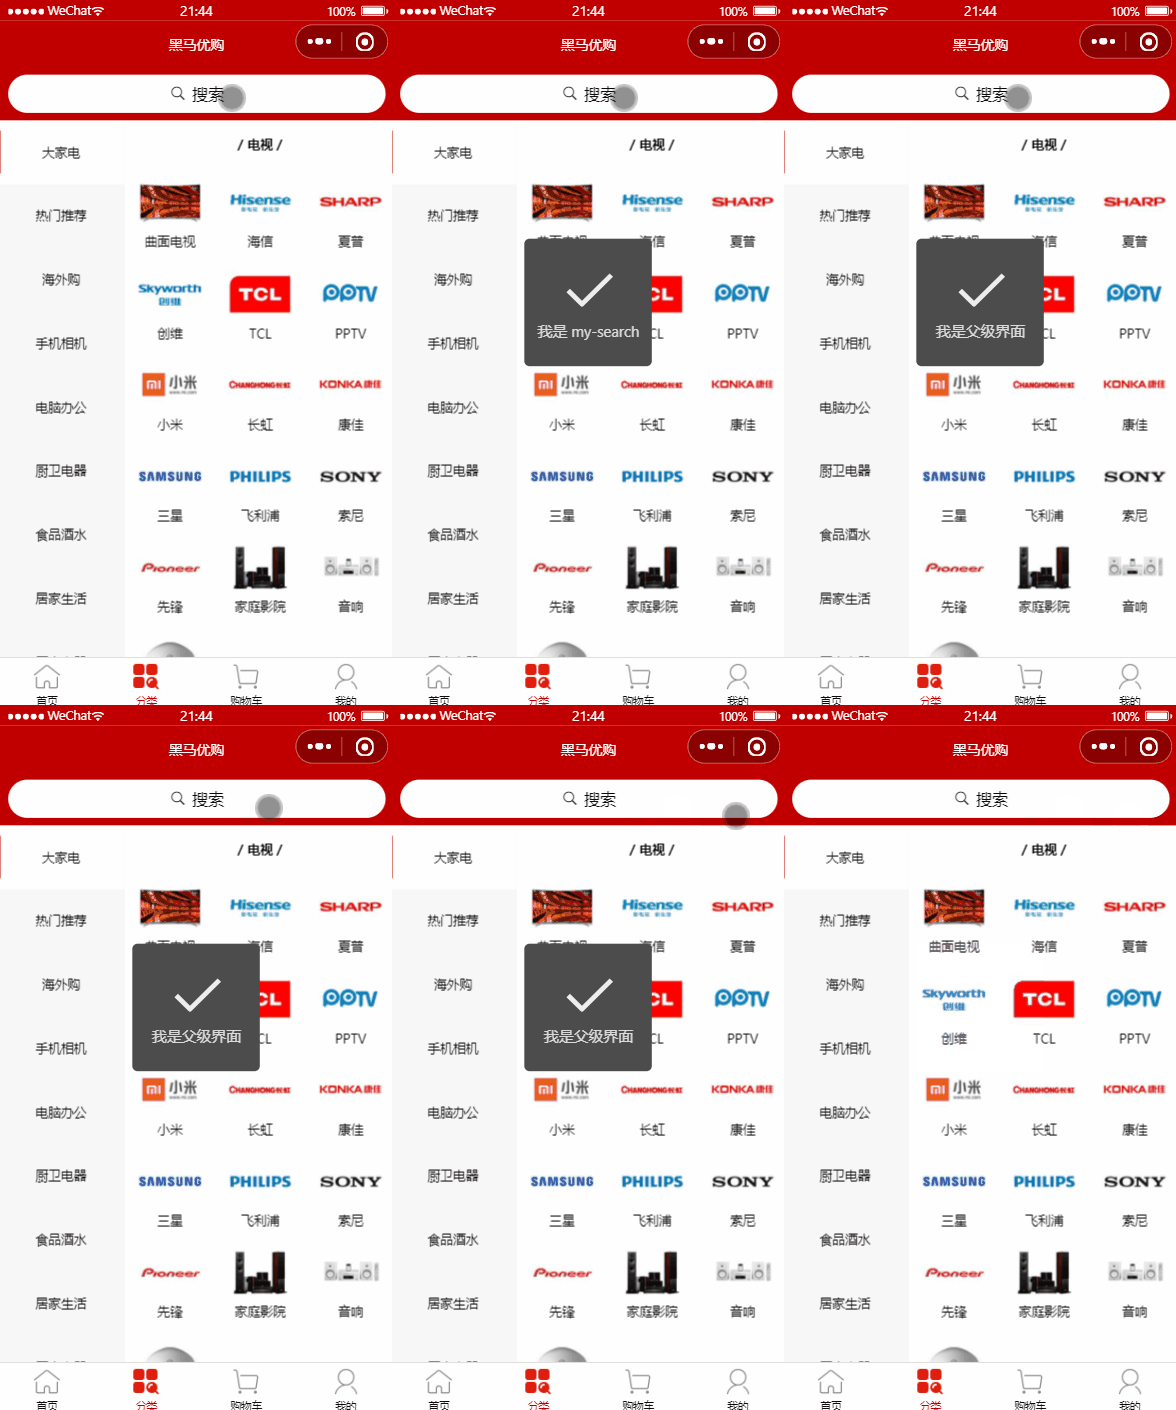
在 subpkg 分包中创建搜索页面
注意选择 在pages.json 中注册 和 选择小程序分包 操作
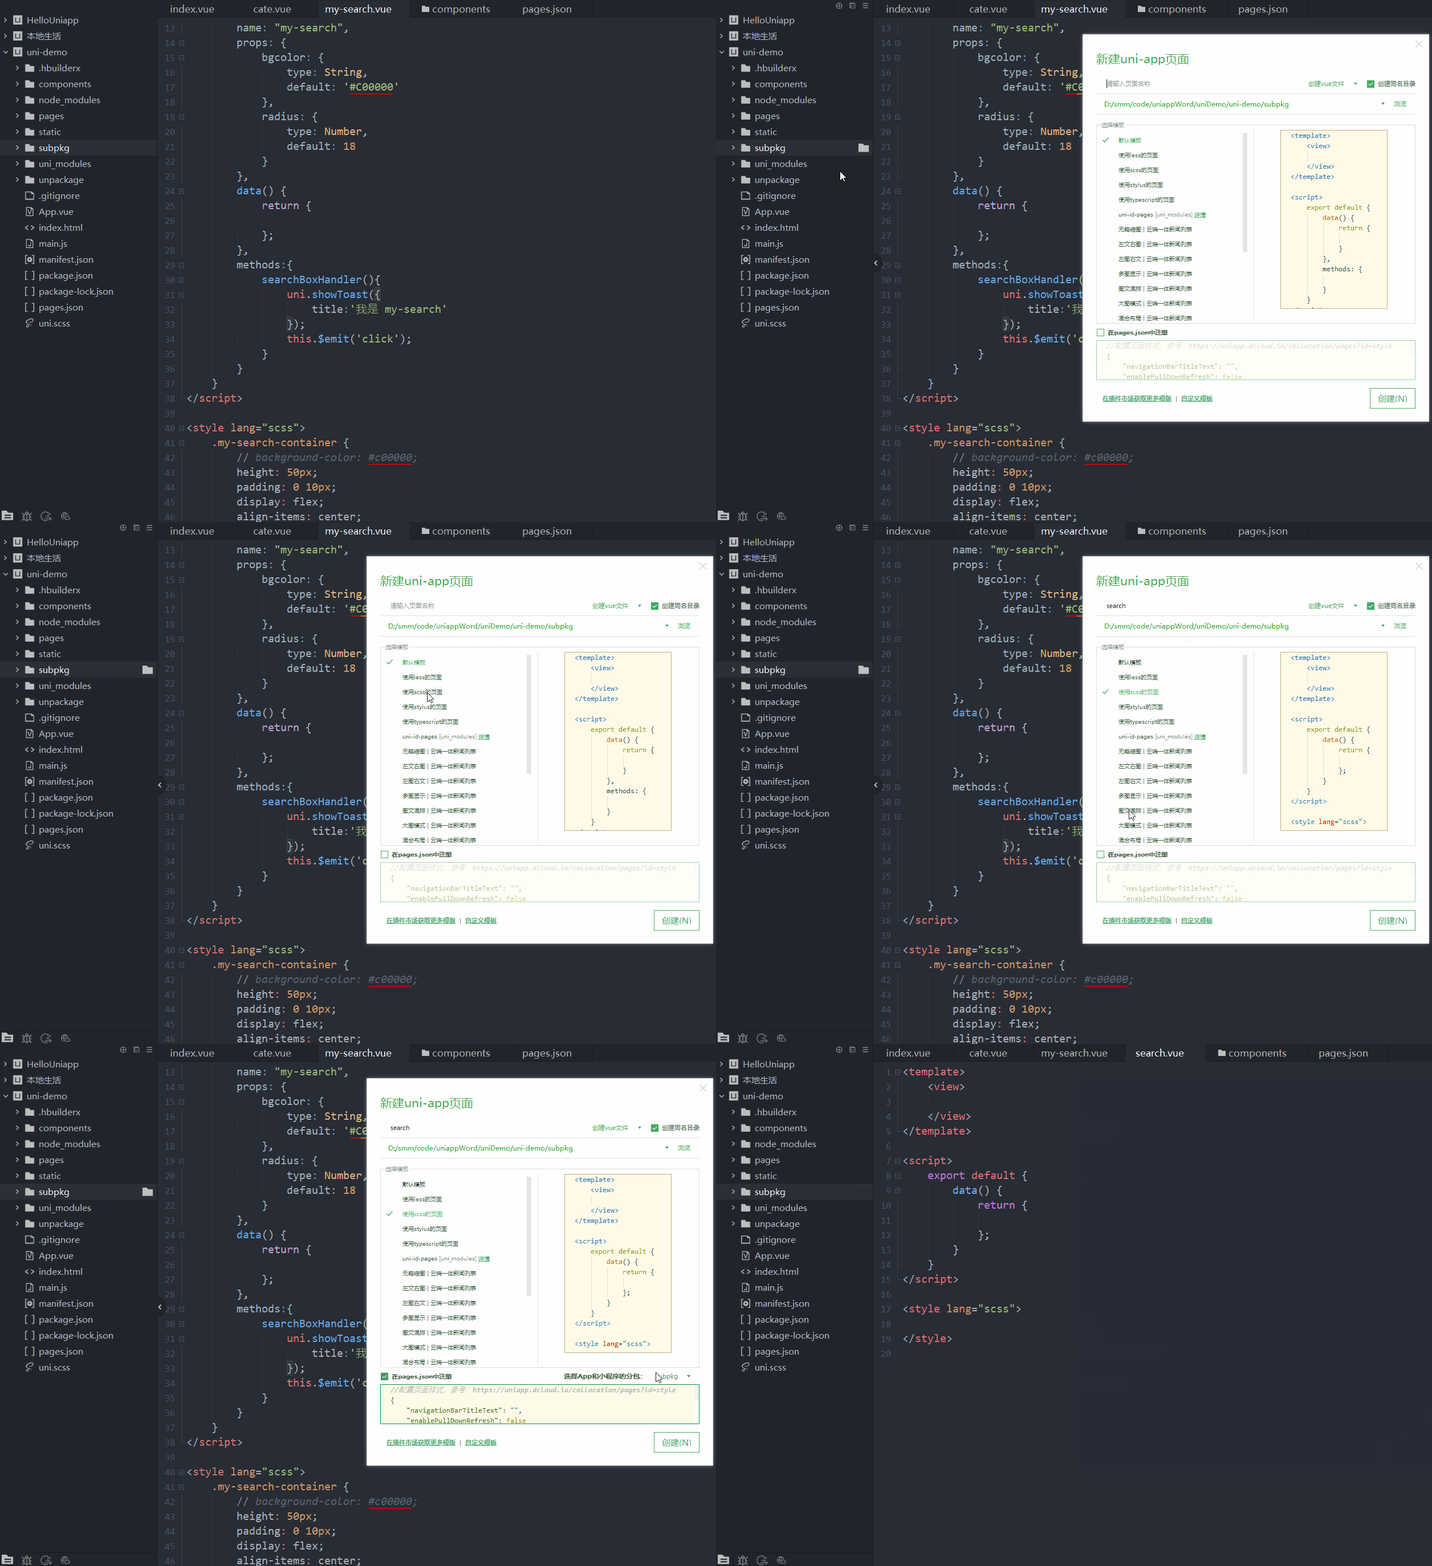
实现单击导航栏组件进行 跳转操作
使用由组件的 单击事件 触发的自定义事件 @click 所绑定的事件处理程序 执行 navigateTo 跳转路由操作
<template>
  <view>
    <my-search @click='gotoSearch'></my-search>
    <!-- ... -->
  </view>
</template>

<script>
export default {
  // ...
  methods: {
    // ...
    // 跳转操作
    gotoSearch() {
      uni.navigateTo({
        url: '/subpkg/search/search'
      })
    }
  }
}
</script>
搜索界面放置在了根目录下的 /subpkg/search/search.vue 中
<template>
  <view>
    Search 页面
  </view>
</template>

<script>
export default {
  data() {
    return {

    };
  }
}
</script>

<style lang="scss"></style>
效果展示
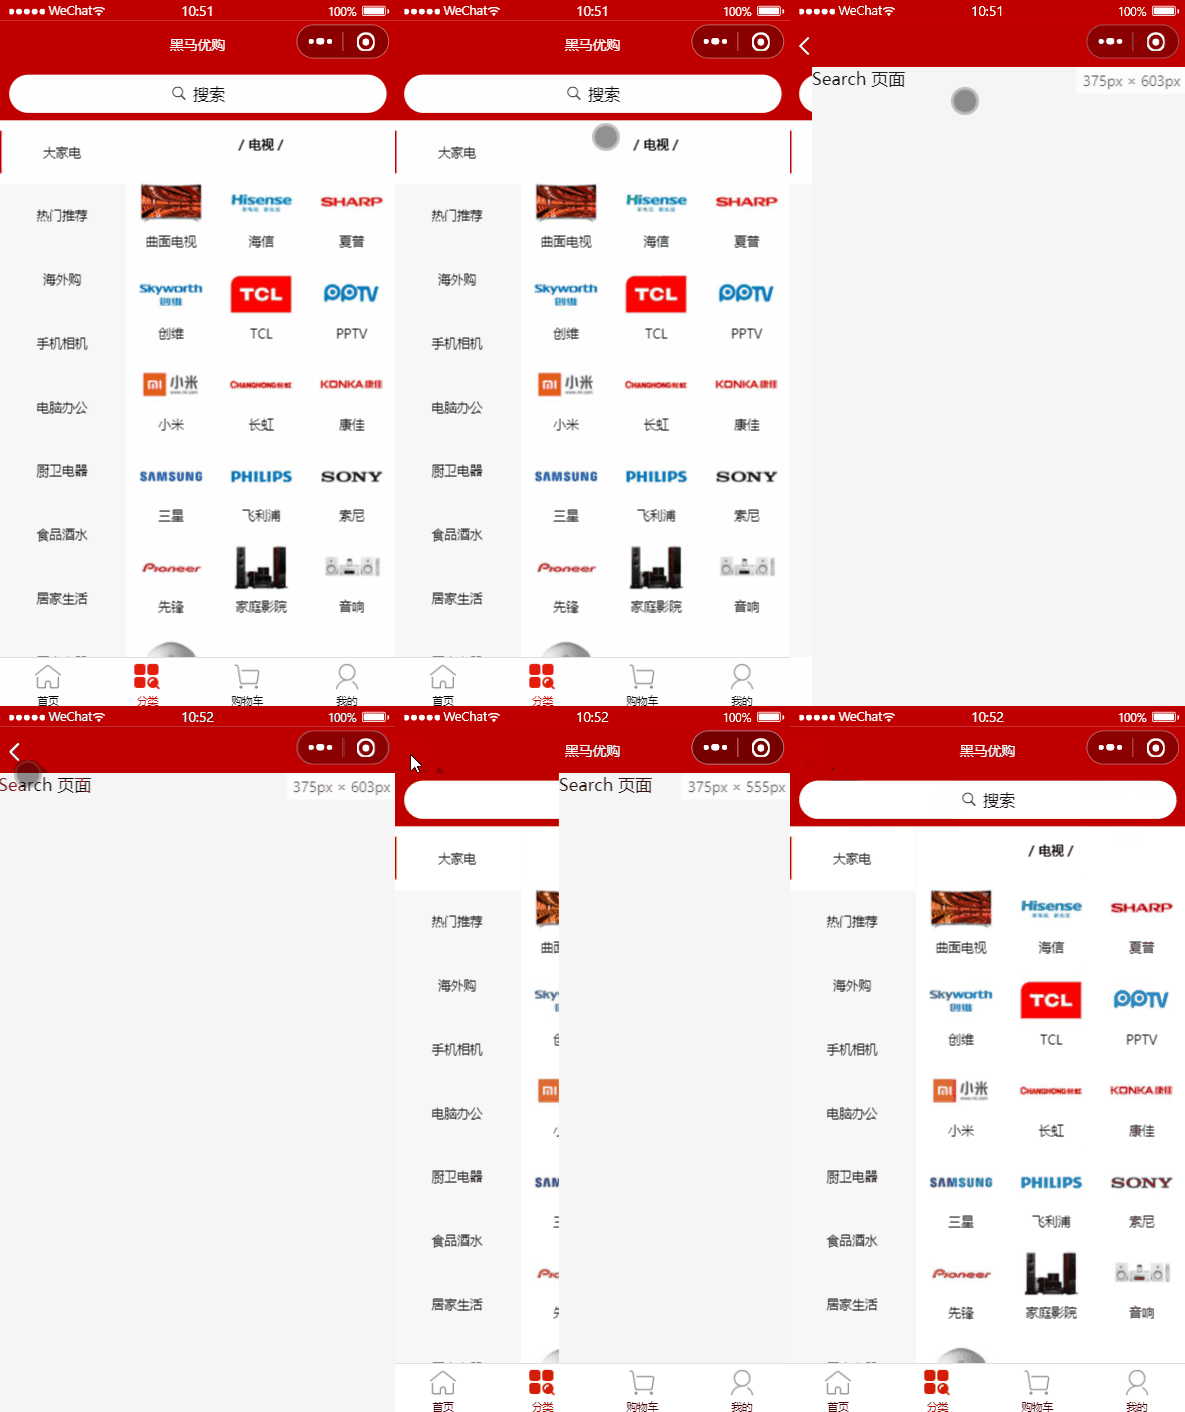
首页实现单击导航栏组件进行 跳转操作
在首页的 顶部也导入 my-search 组件,并传入 @cilck 事件,执行跳转到搜索界面的事件处理函数
<template>
<!-- 使用自定义的搜索组件 -->
<view class="search-box">
  <my-search @click="gotoSearch"></my-search>
</view>
</template>
在 home 首页定义如下的事件处理函数
gotoSearch() {
  uni.navigateTo({
    url: '/subpkg/search/search'
  })
}
通过如下的样式实现吸顶的效果
.search-box {
  /* 设置定位效果为“吸顶” */
  position: sticky;
  /* 吸顶的“位置” */
  top: 0;
  /* 提高层级,防止被轮播图覆盖 */
  z-index: 999;
}
效果展示
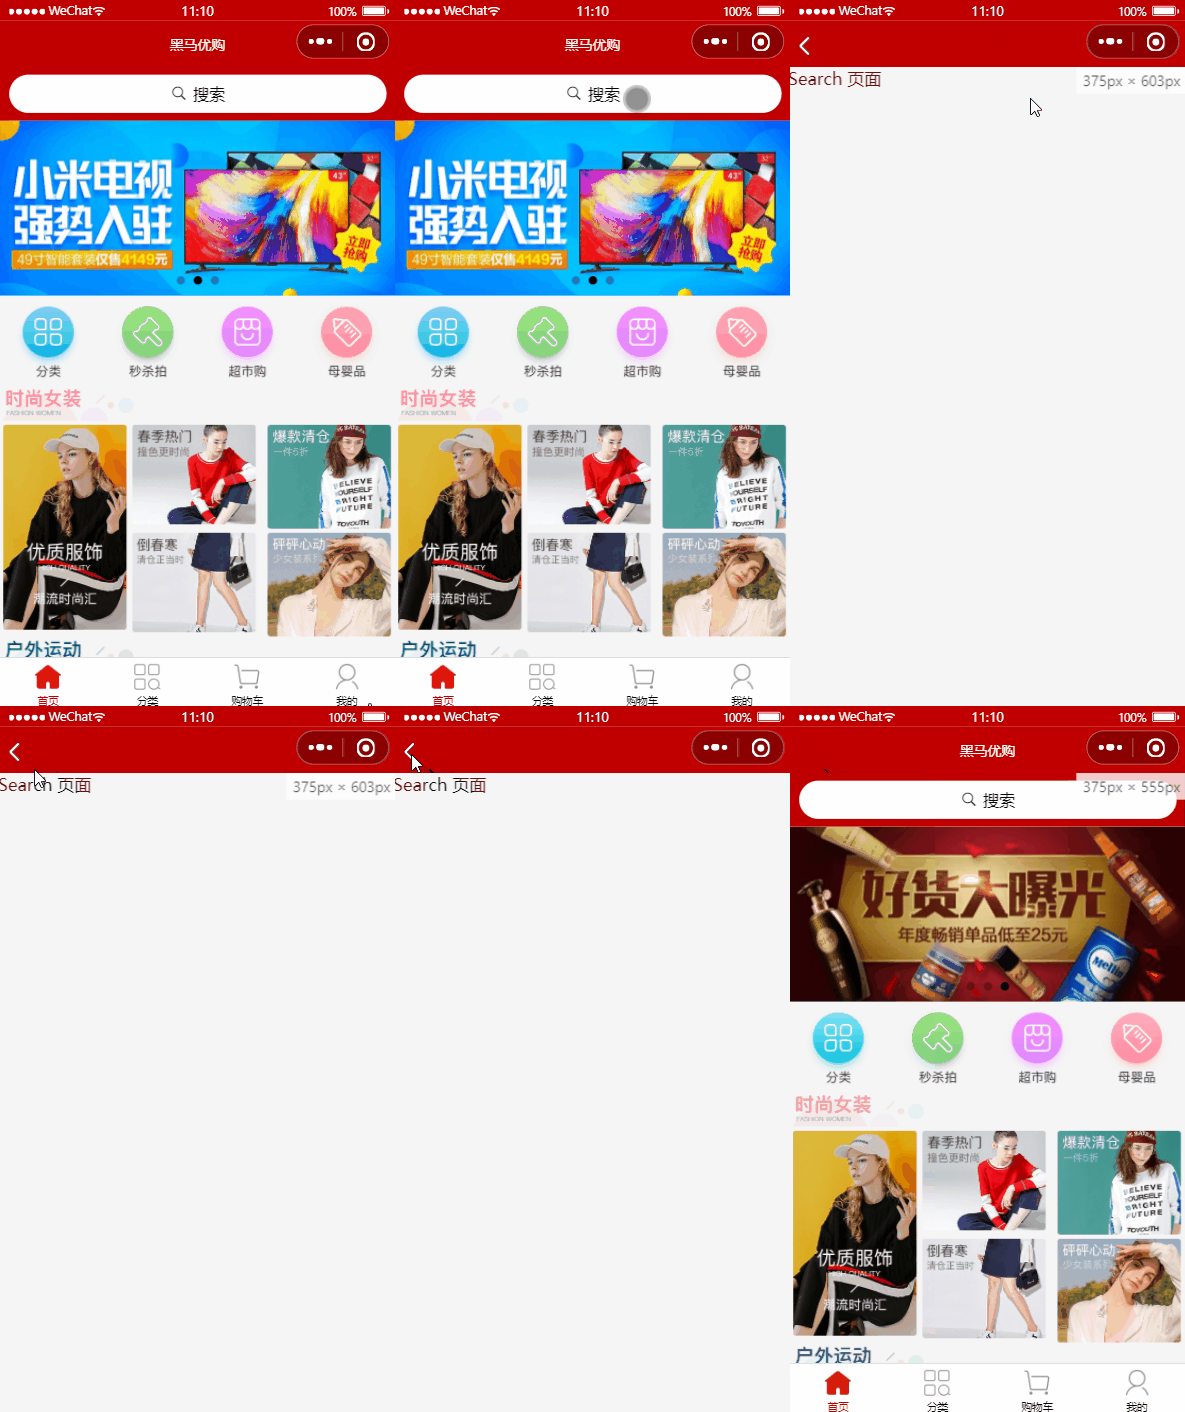
使用 uni-search-bar 提供的搜索组件 实现样式渲染。 官方相关文档
<template>
  <view class="search-box">
    <!-- 设置圆角宽度 监听输入事件 隐藏取消按钮 -->
    <uni-search-bar
    @input="input"
    :radius="100"
    :cancelButton="none"
    ></uni-search-bar>
  </view>
</template>

<script>
export default {
  data() {
    return {

    };
  },
  methods: {
    // 输入事件处理函数
    input(e) {
      // 不是 e.value 而是 e 即可获得输入内容
      console.log(e);
    }
  }
}
</script>

<style lang="scss">
.search-box {
  position: sticky;
  top: 0;
  z-index: 999;
}
/* 通过 uni 提供的类名 去覆盖样式 */
.uni-searchbar {
  display: flex;
  flex-direction: row;
  position: relative;
  padding: 15rpx;
  background-color: #c00000;
}
</style>
效果展示
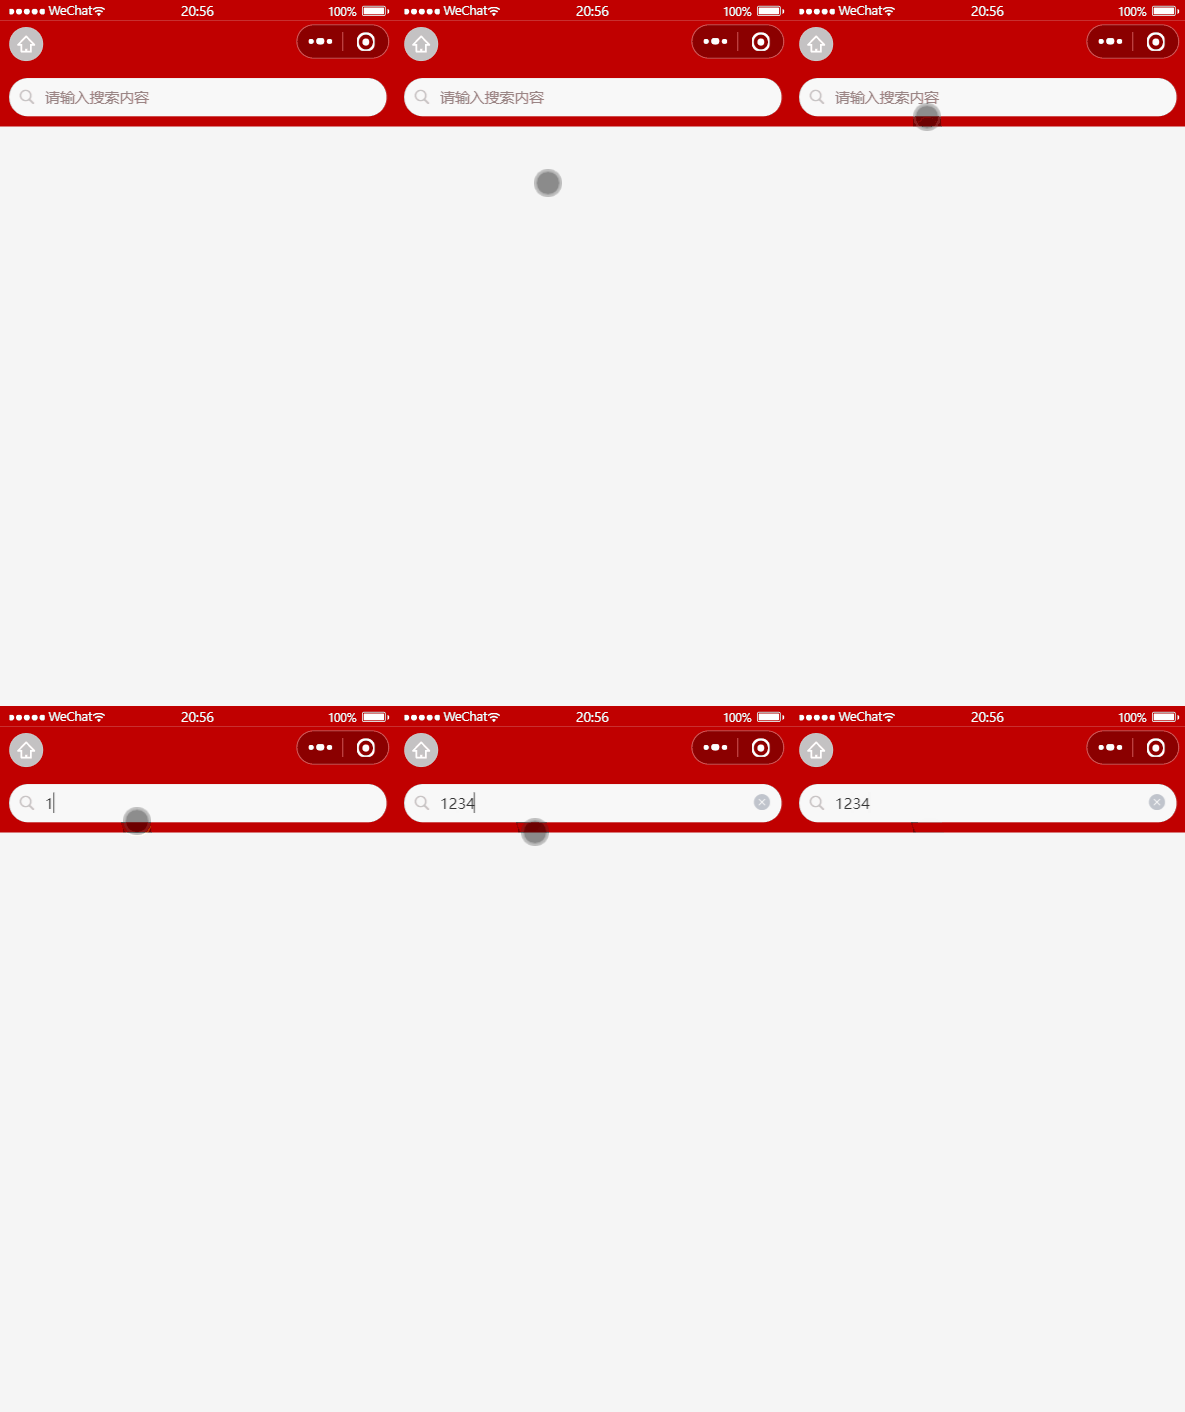
日志打印的效果

自动获取焦点
修改 uni 提供的 uni-search-bar 组件里面的对应代码,为方便后续的业务操作;
文件路径为:根目录/uni_modules/uni-search-bar/components/uni-search-bar/uni-search-bar.vue
原 data 数据
data() {
  return {
    show: false,
    showSync: false,
    searchVal: ""
  }
}
改为如下内容,即可自动获取焦点
data() {
  return {
    show: true,
    showSync: true,
    searchVal: ""
  }
}
效果展示
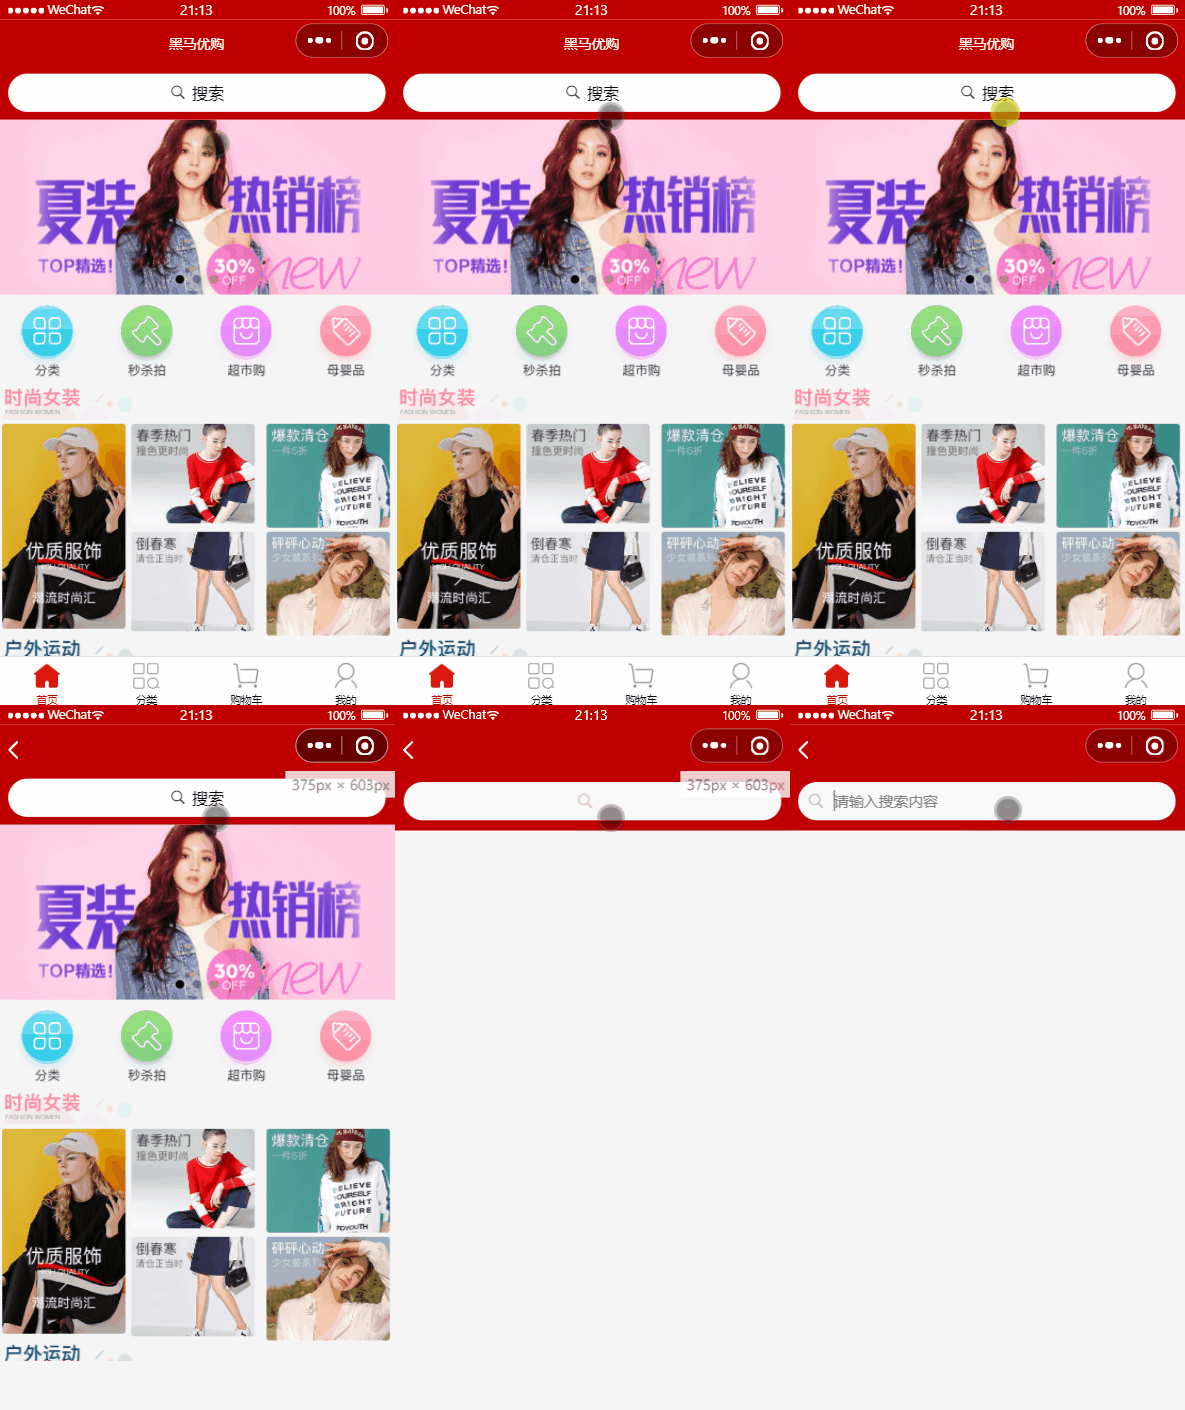
在真机下进入界面会自动获取焦点
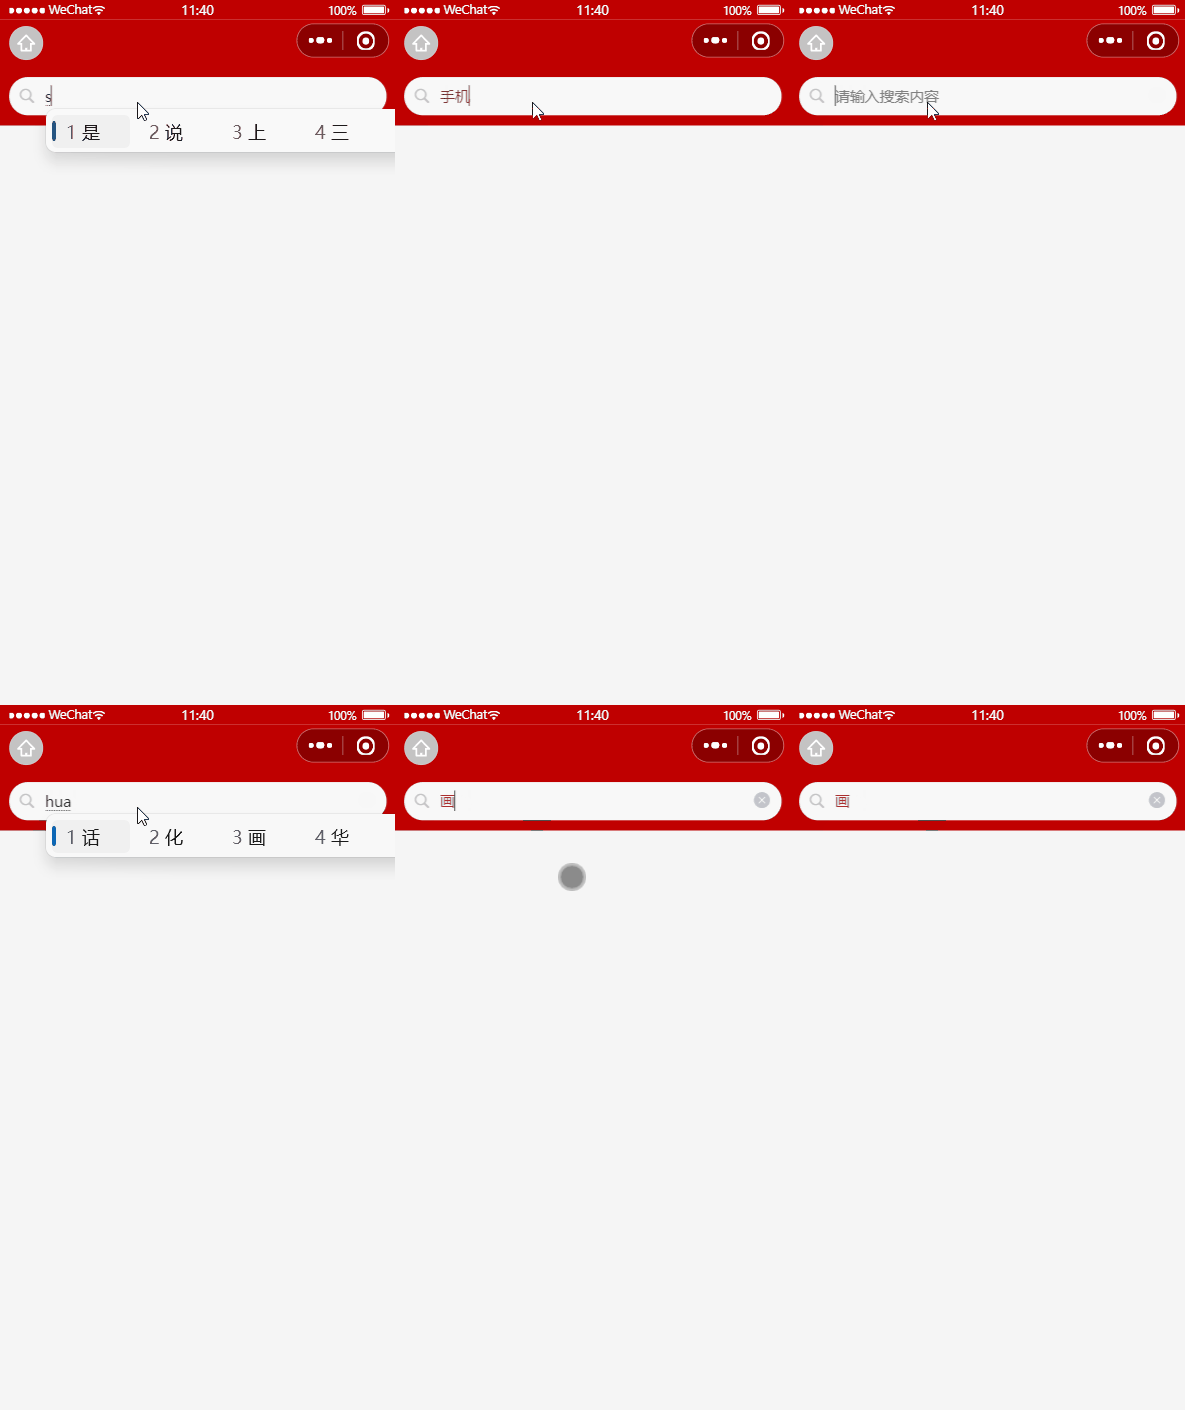
当用户输入内容时会不断触发 input 事件,造成事件处理函数的不断执行,为了减少后续操作执行的次数,应该做防抖操作
防抖策略(debounce) 是当时间被触发后,延迟 n 秒后再 执行回调,如果在这 n 秒内事件又被触发,则 重新计时
在 data 中定义防抖的延时器 timer 如下
export default {
  data() {
    return {
      // 初始化定时器
      timer: null,
      // 搜索关键词
      kw: ''
    };
  },
}
修改 input 事件的处理函数
export default {
  data() {
    return {
      // 初始化定时器
      timer: null,
      // 搜索关键词
      kw: ''
    };
  },
  methods: {
    // 输入事件处理函数
    input(e) {
      // 防抖操作 清除对应 延时器
      if (this.timer) clearTimeout(this.timer);
      /*
         防抖操作 启动延时器并赋值给 this.timer
         如果 500 毫秒内没有触发输入事件 则执行操作
      */
      this.timer = setTimeout(() => {
        this.kw = e;
        console.log(this.kw);
      }, 500);
    }
  }
}
效果展示
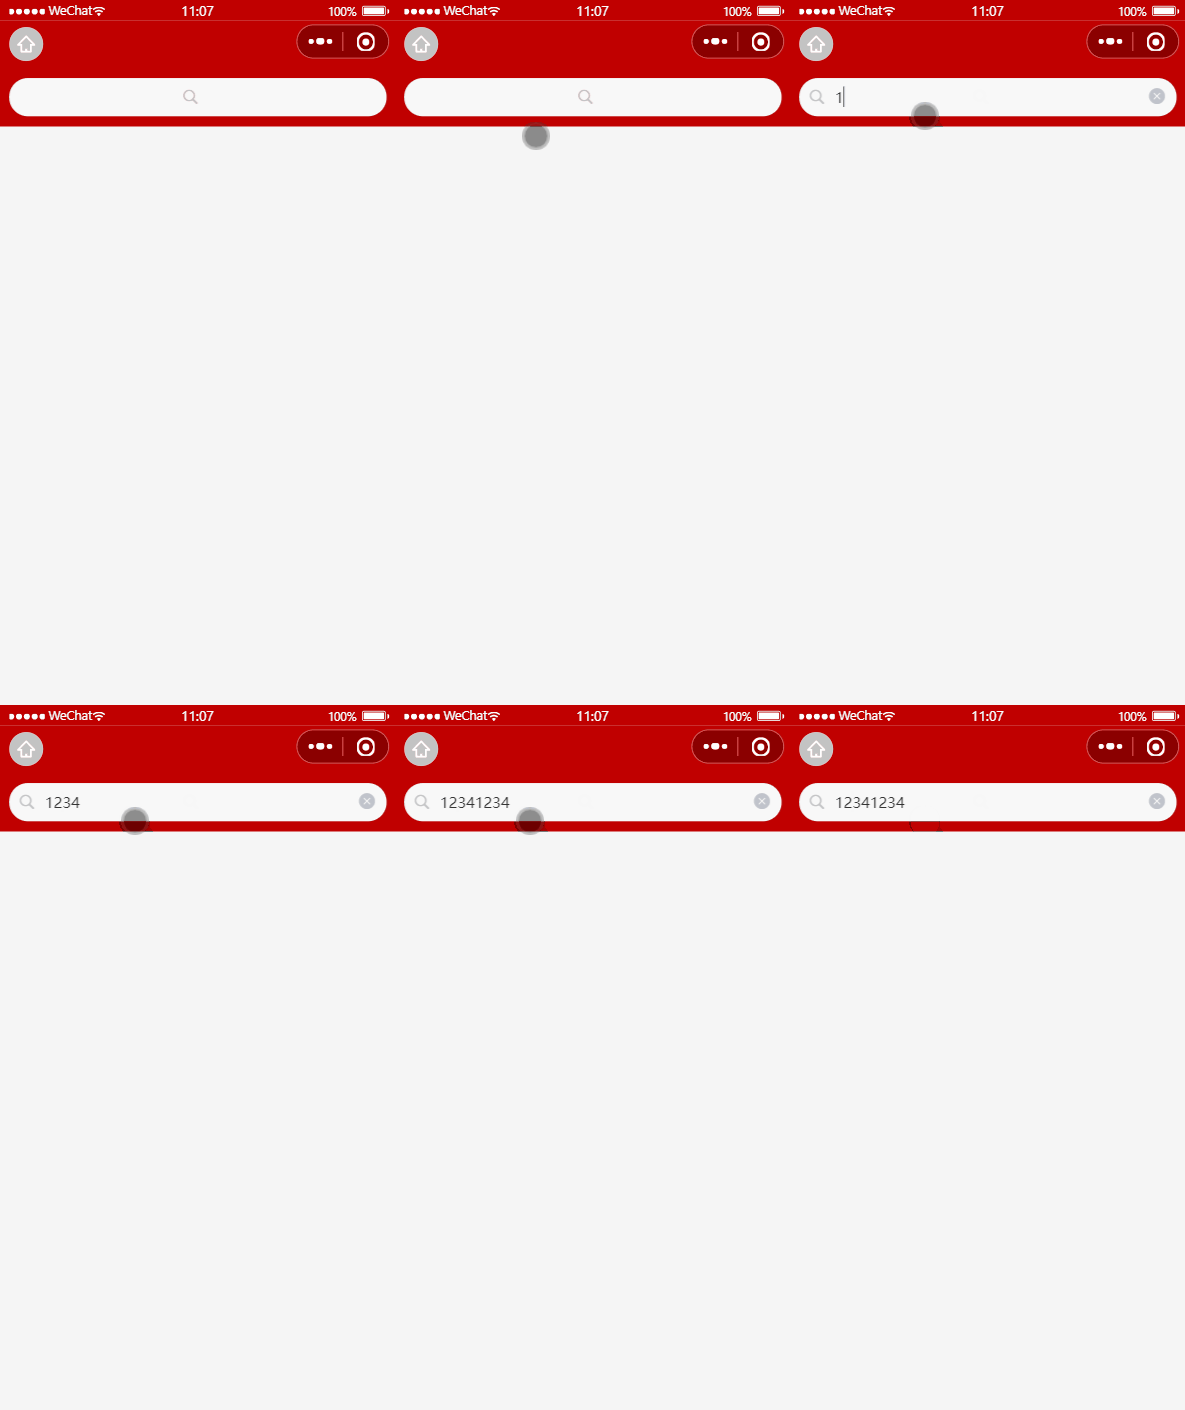
实现 防抖操作 (只打印两次)

在 data 中定义如下的数据节点,用来存放搜索建议一的列表数据
data() {
  return {
    // 搜索结果列表
    searchResults: []
  }
}
在防抖的 setTimeout 中,调用 getSearchList 方法获取搜索建议列表
this.timer = setTimeout(() => {
  this.kw = e.trim();
  // 根据关键词,查询搜索建议列表
  this.getSearchList()
}, 500)
在 methods 中定义 getSearchList 方法如下
// 根据搜索关键词,搜索商品建议列表
async getSearchList() {
  // 判断关键词是否为空
  if (this.kw === '') {
    this.searchResults = []
    return
  }
  // 发起请求,获取搜索建议列表
  const {
   data: res
   } = await uni.$http.get('/api/public/v1/goods/qsearch', { query: this.kw })
  if (res.meta.status !== 200) return uni.$showMsg()
  this.searchResults = res.message
}
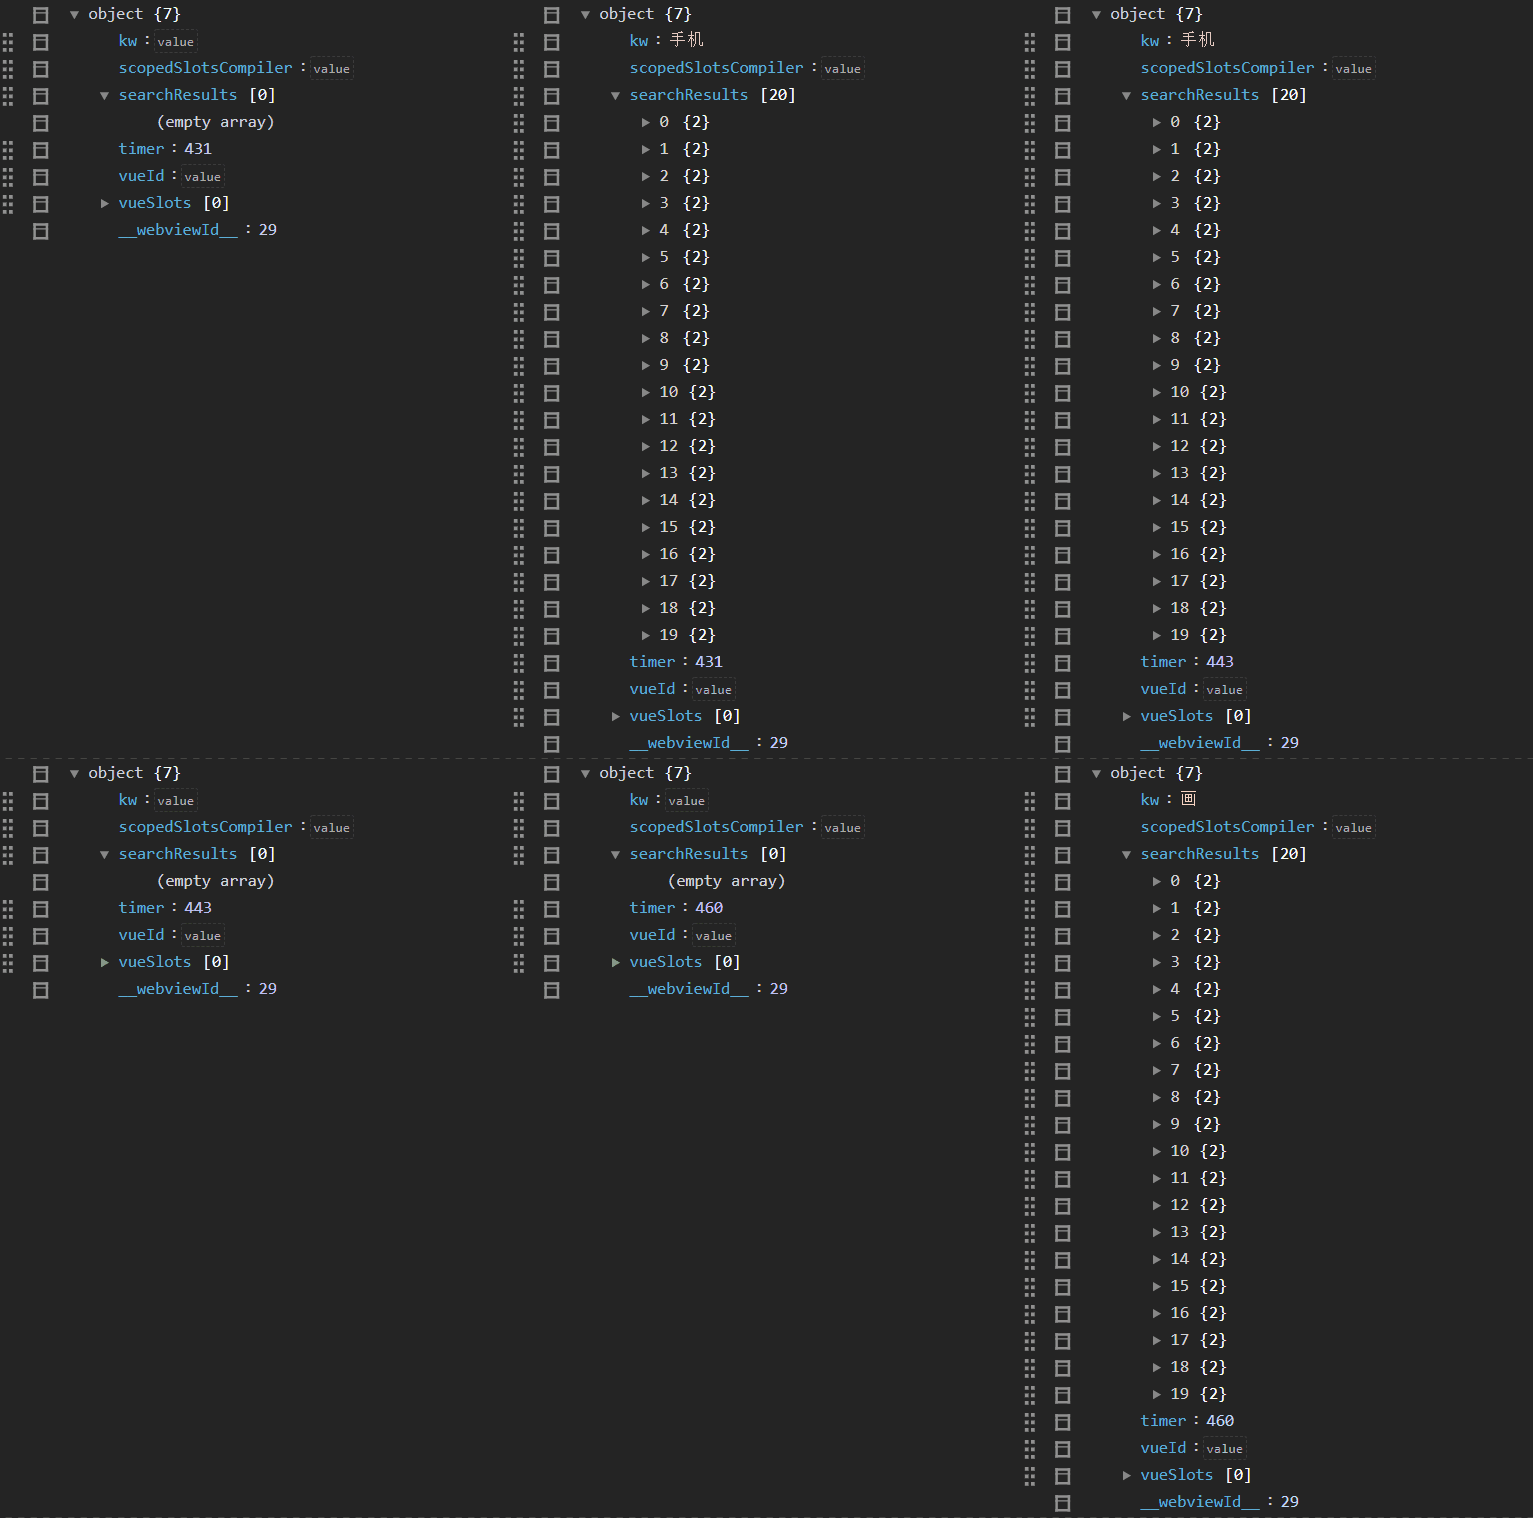
效果展示
后台自动请求到数据并存值
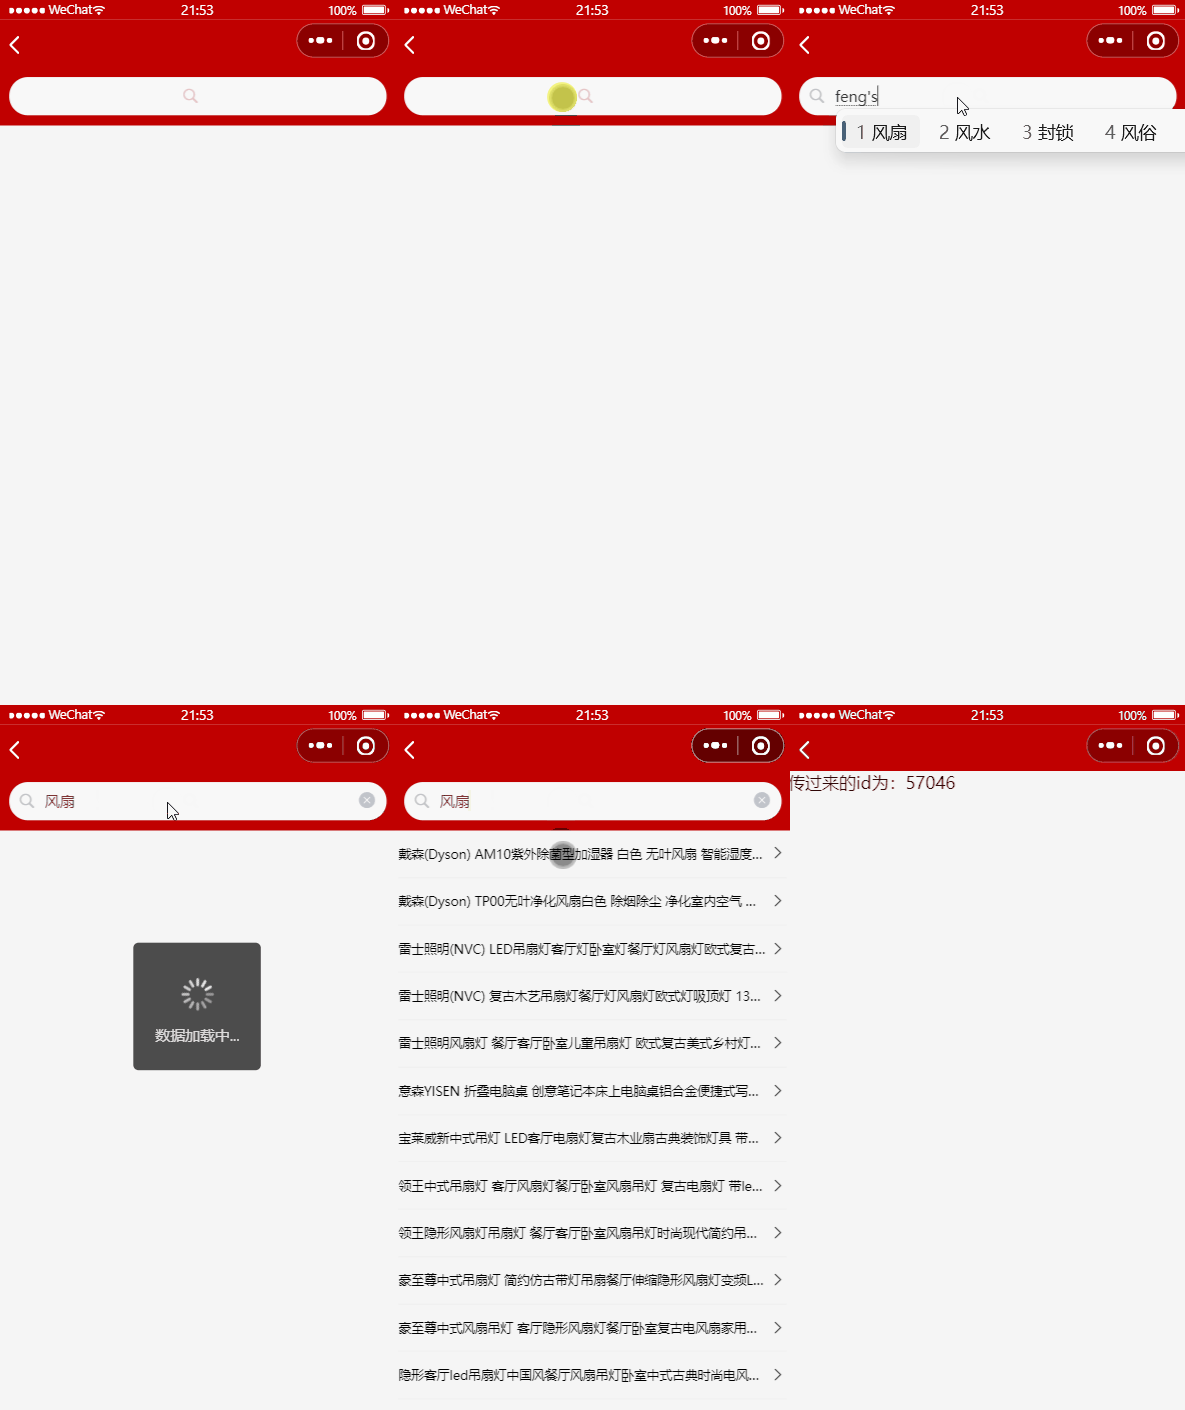
使用 v-for 遍历渲染UI结构,并为每个遍历的 item 项绑定单击事件,传入 id 以便 路由跳转传参
<template>
  <view class="content">
    <!-- 搜索建议列表 -->
    <view class="sugg-list">
      <view
      class="sugg-item"
      v-for="(item, index) in searchResults"
      :key="index"
      @click="gotoDetail(item.goods_id)">
        <view class="goods-name">
        {{ item.goods_name }}
        </view>
        <!-- uni 提供的 Icon 图标 -->
        <uni-icons
        type="arrowright"
        size="16"></uni-icons>
      </view>
    </view>
  </view>
</template>
使用 scss 美化搜索建议列表
<style lang="scss">
.search-box {
  position: sticky;
  top: 0;
  z-index: 999;
}

.uni-searchbar {
  display: flex;
  flex-direction: row;
  position: relative;
  padding: 15rpx;
  background-color: #c00000;
}

.sugg-list {
  padding: 0 5px;

  .sugg-item {
    font-size: 12px;
    padding: 13px 0;
    border-bottom: 1px solid #efefef;
    display: flex;
    align-items: center;
    justify-content: space-between;
  }

  .goods-name {
    white-space: nowrap;
    // 溢出部分隐藏
    overflow: hidden;
    // 文本溢出后,使用 ... 代替
    text-overflow: ellipsis;
    margin-right: 3px;
  }
}
</style>
效果展示
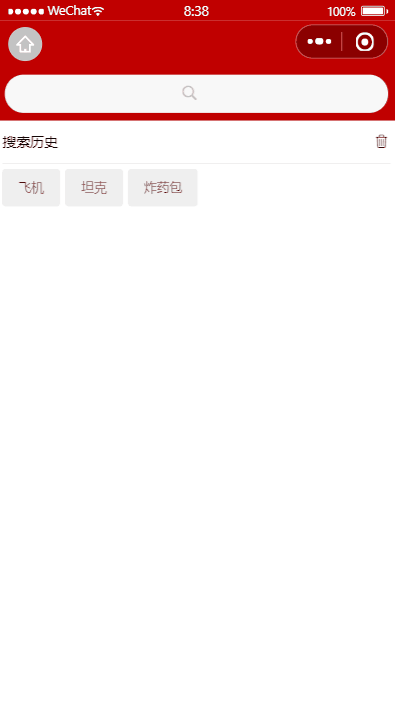
使用 uni-tag 标签组件来实现搜索历史栏目列表的样式渲染:官方文档
渲染UI结构
在 data 中定义搜索历史的假数据
data() {
  return {
    // 搜索关键词的历史记录
    historyList: ['a', 'app', 'apple']
  }
}
渲染历史区域的 UI 结构
<template>
<!-- 搜索历史 -->
<view class="history-box">
  <!-- 标题区域 -->
  <view class="history-title">
    <text>搜索历史</text>
    <uni-icons type="trash" size="17"></uni-icons>
  </view>
  <!-- 列表区域 -->
  <view class="history-list">
    <uni-tag
    :text="item" v-for="(item, index) in historyList"
    :key="index"
    ></uni-tag>
  </view>
</view>
</template>
使用 scss 美化搜索历史样式
.history-box {
  padding: 0 5px;

  .history-title {
    display: flex;
    justify-content: space-between;
    align-items: center;
    height: 40px;
    font-size: 13px;
    border-bottom: 1px solid #efefef;
  }

  .history-list {
    display: flex;
    flex-wrap: wrap;

    .uni-tag {
      margin-top: 5px;
      margin-right: 5px;
    }
  }
}
效果展示
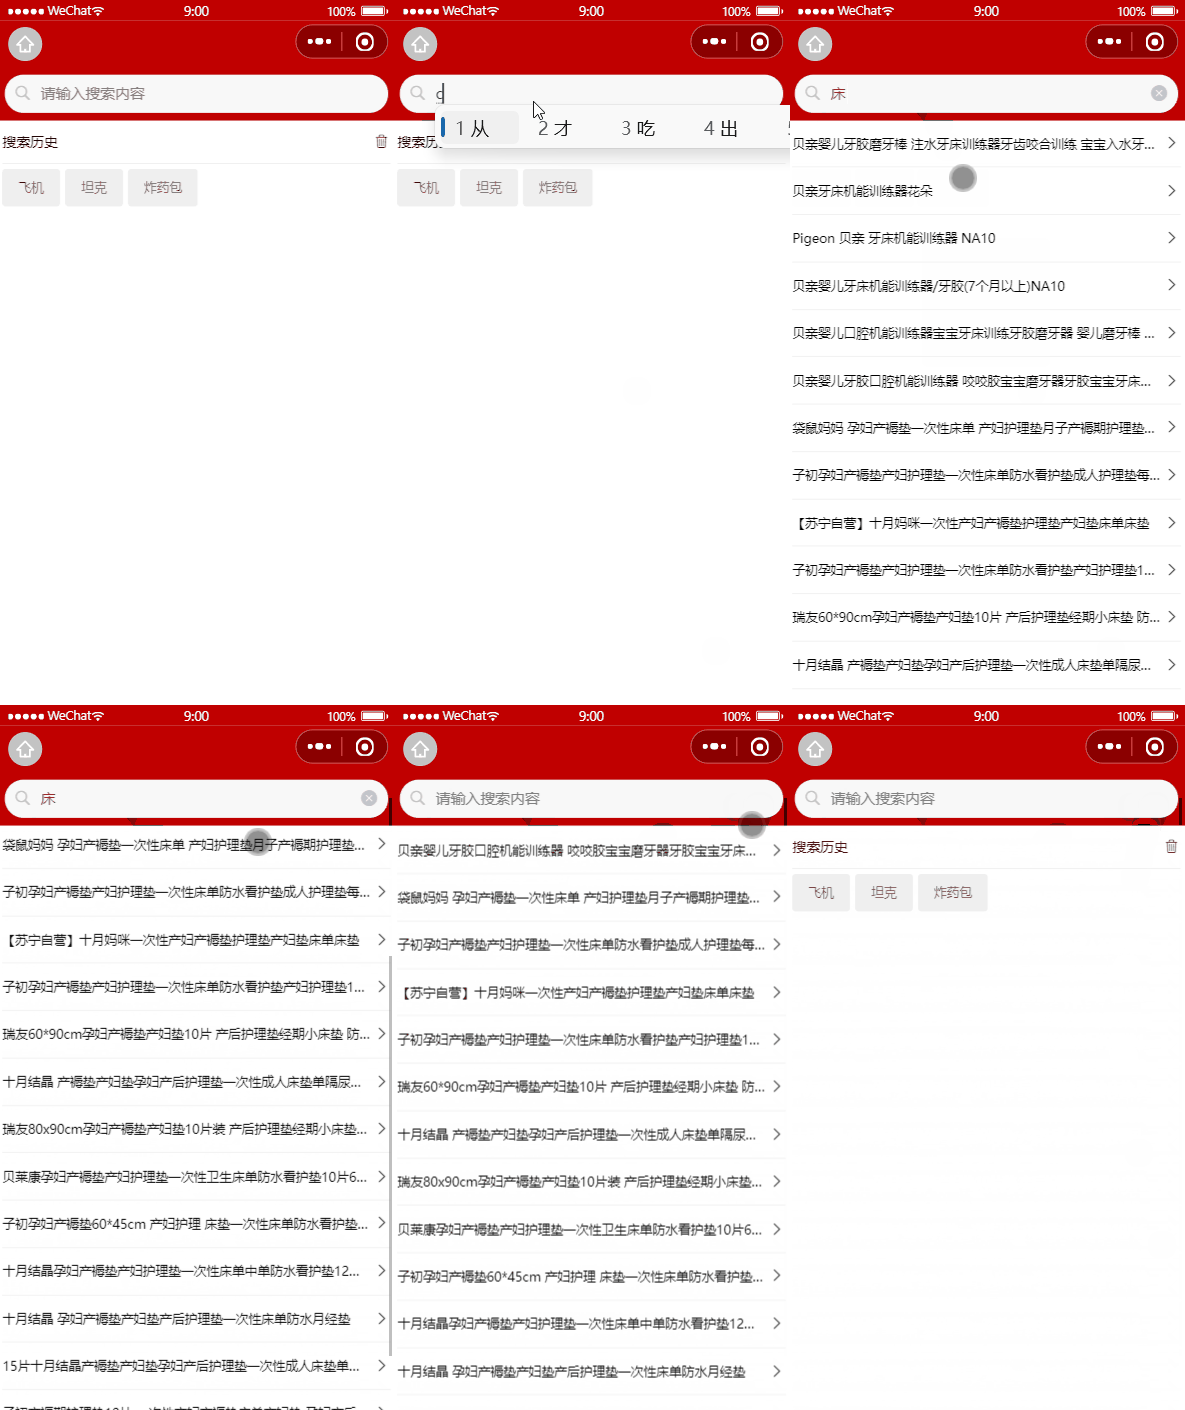
搜索建议与搜索历史进行按需显示
使用 v-if 进行判断,若 搜索建议列表 searchResults 没有值则隐藏搜索列表 sugg-list 并显示 搜索历史区域
- 当搜索结果列表的长度不为 0的时候,(searchResults.length !== 0)
展示搜索建议,隐藏搜索历史 - 当搜索结果列表的长度等于 0的时候,(searchResults.length == 0)
隐藏搜索建议,展示搜索历史
<template>

<!-- 搜索建议区域 -->
<view
class="sugg-list"
v-if="searchResults.length !== 0"
>
  <!-- 省略其它代码... -->
</view>

<!-- 搜索历史区域 -->
<view
class="history-box"
v-else
>
  <!-- 省略其它代码... -->
</view>

</template>
效果展示
将搜索关键词存入 historyList
用户在输入框搜索内容得到服务器返回的数据时,并直接将搜索关键词 push 到 historyList 数组中即可
methods: {
  // 根据搜索关键词,搜索商品建议列表
  async getSearchList() {
    // 省略其它不必要的代码...

    // 1. 查询到搜索建议之后,调用 saveSearchHistory() 方法保存搜索关键词
    this.saveSearchHistory()
  },
  // 2. 保存搜索关键词的方法
  saveSearchHistory() {
    // 2.1 直接把搜索关键词 push 到 historyList 数组中
    this.historyList.push(this.kw)
  }
}
使用 计算属性 来向用户展示翻转后的 historyList 数组
computed: {
  historys() {
    /*
    注意:由于数组是引用类型,
    所以不要直接基于原数组调用 reverse 方法,
    以免修改原数组中元素的顺序

    而是应该新建一个内存无关的数组,
    再进行 reverse 反转
    */
    return [...this.historyList].reverse()
  }
}<template>
<!-- 搜索历史 列表 -->
<view class="history-list">
<uni-tag
:text="item" v-for="(item,index) in historys"
:key="index"
></uni-tag>
</view>
</template>使用 includes() 来实现去重的操作,[与教程不同] 查看黑马教程 Set 的操作
实现当用户输入数组中重复的搜索内容时,不做额外记录的效果
saveSearchHistory() {
  // includes() 判断搜索关键字是否已经存在于搜索历史列表
  if (!this.historyList.includes(this.kw)) {
        // 如果不存在 则将其添加到 数组中
        this.historyList.push(this.kw)
  } else {
        // 如果存在相同内容 获取其下标
        const index = this.historyList.indexOf(this.kw);
        // 删除该下标的成员
        this.historyList.splice(index, 1);
        // 历史记录列表中 插入 当前搜索的关键词 [置尾操作]
        this.historyList.push(this.kw);
      }
}
效果展示
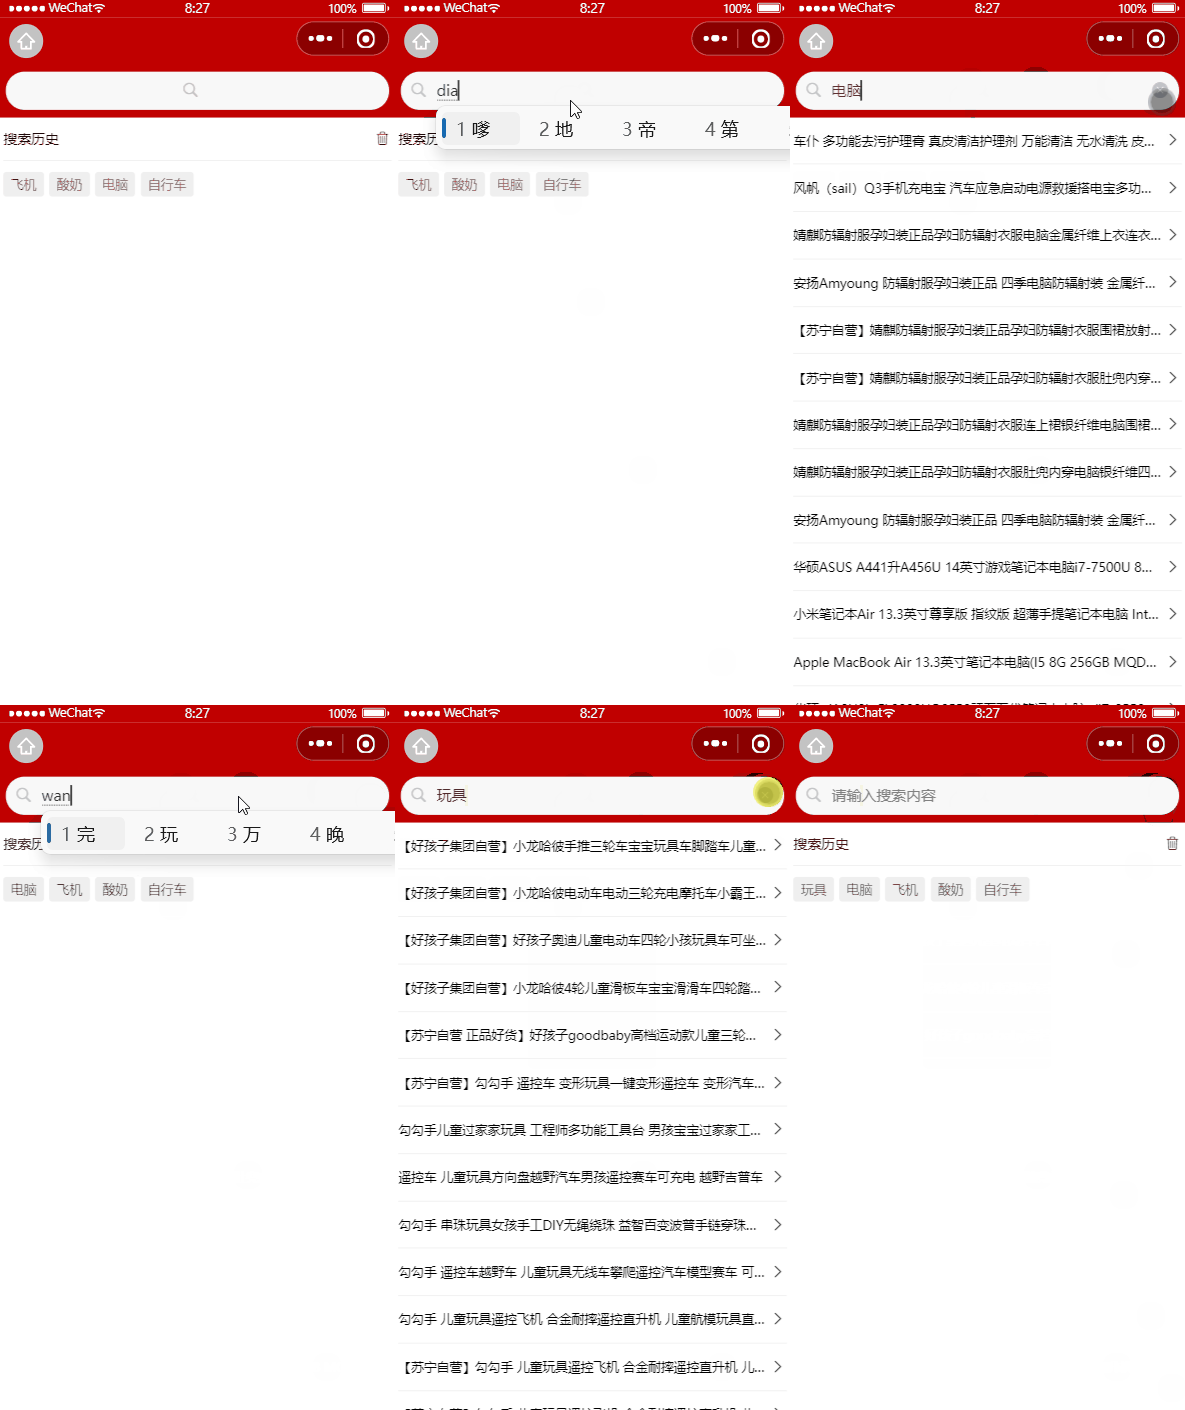
存放历史记录内容,并自动去重;
并将重复写入的内容置前
将搜索历史记录持久化存储到本地
使用 uni.setStorageSync() 与 uni.getStorageSync() 方法去 写入/读取 本地存储数据:uniApp 官方文档
类似页面的 localStorage 方法,实现本地存储
修改 saveSearchHistory 方法如下
// 保存历史记录 并 持久化存储
saveSearchHistory() {
  if (!this.historyList.includes(this.kw)) {
    this.historyList.push(this.kw);
    // 将更新的 历史记录 存储在本地
    uni.setStorageSync("kw", JSON.stringify(this.historyList));
  } else {
    const index = this.historyList.indexOf(this.kw);
    this.historyList.splice(index, 1);
    this.historyList.push(this.kw);
    // 将更新的 历史记录 存储在本地
    uni.setStorageSync("kw", JSON.stringify(this.historyList));
  }
},
在 onLoad 生命周期函数中,加载本地存储的搜索历史记录
onLoad() {
   this.historyList = JSON.parse(uni.getStorageSync('kw') || '[]')
 }
效果展示
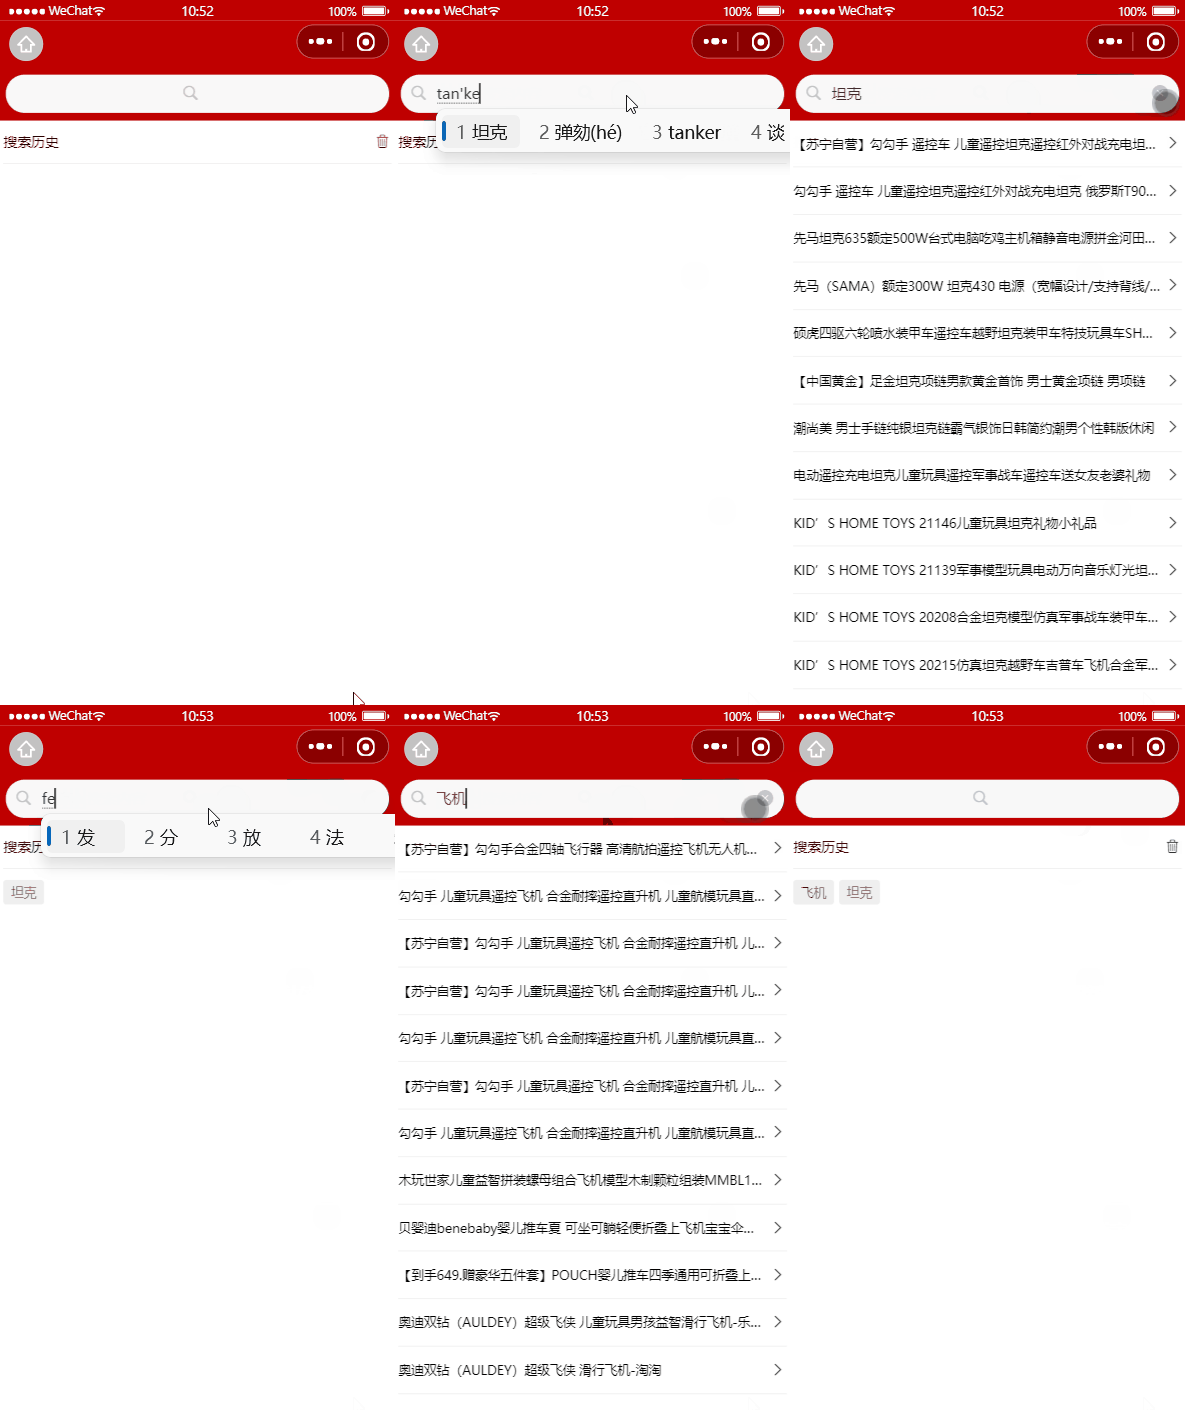
重启后,历史记录数据依然保留
清空搜索历史记录
为历史记录对应的删除图标设置 click 事件处理函数,清空当前与本地存储的 历史记录 数据
<template>
  <!-- 省略其他区域 -->
  <view
  class="content">
    <!-- 搜索历史区域 -->
    <view
    class="history-box" v-else>
      <!-- 搜索历史 标题 -->
      <view
      class="history-title">
        <text>搜索历史</text>
        <uni-icons
        type="trash"
        size="17"
        @click="cleanHistory"
        ></uni-icons>
      </view>
      <!-- 搜索历史 列表 -->
      <view
      class="history-list">
        <uni-tag
        :text="item"
        v-for="(item, index) in historys"
        :key="index"
        ></uni-tag>
      </view>
    </view>
  </view>
</template>
对应事件处理函数,调用 uni.setStorageSync() 重置本地存储数据
cleanHistory() {
  this.historyList = [];
  uni.setStorageSync('kw', '[]');
}
效果展示
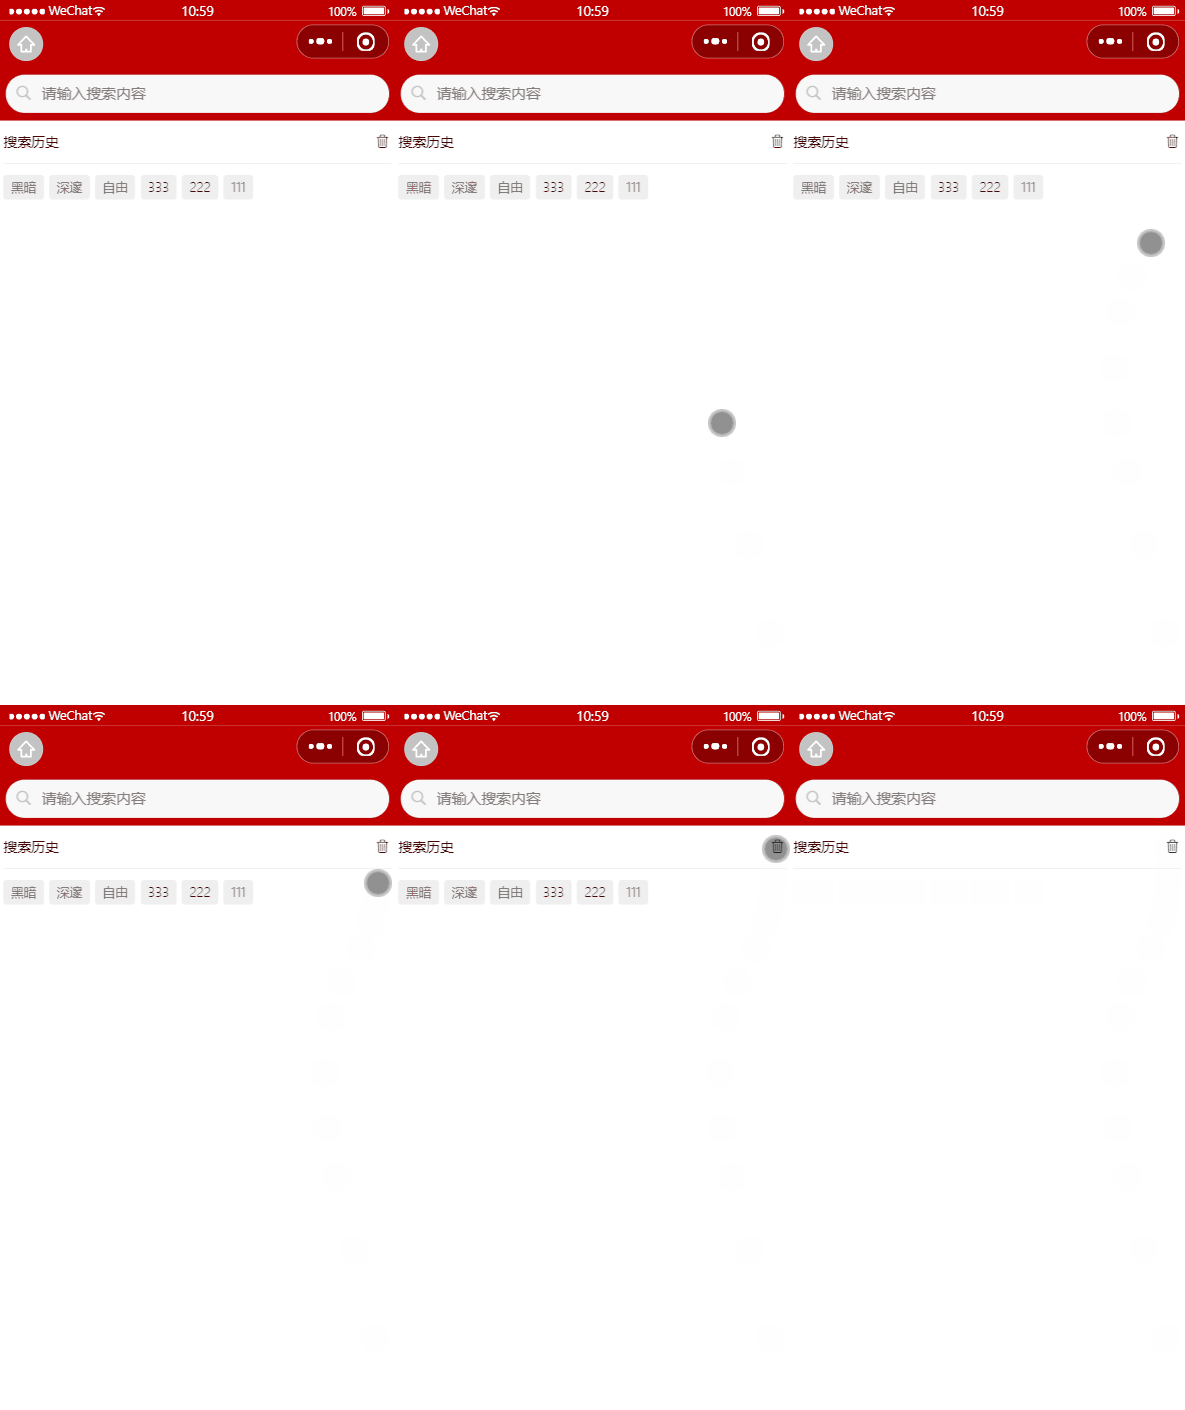
点击搜索历史跳转到商品列表页面
在 v-for 遍历 uni-tag 时,绑定单击事件处理函数,执行路由跳转并传参
<!-- 搜索历史 列表 -->
<view class="history-list">
  <uni-tag
  :text="item"
  v-for="(item,index) in historys"
  :key="index"
  @click="gotoGoodsList(item)"
  ></uni-tag>
</view>
绑定对应的事件处理函数
methods: {
  // ...
  // 历史记录列表 路由跳转函数
  gotoGoodsList(kw) {
    uni.navigateTo({
      url: "/subpkg/goods_list/goods_list?query=" + kw
    });
  }
},
效果展示
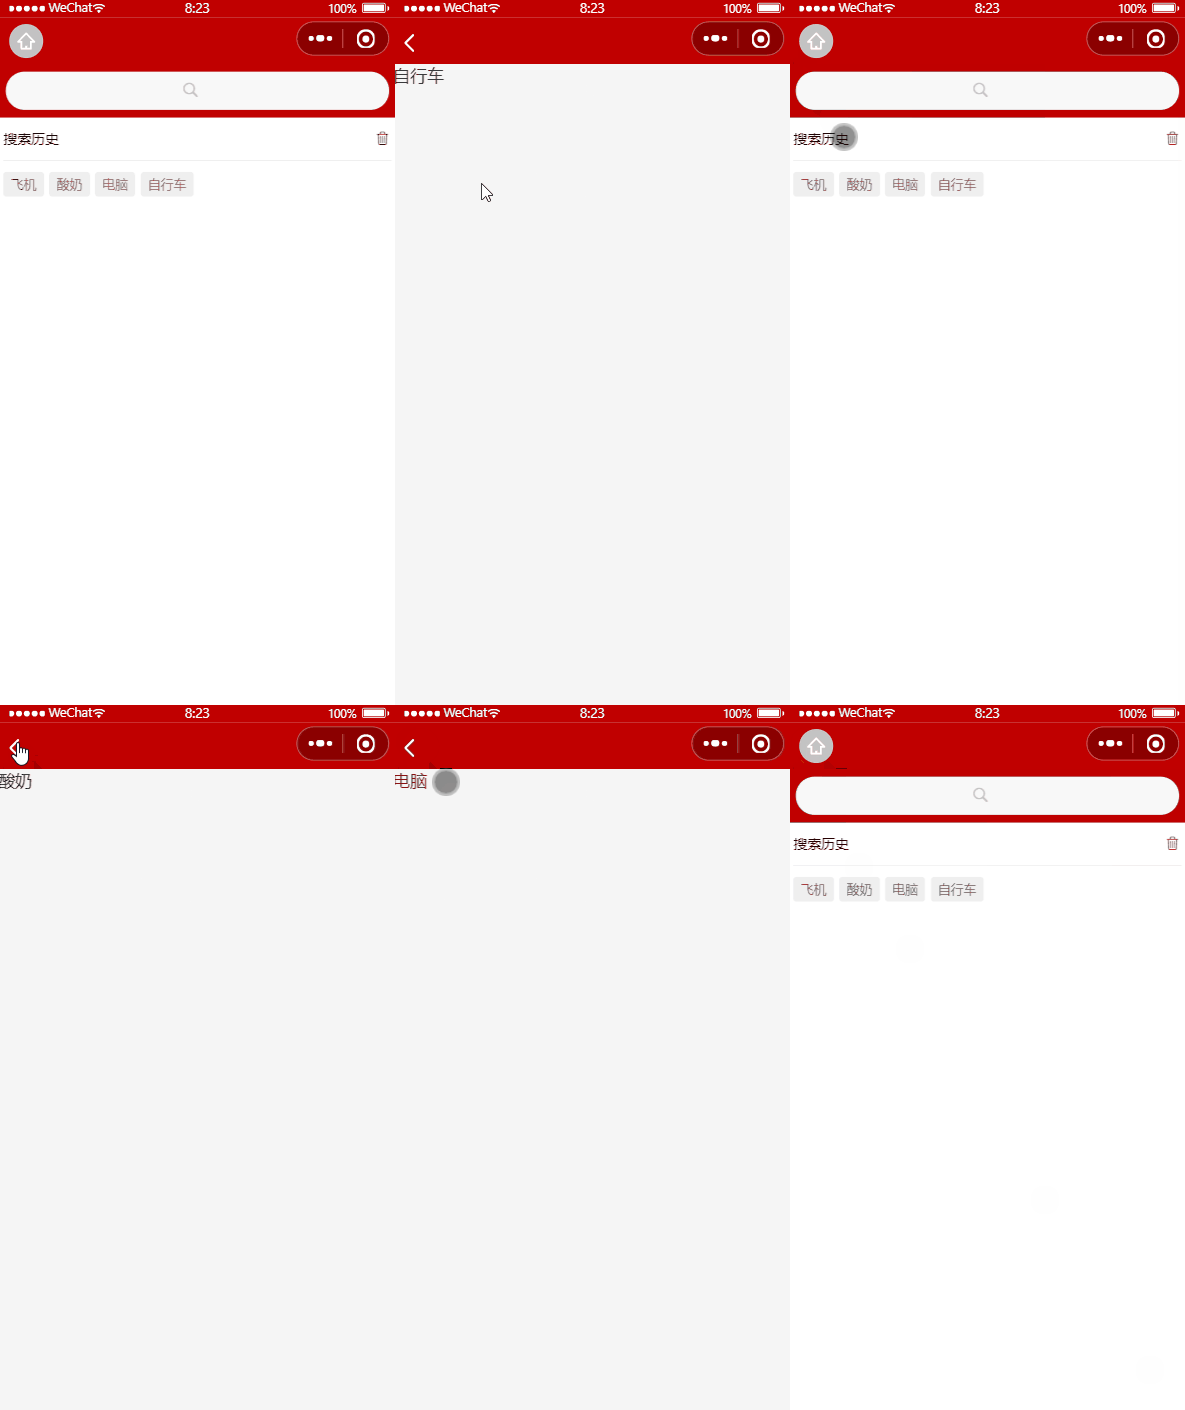
将 search 分支进行本地提交
git add .
git commit -m "完成了搜索功能的开发"
将本地的 search 分支推送到 远程仓库
# 将本地当前分支 上传到 远程仓库对应的 search 分支
# -u 可以在后续的推送和拉取操作中
#    就可以直接使用 "git push" 和 "git pull" 命令,
#    而不需要再指定分支名和远程仓库名
git push -u origin search
将本地 search 分支中的代码合并到 main 分支
git checkout main

# 可选 如若提示一下信息,需要再提交一次 mian 分支
# ... Please commit your changes or stash them before you merge
git add .
git commit -m "main 分支的存档"

# 合并分支
git merge search
# 提交到远程 main 分支
# git 可能需要 再提交一次 main 分支才可以合并
git push
删除本地的 search 分支
git branch -d search创建 goodslist 分支
运行如下的命令,基于 mian 分支在本地创建 goodslist 子分支,用来开发商品列表相关的功能
git checkout -b goodslist创建编译模式
在微信小程序中配置编译模式,方便每次编译进入后直接切换到该界面
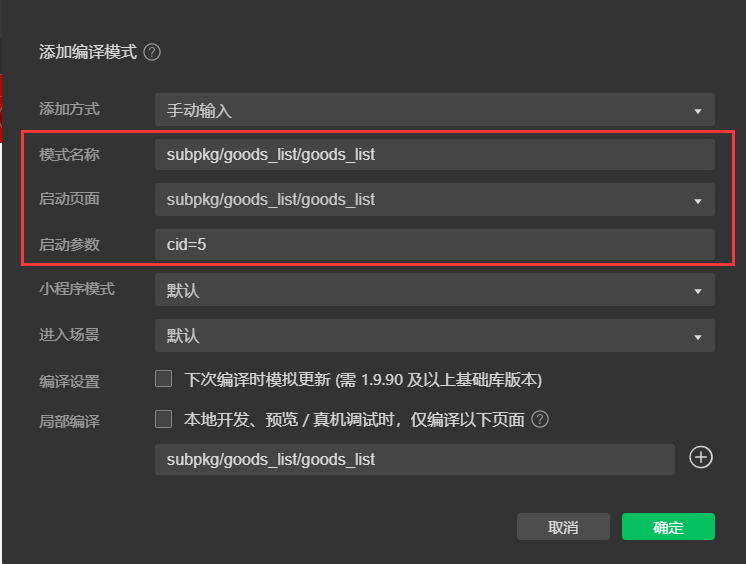
定义请求参数对象
在项目根目录下的 subpkg/goods_list/goods_list.vue 中的 data 数据中创建 请求参数对象
data() {
  return {
    // 请求参数对象
    queryObj: {
      // 查询关键词
      query: '',
      // 商品分类Id
      cid: '',
      // 页码值
      pagenum: 1,
      // 每页显示多少条数据
      pagesize: 10
    }
  }
}发起网络请求
在 data 中新增如下的数据节点
data() {
  return {
    // 商品列表的数据
    goodsList: [],
    // 总数量,用来实现分页
    total: 0
  }
}
在 onLoad 生命周期函数中,调用 getGoodsList 方法获取商品列表数据
onLoad(options) {
  // 调用获取商品列表数据的方法
  this.getGoodsList()
}
methods 节点中,声明 getGoodsList 方法如下
methods: {
  // 获取商品列表数据的方法
  async getGoodsList() {
    // 发起请求
    const {
     data: res
     } = await uni.$http.get('/api/public/v1/goods/search', this.queryObj)
    if (res.meta.status !== 200) return uni.$showMsg()
    // 为数据赋值
    this.goodsList = res.message.goods
    this.total = res.message.total
  }
}
效果展示
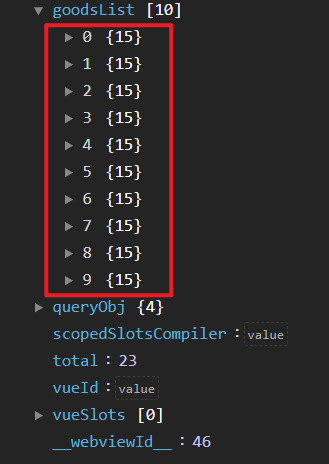
获取到数据,并赋值到对应成员中
渲染UI结构
使用 v-for 遍历渲染界面,并将 遍历的 goods_small_logo 进行判断,若没有图片,返回默认图片
<template>
  <view>
    <view class="goods-list">
      <block
      v-for="(item, index) in goodsList"
      :key="index">
        <view class="goods-item">
          <!-- 商品左侧图片区域 -->
          <view class="goods-item-left">
            <image
            :src="item.goods_small_logo || defaultPic"
            mode="widthFix"
            class="goods-pic"></image>
          </view>
          <!-- 商品右侧信息区域 -->
          <view class="goods-item-right">
            <!-- 商品标题 -->
            <view class="goods-name">
            {{ item.goods_name }}
            </view>
            <view class="goods-info-box">
              <!-- 商品价格 -->
              <view class="goods-price">
              ¥{{ item.goods_price }}
              </view>
            </view>
          </view>
        </view>
      </block>
    </view>
  </view>
</template>
在 data 中声明 defaultPic 变量,用于存储默认图片的网络路径字符串
 data() {
    return {
      // 默认图片网络路径
      defaultPic: 'https://smmcat.cn/wp-content/uploads/2021/09/4557fb13e7d2a0e0.jpg'
    };
 },
使用 scss 进行修饰样式
body {
  background-color: #fff;
}

.goods-item {
  display: flex;
  padding: 10px 5px;
  border-bottom: 1px solid #f0f0f0;

  .goods-item-left {
    margin-right: 5px;
  }

  .goods-pic {
    width: 100px;
    height: 100px;
    display: block;
  }

  .goods-item-right {
    display: flex;
    flex-direction: column;
    justify-content: space-between;

    .goods-name {
      font-size: 13px;
    }

    .goods-price {
      font-size: 16px;
      color: #c00000;
    }
  }
}
效果展示
在 根目录的 components 文件夹中右键 → 新建组件
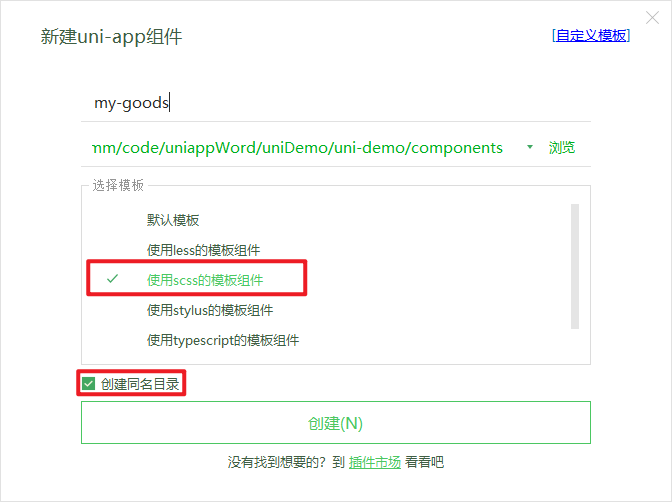
再 my-goods 组件中定义结构和样式,并使用 props 导入传入的数据
<template>
  <view class="goods-item">
    <!-- 商品左侧图片区域 -->
    <view class="goods-item-left">
      <image
      :src="item.goods_small_logo || defaultPic"
      class="goods-pic"
      ></image>
    </view>
    <!-- 商品右侧信息区域 -->
    <view class="goods-item-right">
      <!-- 商品标题 -->
      <view class="goods-name">
      {{item.goods_name}}
      </view>
      <view class="goods-info-box">
        <!-- 商品价格 -->
        <view class="goods-price">
        ¥{{item.goods_price}}
        </view>
      </view>
    </view>
  </view>
</template>

<script>
  export default {
    // 定义 props 属性,用来接收外界传递到当前组件的数据
    props: {
      // 商品的信息对象
      item: {
        type: Object,
        defaul: {},
      },
    },
    data() {
      return {
        // 默认的空图片
        defaultPic: 'https://smmcat.cn/wp-content/uploads/2021/09/4557fb13e7d2a0e0.jpg',
      }
    },
  }
</script>

<style lang="scss">
  .goods-item {
    display: flex;
    padding: 10px 5px;
    border-bottom: 1px solid #f0f0f0;

    .goods-item-left {
      margin-right: 5px;

      .goods-pic {
        width: 100px;
        height: 100px;
        display: block;
      }
    }

    .goods-item-right {
      display: flex;
      flex-direction: column;
      justify-content: space-between;

      .goods-name {
        font-size: 13px;
      }

      .goods-price {
        font-size: 16px;
        color: #c00000;
      }
    }
  }
</style>
在 goods_list 页面中引入 封装为组件的 my-goods 实现组件封装
<template>
  <view>
    <view class="goods-list">
      <block v-for="(item, index) in goodsList" :key="index">
        <my-goods :item='item'></my-goods>
      </block>
    </view>
  </view>
</template>
效果展示

使用 fliters 对象,对接收的值进行增加小数位操作,模板调用 过滤器方式为 {{ 值 | 过滤器名 }}
export default {
 // ...
 // 过滤器对象
 filters: {
  // 把数字处理为带两位小数点的数字
  tofixed(num) {
    return Number(num).toFixed(2)
  }
 }
}
在渲染商品价格的时候,通过管道符 | 调用过滤器
<template>
 <!-- 商品价格 -->
 <view class="goods-price">
 ¥{{goods.goods_price | tofixed}}
 </view>
</template>
效果展示

打开项目根目录中的 pages.json 配置文件,为 subPackages 分包中的 goods_list 页面配置上拉触底的距离
 "subPackages": [
   {
     "root": "subpkg",
     "pages": [
       {
         "path": "goods_detail/goods_detail",
         "style": {}
       },
       {
         "path": "goods_list/goods_list",
         "style": {
           "onReachBottomDistance": 150
         }
       },
       {
         "path": "search/search",
         "style": {}
       }
     ]
   }
 ]
在 goods_list 页面中,和 methods 节点平级,声明 onReachBottom 事件处理函数,用来监听页面的上拉触底行为
// 触底的事件
onReachBottom() {
  // 让页码值自增 +1
  this.queryObj.pagenum += 1
  // 重新获取列表数据
  this.getGoodsList()
}
改造 methods 中的 getGoodsList 函数,当列表数据请求成功之后,进行新旧数据的拼接处理
// 获取商品列表数据的方法
async getGoodsList() {
  // 发起请求
  const { data: res } = await uni.$http.get('/api/public/v1/goods/search', this.queryObj)
  if (res.meta.status !== 200) return uni.$showMsg()

  // 为数据赋值:通过展开运算符的形式,进行新旧数据的拼接
  this.goodsList = [...this.goodsList, ...res.message.goods]
  this.total = res.message.total
}
在 data 中定义 isloading 节流阀如下
data() {
  return {
    // 是否正在请求数据
    isloading: false
  }
}
修改 getGoodsList 方法,在请求数据前后,分别打开和关闭节流阀
// 获取商品列表数据的方法
async getGoodsList() {
  // ** 打开节流阀
  this.isloading = true
  // 发起请求
  const { data: res } = await uni.$http.get('/api/public/v1/goods/search', this.queryObj)
  // ** 关闭节流阀
  this.isloading = false

  // 省略其它代码...
}
onReachBottom 触底事件处理函数中,根据节流阀的状态,来决定是否发起请求
// 触底的事件
onReachBottom() {
  // 判断是否正在请求其它数据,如果是,则不发起额外的请求
  if (this.isloading) return

  this.queryObj.pagenum += 1
  this.getGoodsList()
}
修改 onReachBottom 事件处理函数如下
// 触底的事件
onReachBottom() {
  // 判断是否还有下一页数据
  if (this.queryObj.pagenum * this.queryObj.pagesize >= this.total) return uni.$showMsg('数据加载完毕!')

  // 判断是否正在请求其它数据,如果是,则不发起额外的请求
  if (this.isloading) return

  this.queryObj.pagenum += 1
  this.getGoodsList()
}
效果展示

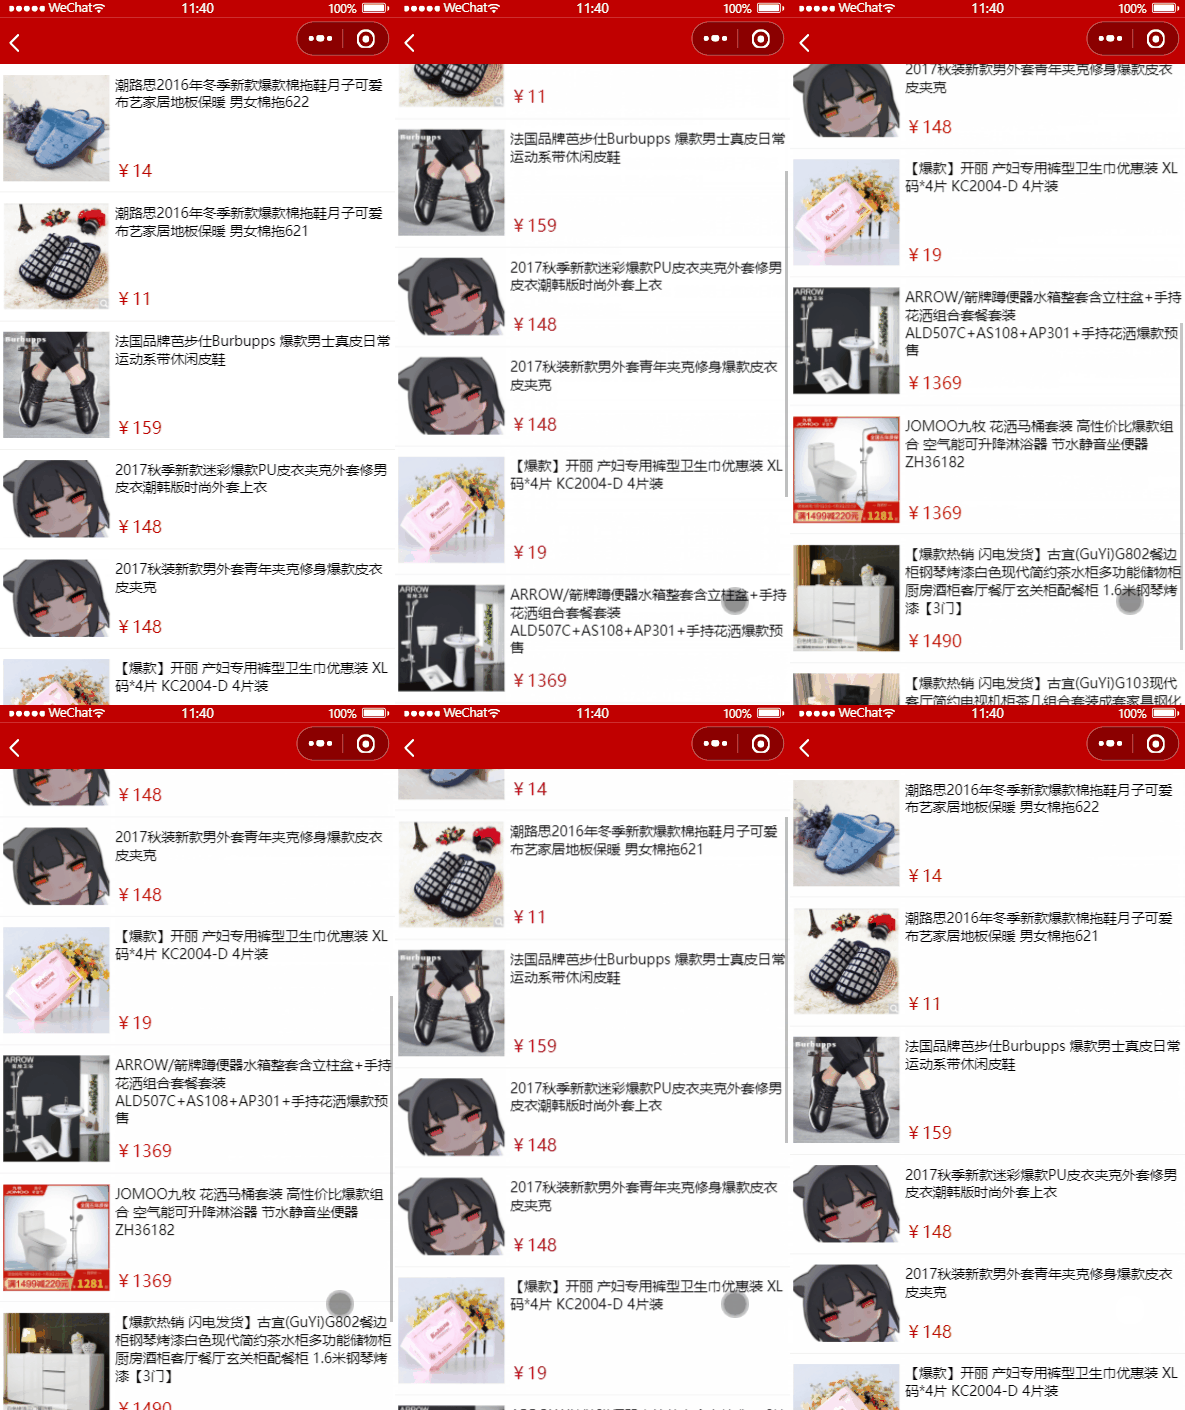
【官方教程】将给每一个item项遍历的 block 修改为 view组件,并绑定 click 事件执行 路由跳转处理函数 (
(存疑:话说为啥不直接给组件内设置跳转的操作路由,目前不清楚)
改造遍历用途的 block 标签为 view,使之可以被单击事件触发
<view class="goods-list">
  <view v-for="(item, i) in goodsList" :key="i" @click="gotoDetail(item)">
    <!-- 为 my-goods 组件动态绑定 goods 属性的值 -->
    <my-goods :goods="item"></my-goods>
  </view>
</view>
在 methods 节点中,定义 gotoDetail 事件处理函数
// 点击跳转到商品详情页面
gotoDetail(item) {
  uni.navigateTo({
    url: '/subpkg/goods_detail/goods_detail?goods_id=' + item.goods_id
  })
}
效果展示

将 goodslist 分支进行本地提交
git add .
git commit -m "完成 商品列表 开发"
将本地的 goodslist 分支推送到远程仓库
git push -u origin goodslist将本地 goodslist 分支合并到 main 分支
git checkout main
git merge goodslist

# 若提示 需再次提交分支 需要执行提交操作
git add .
git commit -m "主分支 合并备份"

git push
删除本地 goodslist 分支
# 确保合并完成后 执行删除指令
git branch -d goodslist由于该页面的大小目前已经是极限,会造成编辑和修改的卡顿。因此开设新档;内容为黑马优购的下半段内容
